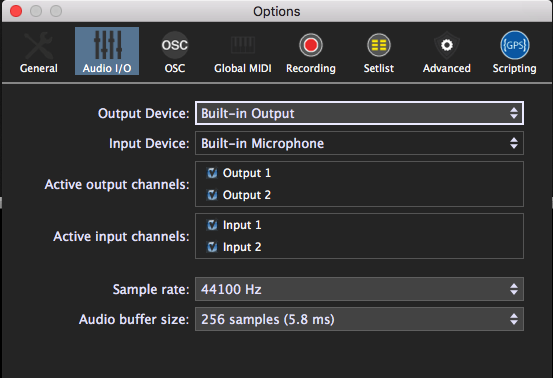
Output Device – Select the audio output device you want to use. If you’re running Gig Performer on a Mac OSX system and have created any Aggregate Devices (consisting of multiple interfaces) in the Audio MIDI Setup utility, they will appear here as options as well.
Input Device – Select the audio input device you want to use. If you’re running Gig Performer on a Mac OS X system and have created any Aggregate Devices (consisting of multiple interfaces) in the Audio MIDI Setup utility, they will appear here as options as well.
Note: Changing the audio output or input device will cause your entire .gig file to be reloaded immediately, so we recommend making such changes immediately after creating a new .gig file. If you are changing your audio configuration (device, sample rate, buffer size, etc.), it can be useful to start Gig Performer with the SHIFT key held down, which temporarily prevents Gig Performer from loading your previous .gig file.
Active output channels/Active input channels – Determines how many input and output channels are to be made available to Gig Performer. If you are using an audio interface with many channels, you may not want to access them all. For example, you may have an interface with 8 analog output channels and another 16 Lightpipe (ADAT optical) channels that you’re not using. So instead of displaying audio IN/OUT blocks with 24 or more channels, you can disable the ones you don’t need by unchecking them in the list
Sample rate – The sample rate determines the quality of the audio signal. Typical values in the live world are 44.1kHz and 48kHz. Note that there is a tradeoff between higher sample rates and CPU utilization. To view our website article about audio latency, buffer size, and sample rate, click here.
Audio buffer size – The buffer size determines how often samples are actually processed. The smaller the buffer size (or the higher the sample rate), the lower (better) the latency but at the cost of higher CPU utilization. Depending on your plugins and your computer, you may need to find a compromise that gives you the best tradeoff between CPU utilization and latency. If you start using too many CPU cycles, you will begin to hear clicks and other noise in the output. To view our website article about audio latency, buffer size, and sample rate, click here.
Apply Settings – This button will appear if you make any changes to the parameters in this dialog. Click on it to accept the changes, or simply close the Preferences dialog to maintain the current settings.