When you click the Edit Mode button, you enter into rack edit if a panel is selected, or widget edit if a widget is selected. Shown here first is rack edit mode. A widget can be added by dragging a widget name from the widget types list to a panel, or by copying and pasting an existing widget. A confirmation message flashes when you copy a widget or panel. MIDI associations are preserved whenever you copy and paste a widget or a panel.
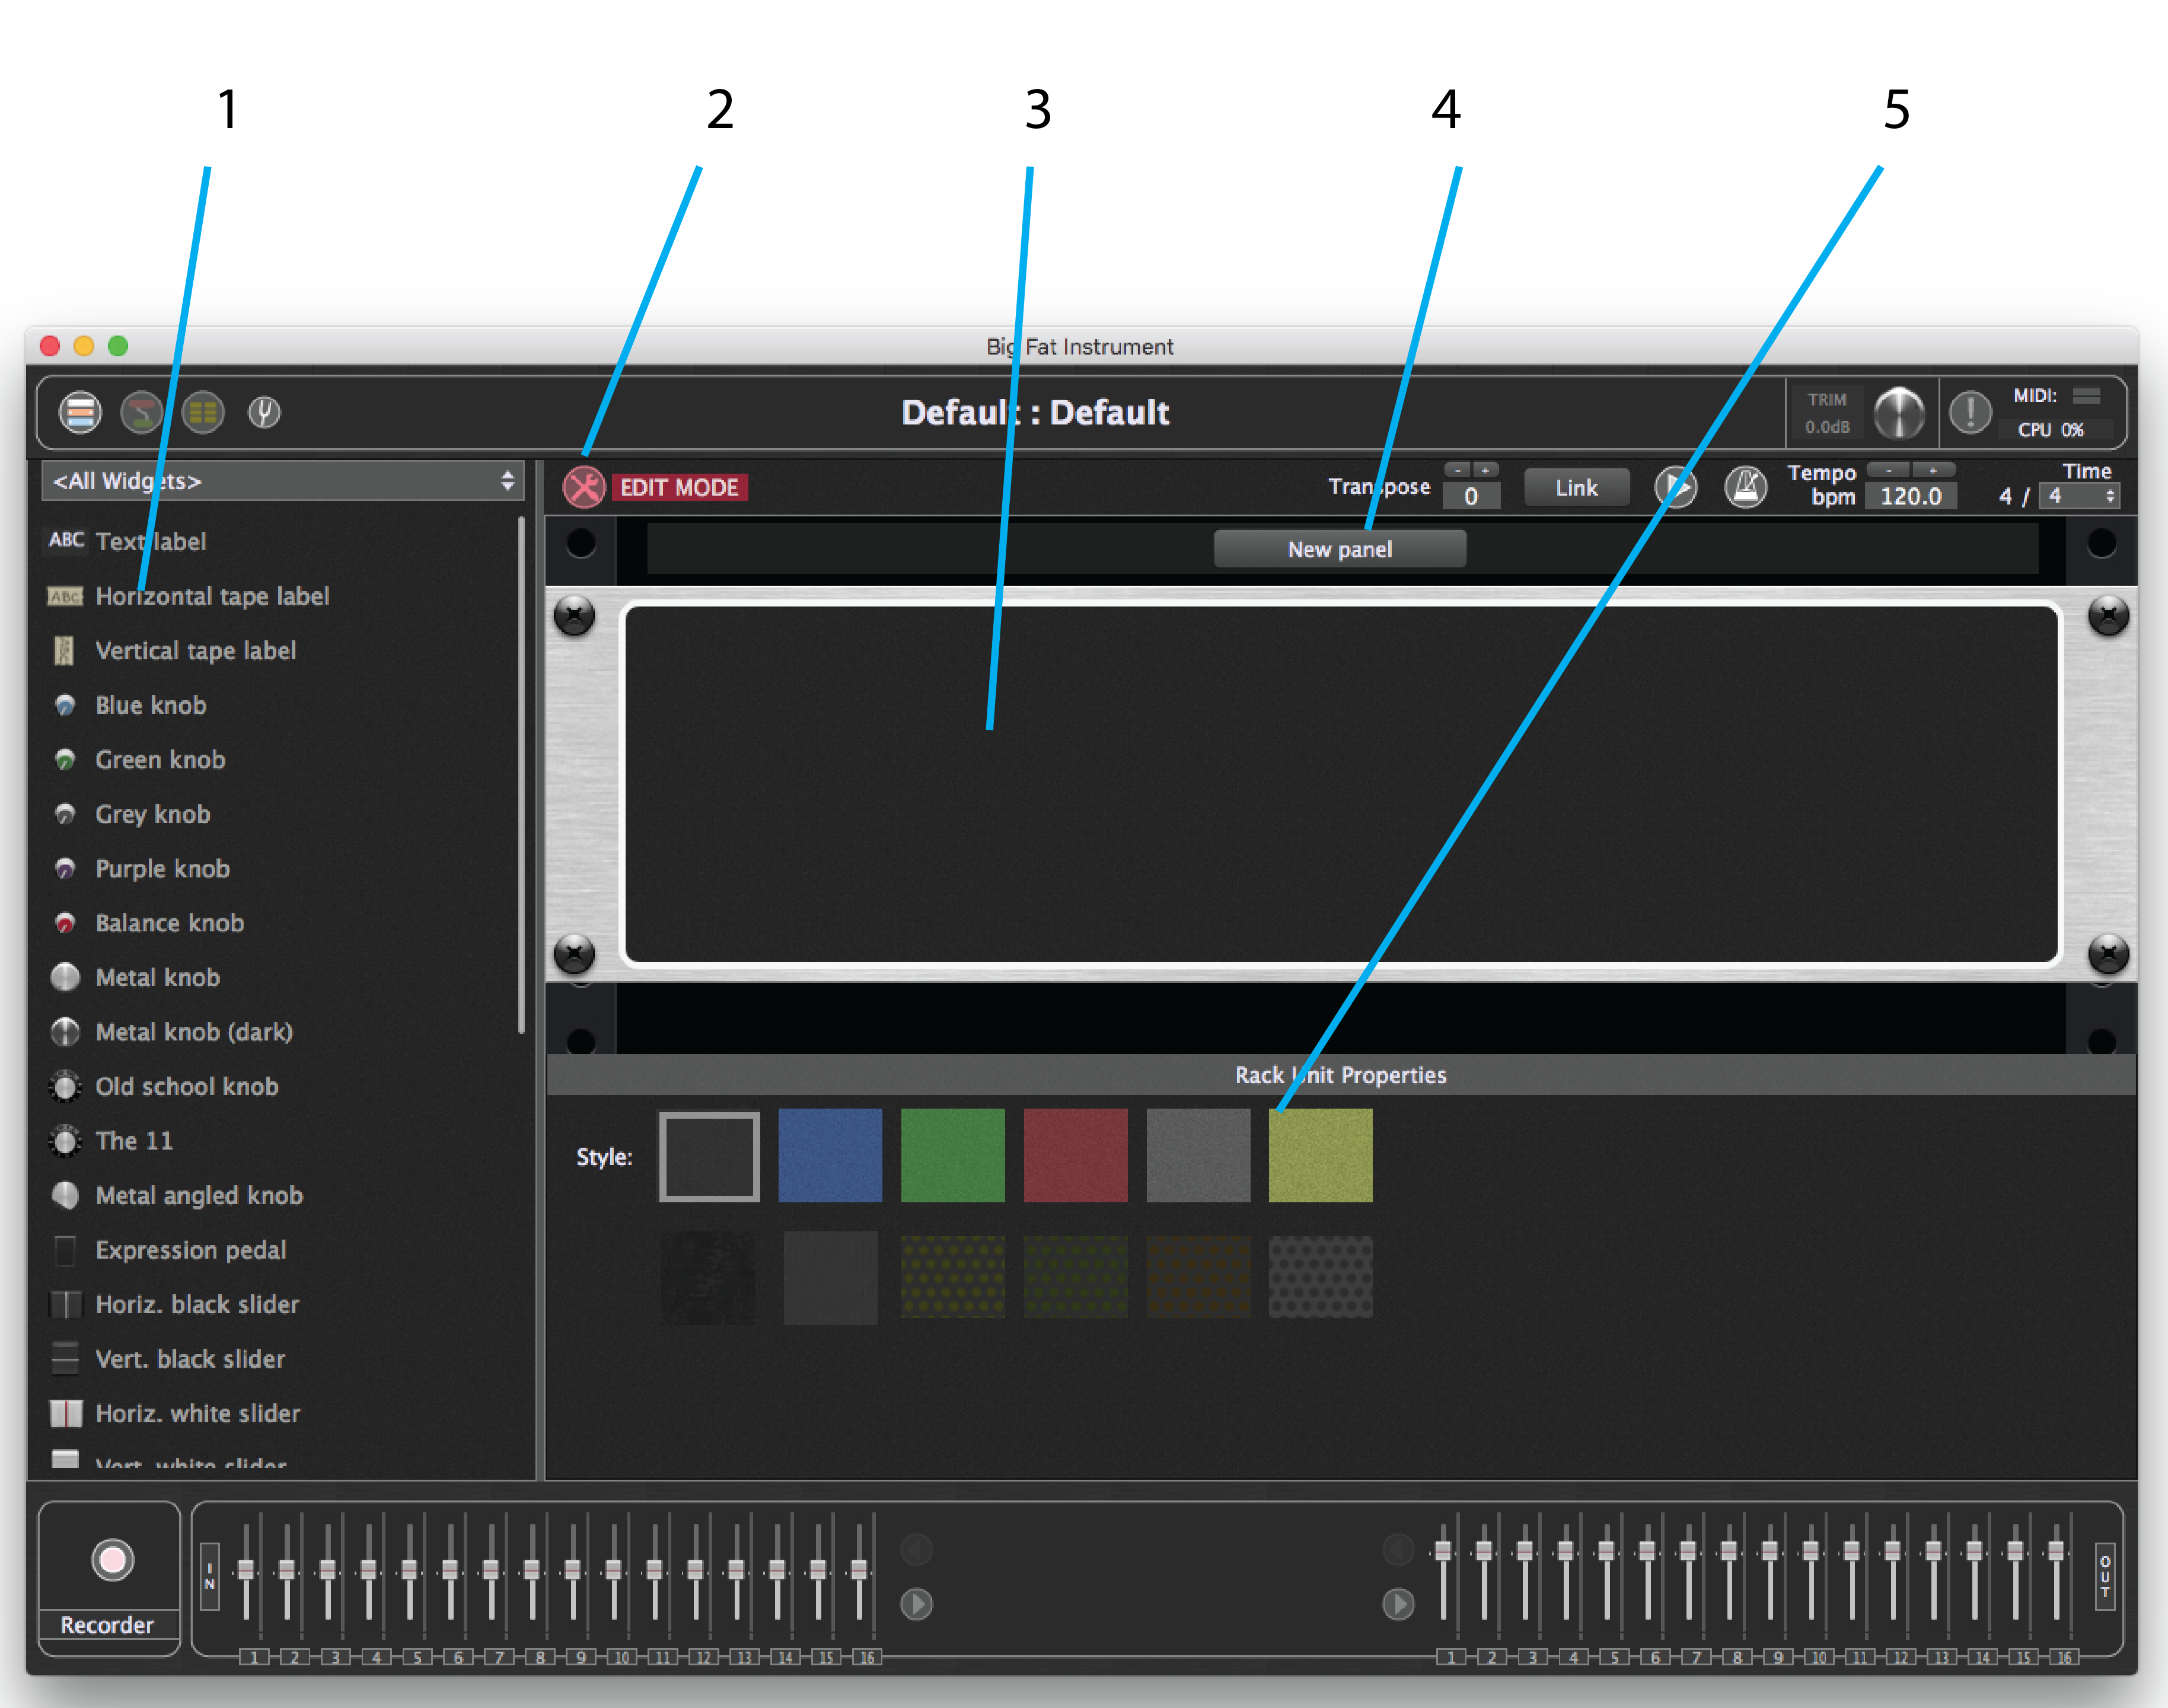
1.Widget types list– To add a widget to a panel, simply drag it from this list to the panel. To add multiple copies of a widget at once, type the number of copies you want while dragging the widget from the widget browser. A message will flash at the top of the window to confirm the number of copies that will be made.

2.Edit Mode button– Click this to enter Edit Mode or to exit to Performer mode and use Gig Performer
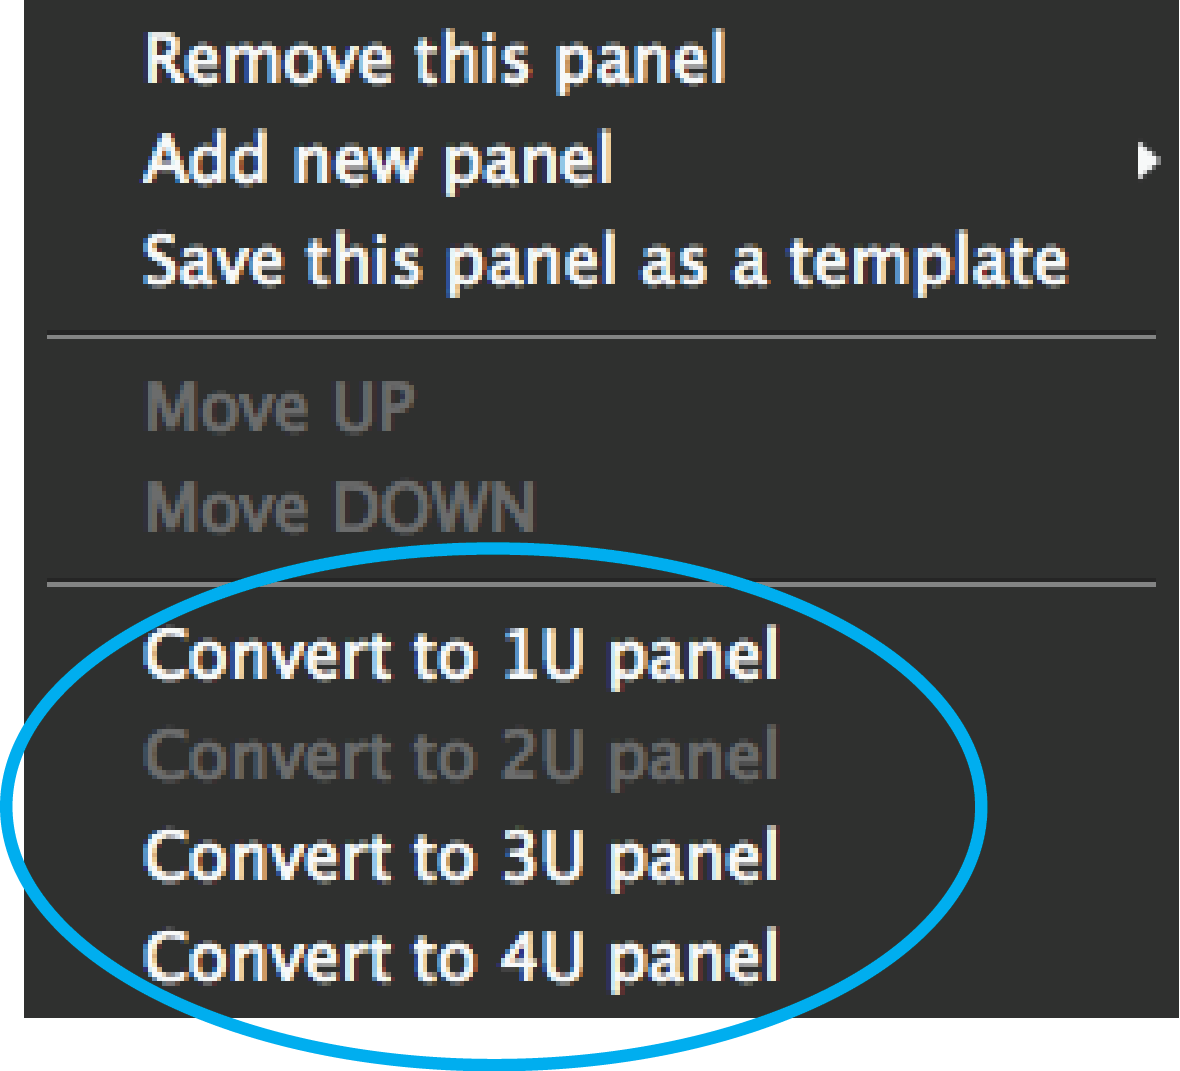
3.Panel area – Panels host all of the widgets. Panels can be set to any of four heights by right-clicking in the panel area. Choose the height you need to accommodate widgets. For more detail on this menu, see Rackpanel right-click menu.
4.New Panel button – Click here to create a new, blank panel in the rack.
5.Panel backgrounds –To change a panel’s background, click the panel to select it and then click one of the textures displayed in this area.