The Mixer page of the Lemur template (as viewed on a tablet or a smartphone) looks like this:
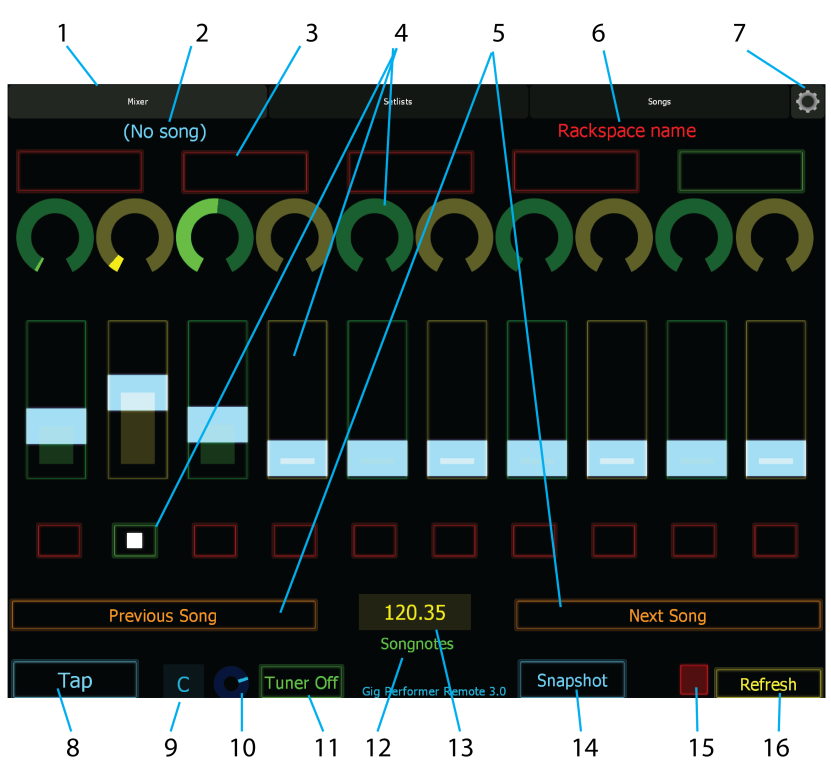
1.Template page tabs - touch these tabs to switch between the Lemur template's Mixer, Setlists, and Songs pages.
2.Current song name - when a song is loaded, the name is displayed here.
3.Song part tiles - when a song is loaded, these tiles show the names of song parts. Clicking on a tile loads the indicated part.
4.Lemur controls - these rows of knob, fader, and button controls get mapped to widgets in your rackspaces.
5.Previous/Next Song buttons - touch one of these to move to the next or previous song in the current setlist.
6.Current rackspace name - each song part is associated with a rackspace variation. The name of the current rackspace is displayed here.
7.Settings menu - touch here to drop down a menu that allows you to load and save projects, plus access Lemur settings.
8.Tap Tempo button - the Tap Tempo button is always active and has the highest priority, so it can be tapped at any time to set a tempo. This can be useful for syncing delays to the tempo of a live performance.
9.Tuner current note display - when the tuner is on, the note currently detected from the input is displayed here.
10.Tuner current intonation display - when the tuner is on, this display shows how sharp or flat the note currently detected from the input actually is from the note displayed.
11.Tuner on/off button - touch this button to bring up Gig Performer's Tuner view for tuning. Touch it again to hide the tuner.
12.Songnotes display - a small display for a reminder or any short message you would like to have shown on the Lemur screen. Create a label on a panel in Gig Performer, check the Customize caption box in the Widget Properties area. and enter as the caption the text you want displayed in Lemur. In the OSC Name field, enter "Songnotes", and then check the Enable OSC box. The caption for that label will now appear in Lemur in place of the Songnotes label.

13.Tempo field - displays Gig Performer's current tempo.
14.Snapshot button - this is the same as the Capture variation into this part button just above the panel in the Setlist/Song view. It captures any changes you may have made to widget settings since recalling the rackspace variation associated with the song part, and stores the changes with the part, so they are recalled each time that part is.
15.Snapshot indicator - when a snapshot is taken, this indicator turns red to show that the variation has been edited. Touching the red button recalls the variation as stored. Changes to widget values are lost.
16.Refresh button - touch this button after making changes to a Gig Performer rackspace to update the Lemur display with the changes.
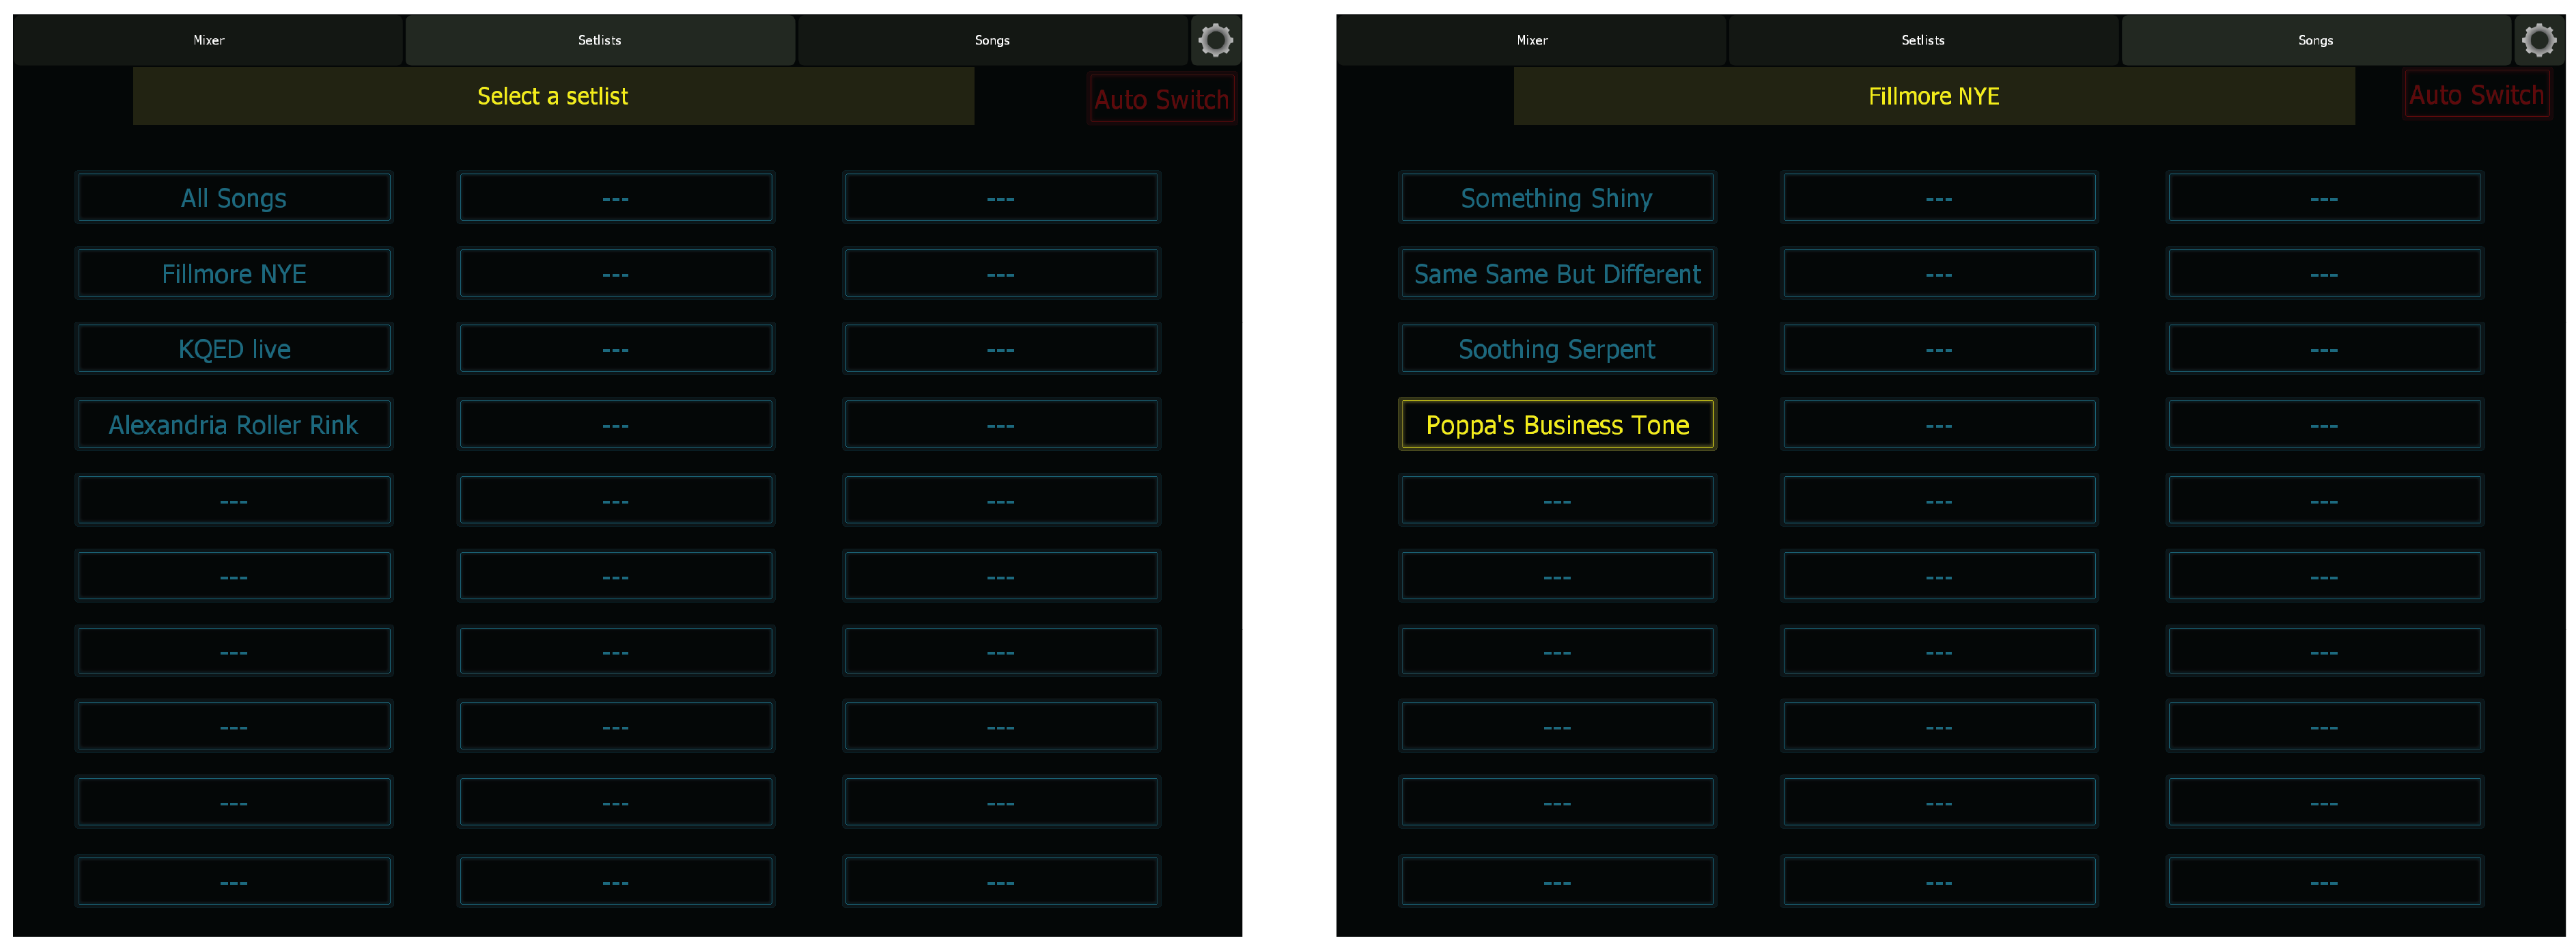
The Setlists and Song pages in the Lemur template offer quick touch access to, of course, your setlists and songs.
Note: this template assumes that you have defined up to 10 knobs whose handles are Knob1, Knob2, ...Knob10, 10 sliders with handles Slider1, Slider2, ... Slider10 and 10 buttons with handles Button1, Button2, ... Button10.
The TouchOSC template, as viewed on an iPhone, looks like this:
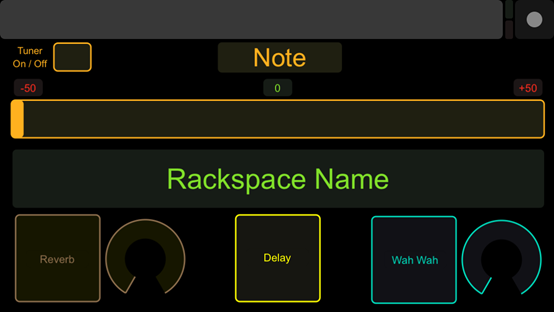
Note that our Lemur template has been designed for general use, while the TouchOSC template has been designed specifically for guitarists (an instructional video about using the Lemur template can be found here, and an instructional video about using the TouchOSC template can be found here). Both templates display the currently selected rackspace and variation prominently; the Lemur template also displays the caption of a text label in the "Songnotes" field.
If you would like to experiment with either template, relaunch Gig Performer and then touch the Tuner On/Off button in the template. Gig Performer should immediately open the Tuner (if for some reason the Tuner On/Off button doesn't work, double-check the communication between the device running your OSC app and the computer running Gig Performer).
In Lemur, if you have a microphone or instrument connected to one or more inputs of your audio interface, the virtual dial to the left of the Tuner On/Off button will move and the note number to the left of that knob will change to reflect the note coming in on the channel(s) Gig Performer is currently "listening" to. In TouchOSC, the box at top center will display the note coming in, and the slider below it will show the tuning offset in cents, with the center position indicating that you are exactly in tune.
Touch the Tuner On/Off button again to return Gig Performer to Panel View. If you are using Lemur, touch the "Tap" button presented by the template several times. You should see the Tempo display in the upper-right hand corner of Gig Performer's screen change the BPM value as you do so; the shorter the intervals between taps, the higher (faster) the BPM value.
Note: give your widgets the appropriate OSC names. One of the requirements of OSC is that each object in both the host computer and remote device must have matching unique case-sensitive names. You can make up any names you like, as long as they are comprised of ASCII characters only, with no spaces. If you are running Lemur or TouchOSC, here are the OSC names used in the templates we have created:
Object |
Lemur template |
TouchOSC template |
Rotary knobs (Reverb and WahWah in TouchOSC template) |
"Knob1" through “Knob 10” |
"knob1" and "knob2" |
Sliders / drawbars |
"Slider1" through "Slider10" |
(none)
|
Buttons (Reverb, Delay, WahWah in TouchOSC template)
|
"Button1" through "Button 10" |
"button1", "button2" and "button3" respectively |
Text label caption |
"Songnotes" |
(none)
|
To use the templates, simply put Gig Performer into Edit mode, select a widget, and in the Widget Properties inspector, enable the Enable OSC option, enter one of the OSC names in the "Name" field, then press Enter (this is important):
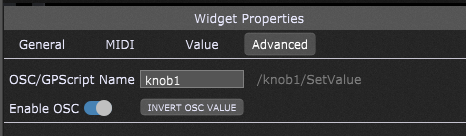
For example, if you are using the Lemur template, add a knob widget and name it "Knob1"; if you are using the TouchOSC template, name the knob widget "knob1".
Then take Gig Performer out of edit mode and move the knob widget with your mouse. As you do so, the identically named knob in the Lemur or TouchOSC screen changes the same way. Because OSC is bi-directional (meaning that changes can be made in either the device running the OSC app or the host computer running the target software - in this case, Gig Performer), the opposite occurs too: You can move the onscreen knob in Lemur or TouchOSC and the knob widget in Gig Performer changes the same way.
Do the same with a switch or LED button widget, changing its OSC name to Button1 (for use with the Lemur template) or button1 (for use with the TouchOSC template). Exit Edit mode and test to make sure that touching the corresponding button in your tablet or smartphone turns the associated Gig Performer widget on or off, and vice versa.
To use OSC in rackspaces, make your existing rackspaces OSC-compatible. It's easy to make any rackspace OSC-compatible: all you have to do is assign OSC names to your widgets that match the names being used in the environments you create in your OSC app editor. For example, load any of the templates while starting Gig Performer, then open the Edit mode, and select each widget in turn. The only change you have to make to each is in the "Name" field in the Properties area of the inspector and checking the Enable OSC box below it; all MIDI device and plugin parameters remain the same. The only difference is that you can now move these widgets remotely from the tablet or smartphone running your OSC app, and vice versa (i.e. any widget adjustments you make from your laptop or from a connected MIDI controller are reflected in the tablet/smartphone screen).
Please note that this only scratches the surface of what can be accomplished when using an OSC app with Gig Performer. Again, the Lemur and TouchOSC templates provided on our website make good jumping-off points towards constructing your own custom OSC environments. Consult the documentation of your OSC app for more information.