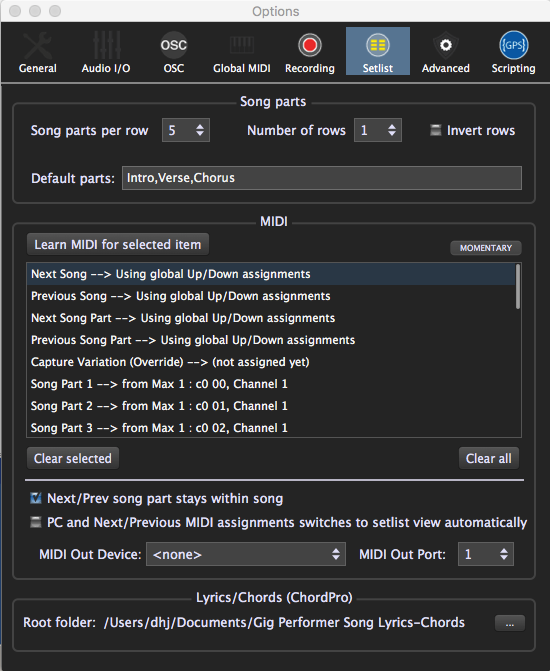
Learn MIDI for selected item button– Setlist operations in the MIDI list can be mapped to MIDI controllers. Select the item in the list, click the button, and use the MIDI controller you want mapped to it.
Momentary button – If the physical control you are mapping is a momentary switch (rather than a latching/toggle switch), click this button.
MIDI controls list – The list shows setlist operations that can be externally controlled and the MIDI events they are mapped to. To map a control, select it in the list and click the Learn MIDI for selected item button.
Clear All/Clear Selected buttons– These buttons remove the mapping from all or just a selected set of MIDI controls.
Next/Prev song part stays within song–With this box checked, the MIDI controller assigned to Next and Previous actions will never move to a different song. When the first song part in a song is reached, the Previous command has no further effect; when the last part is reached, the Next command has no further effect.
Note: This checkbox has no effect when using arrow keys on the computer keyboard to move between song parts; they will still move to the next or previous song.
PC and Next/Previous MIDI assignments switches to setlist view automatically– When this box is checked, any incoming MIDI program change (PC) messages or Next/Previous Song Part or Song commands cause Gig Performer to switch to Setlist view immediately.
MIDI Out Device and Port – These settings determine where program change messages sent when songs are selected. Choose a MIDI device from the drop-down menu and a MIDI Out Port from the drop-down menu in that field.
Lyrics/Chords (ChordPro) – This field holds the path to the default ChordPro file folder (root directory) for Gig Performer. The Chords/Lyrics editor can only open ChordPro files located in this folder.
“…” – Opens a dialog for locating the folder you want to designate as the root directory.