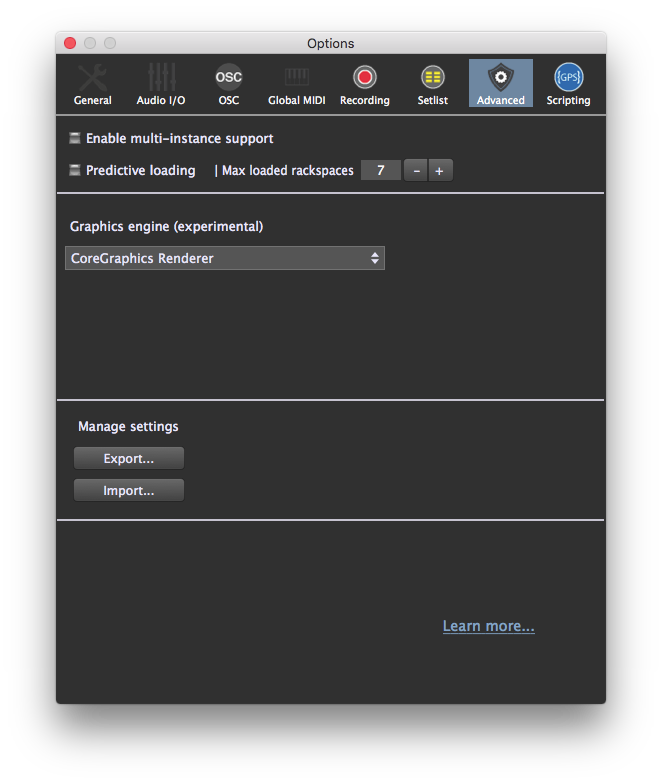
Enable multi-instance support–Checking this option gives you the ability to launch Gig Performer multiple times in the same computer, with each such “instance” operating independently.
This has many different practical applications. For example, each bandmember can have the ability to change the rackspace affecting their particular instrument without changing the rackspaces affecting different instruments; they can even use separate MIDI controllers or pedalboards to do so. Instances also make it far more efficient to process vocals, since in many circumstances only a couple of rackspaces are required to manage all vocal sounds. If those rackspaces live in a separate instance, you no longer have to duplicate them in every single rackspace you create.
Keyboardists that want to dedicate one of their controllers (such as an 88-note weighted keyboard) to one particular sound—say a grand piano—will also find instances useful. Simply create an instance with just a single rackspace containing the grand piano plugin and the appropriate MIDI In block. Now you no longer have to include that controller and grand piano plugin in every single rackspace you create, something that can help simplify your overall design and be a real timesaver. There are also many advanced usages: For example, you can use a MIDI In plugin to send program change messages from one instance to another so that one instance can be used to change the rackspace in another instance.
The number of instances you will be able to successfully have open at any one time is dependent upon your system’s RAM and CPU resources. Each instance can access entirely different plugins and MIDI In blocks; however, their Audio In/Out blocks must be consistent. (In other words, separate instances cannot access different audio interfaces.)
Note that when multi-instance support is enabled, three new options are added to the menu, allowing you to create new instances, and to open or delete existing instances.
A demonstration of how to implement instances is provided in the Configuring Audio Plugins tutorial in this user guide.
Predictive loading– One of the biggest problems for live performers is how much memory and CPU cycles are required to keep all the desired plugins available. In particular, plugins that use a significant number of samples can use many gigabytes of RAM to hold the required data.
In normal operation, Gig Performer loads all plugins for all rackspaces and does some optimization to reduce the impact of hosting a large number of plugins simultaneously while still allowing you to switch quickly from one rackspace to another. However, this comes at the cost of RAM and CPU usage, which may create issues in systems with limited resources and/or significant audio hosting requirements. The alternative—loading just one rackspace (i.e., one set of plugins) at a time—would certainly reduce RAM and CPU requirements considerably, but at the cost of having to wait while each new rackspace is loaded.
When using setlists, predictive prioritizes what gets loaded. The current song is always fully loaded, after that are loaded, in order: the next song, previous song, and any further songs until the limit imposed by the Max Loaded Rackspaces setting in the Advanced panel of the Options dialog is reached.
Enabling the “predictive loading” option provides a creative solution: Load only those rackspaces that will be needed in the immediate future (e.g. while playing the current song). Other rackspaces are not loaded and will therefore not consume any memory. As an added benefit, startup time is significantly shortened since not all plugins need to be loaded. You may also see some reduced overall CPU utilization.
Predictive loading provides glitch-free instant switching among those rackspaces that are currently loaded, but with the tradeoff that you might not always be able to jump to an arbitrary rackspace without a short delay, depending on the particular plugin requirements. As a result, when using this option, you should configure your rackspaces in such a way that they are in rough order of when they will be needed in a performance; i.e., song intro -> first verse -> first chorus, etc. In that way, you can best ensure that you will never have to “jump” to another rackspace that is farther away that the specified number of loaded rackspaces (see Max loaded rackspaces below). Note that rackspaces can easily be reordered by dragging them up and down using your mouse or trackpad; holding down the Shift key while doing so results in the dragged rackspace not being loaded, making it more efficient to do setlist reordering without having to wait for each rackspace to load.
More details about predictive loading can be found on the Gig Performer website: Click here.
Max loaded rackspaces–Specifies the maximum number of rackspaces that will be pre-loaded around the currently selected rackspace. The default value is 5, where the current rackspace as well as the next two and previous two rackspaces are also loaded and instantly accessible. Optimal use of this feature assumes you will be moving from your current rackspace to rackspaces that are close to it (within two, if the default value of 5 is being used). As you move to a new rackspace, Gig Performer will then load and unload other rackspaces so that there are always two available before and two after where you are. This happens in the background and does not affect your audio.
Graphics engine (experimental)
This field selects the graphics library that Gig Performer uses for its displays. Mac OS X users will likely never need to change this setting from CoreGraphics Renderer, as shown below. Depending on the graphics card in their machine, Windows users may find that OpenGL Renderer delivers better quality than Software Renderer.
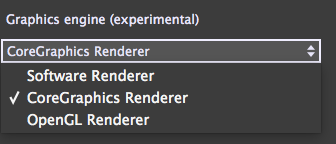
Software Renderer – This choice means that Gig Performer uses your computer’s CPU to render the display without the help of any graphics library optimizations. Windows users without high-performance graphics in their machines will likely get the best results with this setting.
CoreGraphics Renderer – Mac OS X uses its CoreGraphics engine to render the display. Most Mac users will use this setting.
OpenGL Renderer – On systems with high-performance graphics capabilities, OpenGL may provide better visual quality, as high-quality graphics cards are typically optimized to run OpenGL.