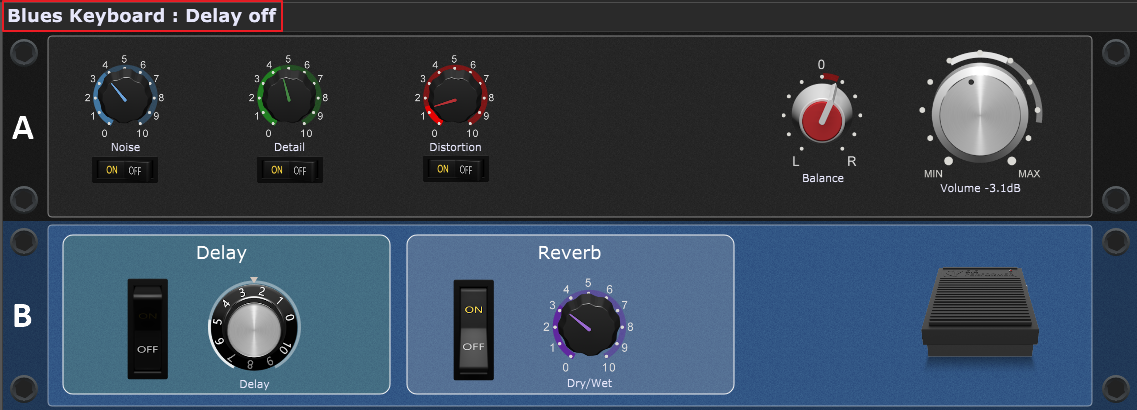
In Gig Performer, a panel is an area (visually similar to hardware rack-mounted sound modules and signal processors) containing widgets used to control the plugins in a rackspace. A rackspace can contain multiple panels, each containing one or more widgets:

On the screenshot above is shown a rackspace ("Blues Keyboard" with the "Delay off" variation, as indicated with the red rectangle) with two panels (indicated with the letters A and B).
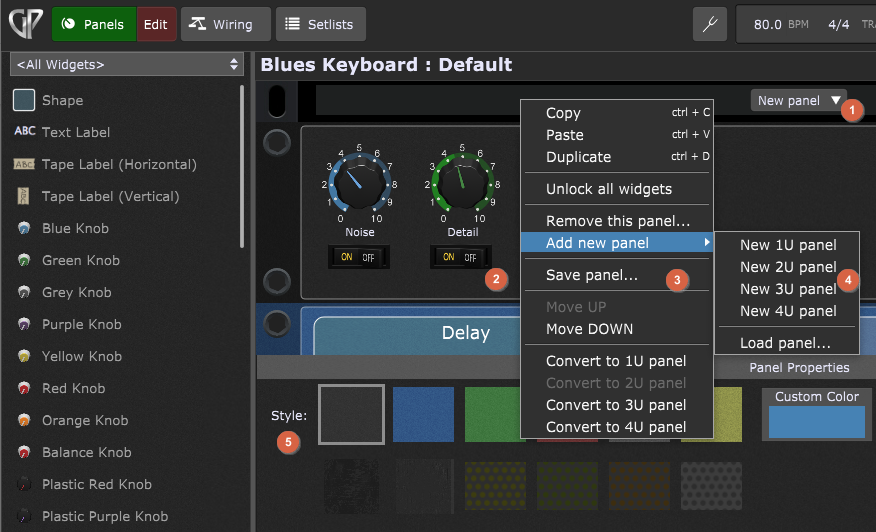
In normal operation (i.e. when not in Edit mode) dragging a widget with your mouse (or by remote control from your keyboard or control surface) will change the value of that widget, thereby updating whatever parameter is attached to the widget. If you want to make changes to panels and widgets, activate Edit mode. Refer to the Panels view chapter for more information. In Edit mode, note the following options as depicted on the screenshot below:

To create a new panel, either:
•click on the New panel button (1) and then select the desired option from a drop-down menu (this drop-down menu has the same menu items as the sub menu (4).
•or right click on the empty panel surface (2) to open the panel contextual menu (3), then expand Add new panel and choose the option from the sub menu (4).
Every time you enter into Edit mode of the Panels view, tips appear in the Properties section: you can click on a panel or a widget to show their properties, or you can add new widgets by dragging them onto a panel surface. When you click on a panel you can see Panel properties (5). Here you can change the background style of the current panel. To change a panel's background, click the panel to select it and then either click one of the textures displayed in this area or choose a custom color.
To find out more about widgets and how to add them to a panel, see the Widgets chapter.
Note: you can move a widget across panels in Edit mode. Simply drag a widget from one panel to another. This feature works currently only for single widgets, and all assignments to parameters are kept.