The GP Relayer plugin allows you to transport audio and MIDI between Gig Performer instances, to other DAWs for easy recording and from DAWs back to Gig Performer to utilize their proprietary sounds and effects.
Note: this feature is available in Gig Performer Pro.
This plugin provides two audio input pins, a MIDI input pin, two audio output pins, and a MIDI output pin:
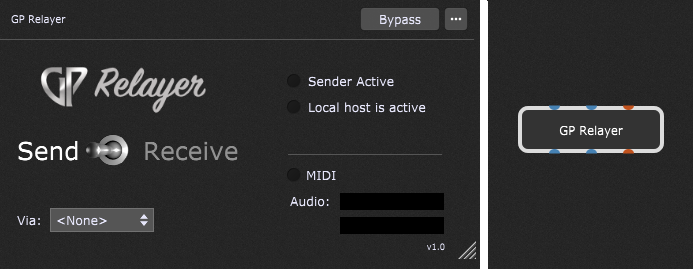
The elements in the GP Relayer plugin editor window are:
Send / Receive - 'Send' sets the GP Relayer to send audio and MIDI to another instance of GP Relayer set as receiver; 'Receive' sets the GP Relayer to receive audio and MIDI from another instance set as sender.
Via - select the desired relay (a transmission channel) from 1 to 10.
Sender Active - this indicator will light up if there is an active audio or MIDI transmission in the selected relay.
Local host is active - this indicator will light up if there is an active sender. When this indicator is not lit, the host (DAW, VST host or another Gig Performer instance) is not driving the GP Relayer plugin audio/MIDI. This state can happen with certain DAWs and plugin hosts (e.g. Logic and GarageBand) that have an optimization where they don't process plugins unless they are actively playing and recording. In this case, select play or record to receive audio from the GP Relayer plugin.
GP Application - this indicator appears when GP Relayer is used inside a DAW or other VST host and indicates that Gig Performer is running. It doesn't appear in the Gig Performer internal version of GP Relayer.
MIDI - this indicator shows MIDI activity.
Audio - shows the levels of audio that is being sent or received.
The example below shows how to send audio from the main Gig Performer instance to the second Gig Performer instance.
First, connect the audio source (in this case, a Streaming Audio File Player) to GP Relayer in the main instance. Next, in the GP Relayer plugin editor window, make sure that "Send" is selected and then choose the desired relay (in this example, Relay #2):
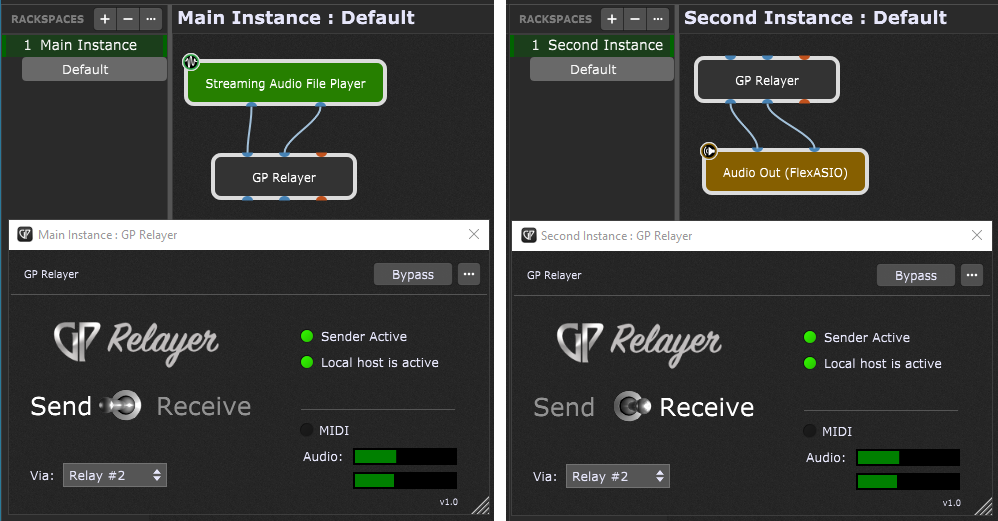
Switch to the second instance; in the GP Relayer plugin editor window make sure that "Receive" is set, and then choose the relay number you set in the main instance (in this example Relay #2).
To hear the audio, connect the GP Relayer outputs to your audio interface's outputs.
Note: multiple sender instances can simultaneously send audio/MIDI via the same relay, and multiple receiver instances will receive the mix of all senders for that relay.
Tip: to see examples of how to configure GP Relayer inside various DAWs, please visit this community thread.
GP Relayer parameters
Apart from the common parameters Bypass Plugin and Open/Close Plugin Editor, the GP Relayer plugin provides no other parameters.