To get started as a guitarist, first connect your audio interface inputs to your effect and amp modelling plugins (check this chapter to learn more):
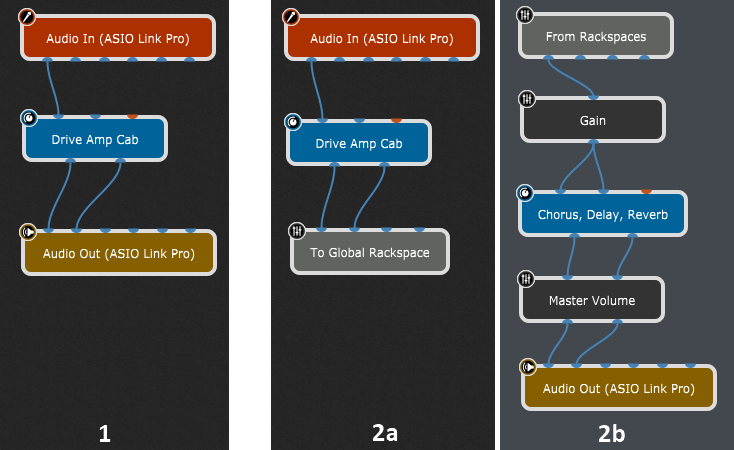
Complete the signal chain by connecting these plugins to your audio interface outputs. The very basic setup is displayed in image [1]. At this point you should be able to play your guitar and hear the result.
You can mix and match plugins together just as if they were physical devices. There are no complicated AUX buses, sends or inserts. Simply connect things together as if you were using wires.
If you want to parallel process your signal and, for example, run it through two different amps you can simply connect your input signal to two amp plugins, then sum these together with our Audio Mixer plugin.
Gig Performer 4 includes the Global rackspace where you can place your common effects, such as Chorus, Delay and Reverb. Image [2a] displays a rackspace which routes the audio signal to the Global rackspace, and [2b] is displaying a connection where the audio signal is coming from the Global rackspace, does some further processing and then completes the signal chain by sending the singal to your audio interface outputs.
Check the Global Rackspace chapter to learn more about the Global rackspace.
When you finish adding your plugins, switch to the Panels view, and enter Edit mode. Add panels and widgets for plugin parameters you mostly use or want to control via MIDI or OSC. Here is an example:
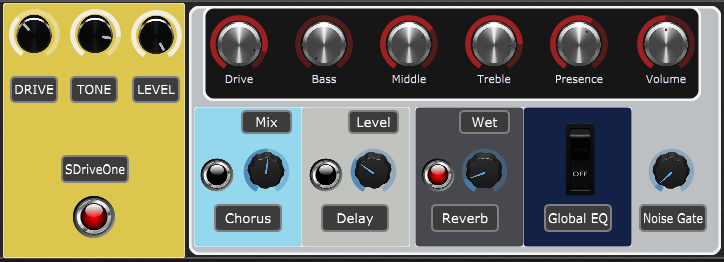
Refer to the Widgets chapter to learn more. Make sure to also check our built-in templates and Community-driven shared rackspaces (click Help -> Community -> Community Shared Gigs, Rackspaces and More) to access nicely designed, community created rackspace and gig files that you can use directly or as templates for your setups.
We recommend that you organize your rackspaces based on the common sounds you use like Clean, Crunchy, Distorted, etc. This is not a rule, however, and you're free to organize things the way it works for you and your style of playing.
As a guitarist you'll appreciate that each rackspace has fine-grain control over its "silencing periods". This means that you control how long each rackspace has to silence its input/output as you switch to another rackspace. This provides an incredibly smooth transitions between your sounds (check the Tail Length section in the Rackspace properties).