Adding or selecting a widget in Edit mode opens the Widget Properties inspector which is divided into four parts, General, MIDI, Value and Advanced:
General:

Customize caption – Check to have the widget display a custom caption, then type in a new name. If unchecked, the default caption will be defined by the selected parameter. Normally the caption will be assigned the parameter name only. However, if you hold the Shift key down while selecting a parameter, the caption will include the plugin name as well as the parameter name. If you also hold the Option/ALT key down, the caption will include the plugin name only.
Display range – When checked, the widget shows the Min and Max values as a white shadow around the outside of the knob or slider.
Show back plate– (Displayed only when editing a knob or toggle switch.) When checked, “back plate” information such as numbers or an “on/off” legend is displayed.
Ignore variations – When checked, the selected widget will be excluded from variation changes and will instead remain at its current value. This is useful if you have, for example, several different variations that change the widget settings controlling effects such as phasing or flanging, but you want the widget controlling overall volume to remain constant.
Widget groups– Each widget can only be associated with a single plugin parameter. However, the 26 Widget Groups provided by Gig Performer enable you to control multiple parameters from any or all of the widgets assigned to that group. Clicking below the words “Widget Group” opens a dropdown menu with the letters A - Z. All widgets with the same letter are grouped together so that moving one widget will cause all the other widgets in that group to move as well, adjusting various plugin parameters simultaneously.
Panel widget properties – When a panel is selected, some additional properties are available.
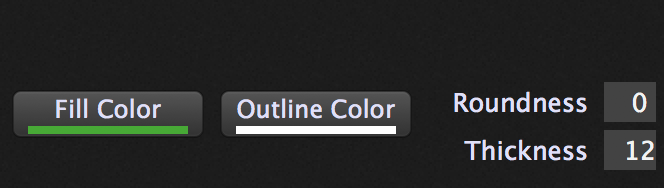
You can change the fill and outline colors (as well as the transparency) of a panel. You can also tweak the roundness and thickness of the outline of the panel.
MIDI:
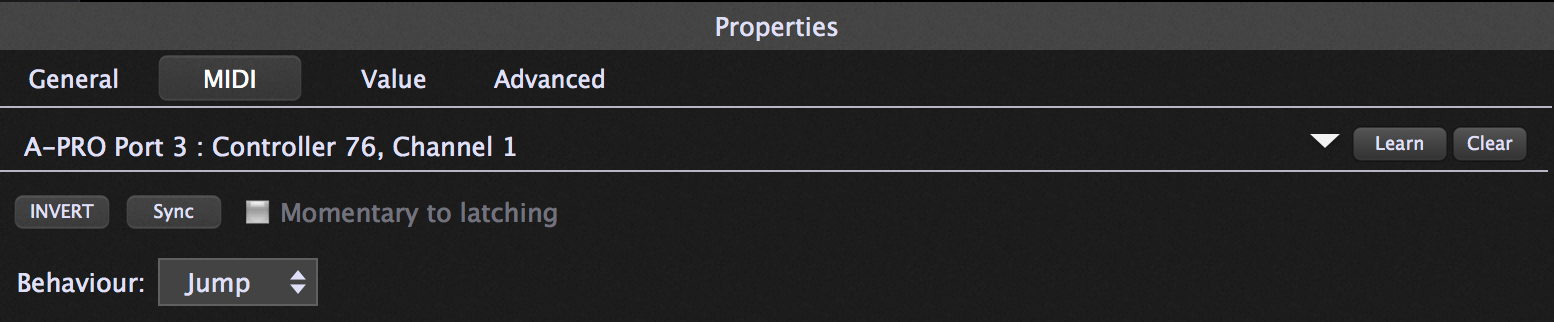
Learn– Click on this button to have Gig Performer learn the physical controller you want to associate with the widget. When actively in Learn Mode, the button is lit red; to exit Learn mode, click on it again and it will return to its normal gray color.
Clear– Click on this to clear the current controller assignment.
Invert- When checked, the widget does the opposite of the expected operation; i.e., a switch or button will cause a parameter to go to minimum when in the ON (lit) position, and vice versa.
Sync – Pressing this button engages bidirectional communication between Gig Performer and the controller mapped to the control. This lets physical controls on control surfaces reflect changes executed in Gig Performer, as well as Gig Performer widgets showing changes made on the physical control to which it is linked.
Treat momentary as latching – (Displayed only when editing an on-off widget i.e., a switch or a button). When checked, the widget remains in its ON position until you click on it (or touch the associated physical controller), and vice versa. This is useful when you want to have a widget carry out an operation until stopped; i.e., staying at a fast Leslie speed until you are ready to return to a slow Leslie speed.)
Behavior - Jump/Catch–This drop-down box allows you to choose between Jump and Catch modes. When a widget is in Jump mode, moving the associated physical controller will cause the widget to immediately jump to the position of the controller. When a widget is in Catch mode, the widget will not respond to the associated physical controller until the controller’s value matches the current value of the widget, at which point the widget will respond.
Value:
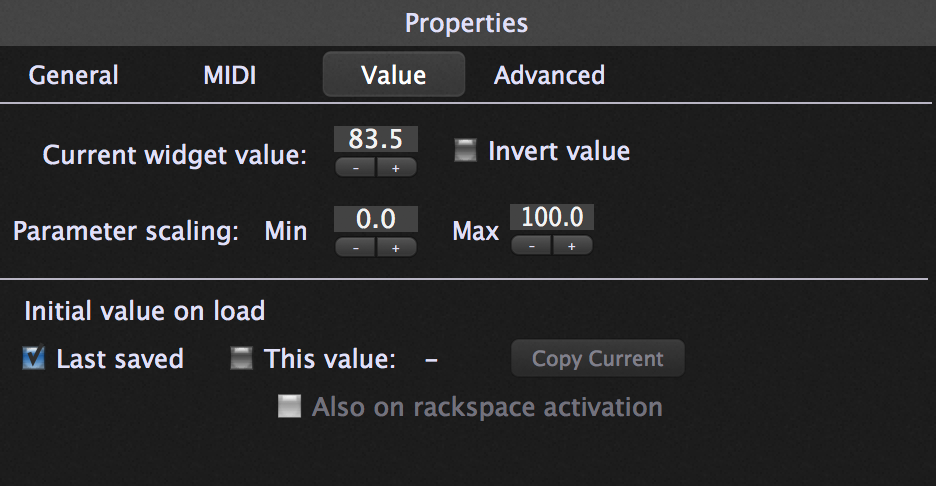
Parameter range and control–Each widget has a range of 0 to 100. Note that this is a percentage, not an absolute value. For example, if the plugin parameter it is controlling has an absolute range from 0.0 to 1.0, then when the widget is at its “100” setting it is actually changing that parameter to 1.0 (i.e., 100% of 1.0).
By entering Min and Max values other than 0 and 100, you can scale the range of the widget movement. For example, if you set Min to 10 and Max to 20, then the associated plugin parameter will change from 0.1 to 0.2.Finer resolution can be accomplished by entering decimal point values, in tenths of a decimal. Scaling can be inverted by setting the MIN value to a higher number than the MAX value.
Note that you can use each widget’s Min/Max range controls to specify how much each individual widget affects its associated parameter. You can even make some parameters go in reverse, either by clicking on that widget’s “Invert value” button or by setting the MIN value to a higher number than the MAX value. This makes it possible to implement special effects like crossfades, for example.
You can also directly enter MIDI data values in the Min and Max fields, by adding the letter ‘m’ at the end of the value. For example, if you type in “64m,” Gig Performer will interpret it as an exact value of 50.4 (roughly 50% of the maximum MIDI value of 127). The Now field simply indicates the current setting of the widget.
Text label widgets are capable of displaying the current “Now” value. To do so, simply assign it to a plugin and parameter, then check “Customize caption” and enter the term “[value]” (make sure the word “value” is inside square brackets) along with, optionally, a text label name. Whenever that same parameter is altered by another widget, the Text label widget will display the current value. For example, if you have a slider widget controlling the Gain of a plugin, as you move the slider, the value inside the Text label will change.
You can also use a Text label widget to act as a very cool visual cue (to remind you of pretty much anything) when switching between variations. To do so, check “Customize caption” and enter any name, but don’t assign the Text label widget to any plugin (select “(no plugin” in the Mapping section of the inspector), then enter a “Now” value. The lower the value, the dimmer the label will be; the higher the value, the brighter it will be!
Initial value on load– Gig Performer normally restores all widgets to the position they were last in when a .gig file is saved. The "Last saved" check box will be enabled in this case. You can however click the "This value" check box to take a snapshot of the current position of the selected widget so that it is that position that gets recalled and loaded instead. This can be useful if you are playing, for example, a song where the volume of your piano always starts softly but gets quite loud by the end. When you come back to that song again, you don’t want the piano to still be loud—you want it to always start soft. The concept is that, even if you play around with widgets during the course of your live performance, when you next reload a .gig file, your originally stored values will return.
Copy Current – (Displayed only when “Recall value on load” is checked.) Click on this button to take a snapshot of the current widget position
Also on rackspace activation– Gig Performer normally restores all widgets to the position they were last in when a rackspace is activated. Checking this button allows you to take a snapshot of the current position of the selected widget so that it is that position that gets loaded instead when the rackspace is again activated. The concept is that, even if you play around with widgets during the course of your live performance, when you next return to a rackspace, your originally stored values will return.
Advanced:

Name– Allows you to set a name for use in GP Script and/or OSC.
Enable OSC –Check this box to make the Name field also be available to OSC. For more information on OSC, click here.
Mapping section:
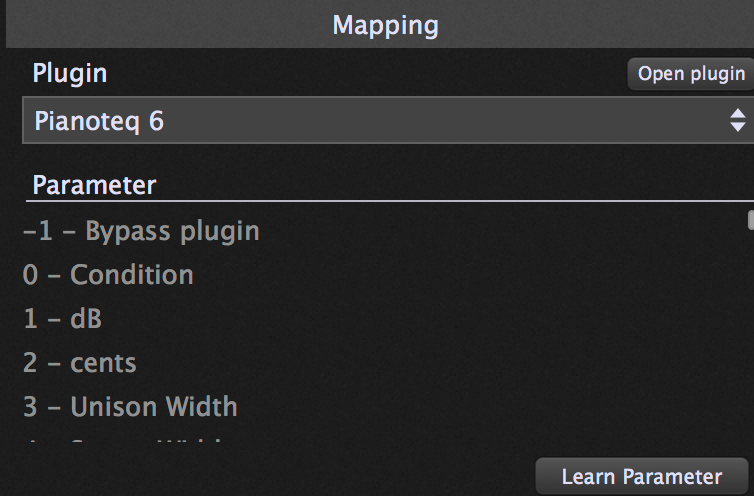
Plugin – Click in this box for a dropdown list of plugins currently being used by the rackspace, then select the plugin you want the widget to access.
Open plugin – (Displayed only when a plugin is selected.) Click on this button to open the editor for the selected plugin.
Parameter – (Displayed only when a plugin is selected.) A list of available controllable parameters is displayed here. Select the one you want to have the widget control. Alternatively, you can press the Learn button.
Learn – (Displayed only when a plugin is selected.) Click on this button to have Gig Performer learn the plugin parameter you want to associate with the widget. When actively in Learn Mode, the button is lit red; to exit Learn mode, click on it again and it will return to its normal gray color.
Note: Assignments of widgets to physical controllers in the Widget Properties area overrides assignments made in the Options>Global MIDI Assignments window.