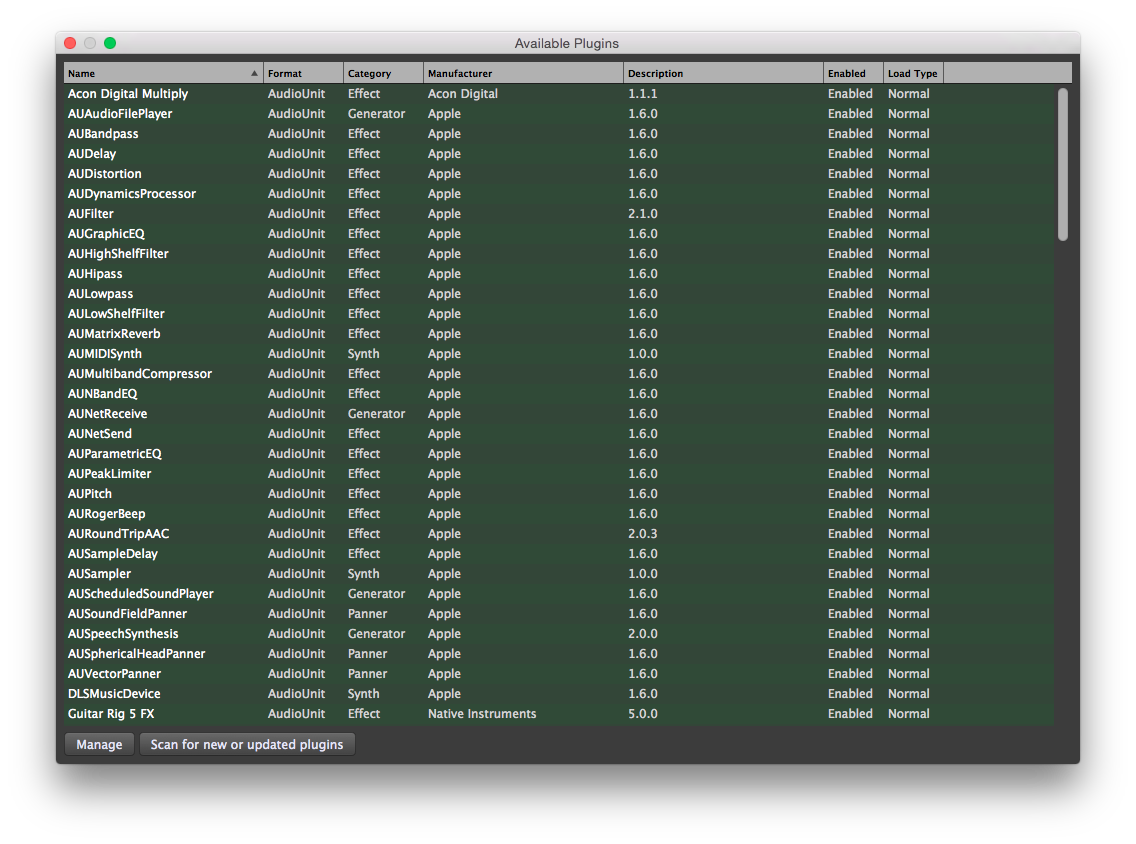
The Plugin Manager lets you view all of the plugins installed in your system, categorized by name, format (AudioUnit or VST), category (Effect, tone Generator, Synth, Panner, etc.), manufacturer name, and version name.
To access the Plugin Manager, press Cmd-Shift-P or choose from the Window menu. Click on “Name,” “Format,” “Category,” or “Manufacturer” in the top line to sort the list by that category. Click that category a second time to reverse the order of the list.
Right-clicking on any plugin name opens a pop-up menu that allows you to Enable or Disable any plugin, or to specify its Loading type (“Normal” or “Delayed”). If you encounter third-party plugins that regularly fail to reinitialize successfully (i.e., they don’t launch or display with the last saved value when recalling a .gig file), try designating them here as “Delayed.” (They will be overlaid with a light green see-through bar.) Gig Performer will then slightly delay their loading time the next time it is launched, which may help solve the problem.
Clicking on the Scan for new or updated plugins button(to the right of the Manage button) causes Gig Performer to immediately scan your system for any newly installed or updated plugins; any found will be added to the Plugin Manager list.
Important note: Plugins labeled as “Disabled” in the Plugin Manager are overlaid with a red see-through bar and will not appear in the list of available plugins when you right-click in the Plugin Connections area. This enables you to reduce clutter if you are sure you won’t need to access particular plugins when creating a rackspace.
Clicking on the Manage button (in the bottom right-hand corner) opens the following popup menu:
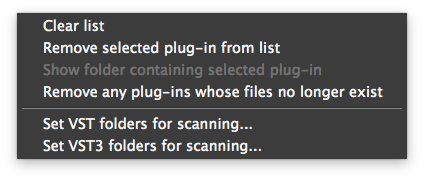
Clears the listing of all plugins.
Note: While this does not actually erase any plugins from your computer, it does remove them from Gig Performer’s memory, so a new scan is required after this operation. Click on the “Scan for new or updated plugins” button next to the Manage button to begin the scan.
Select a plugin first to make this operational.
Select a plugin first to make this operational.
Use this to clean up your plugins list.
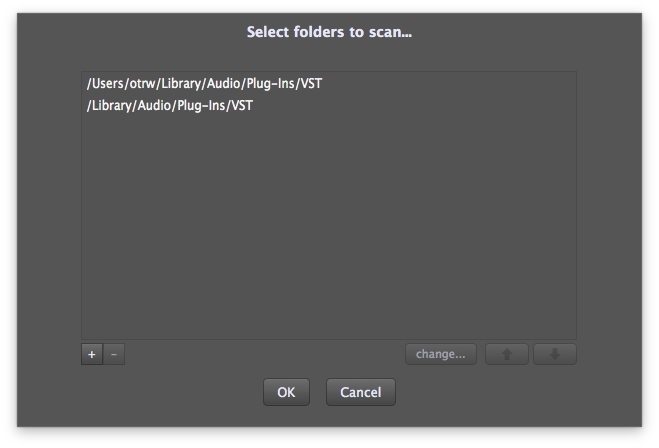
Opens the window shown below, which allows you to change, add, or delete the VST plugin folders to be scanned. (See Troubleshooting for more information.)
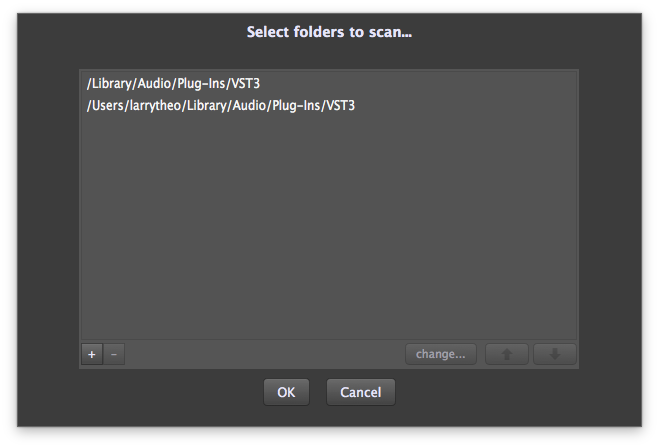
Opens a window that allows you to change, add, or delete the folders to be scanned for VST3 plugins. (See Troubleshooting for more information.)