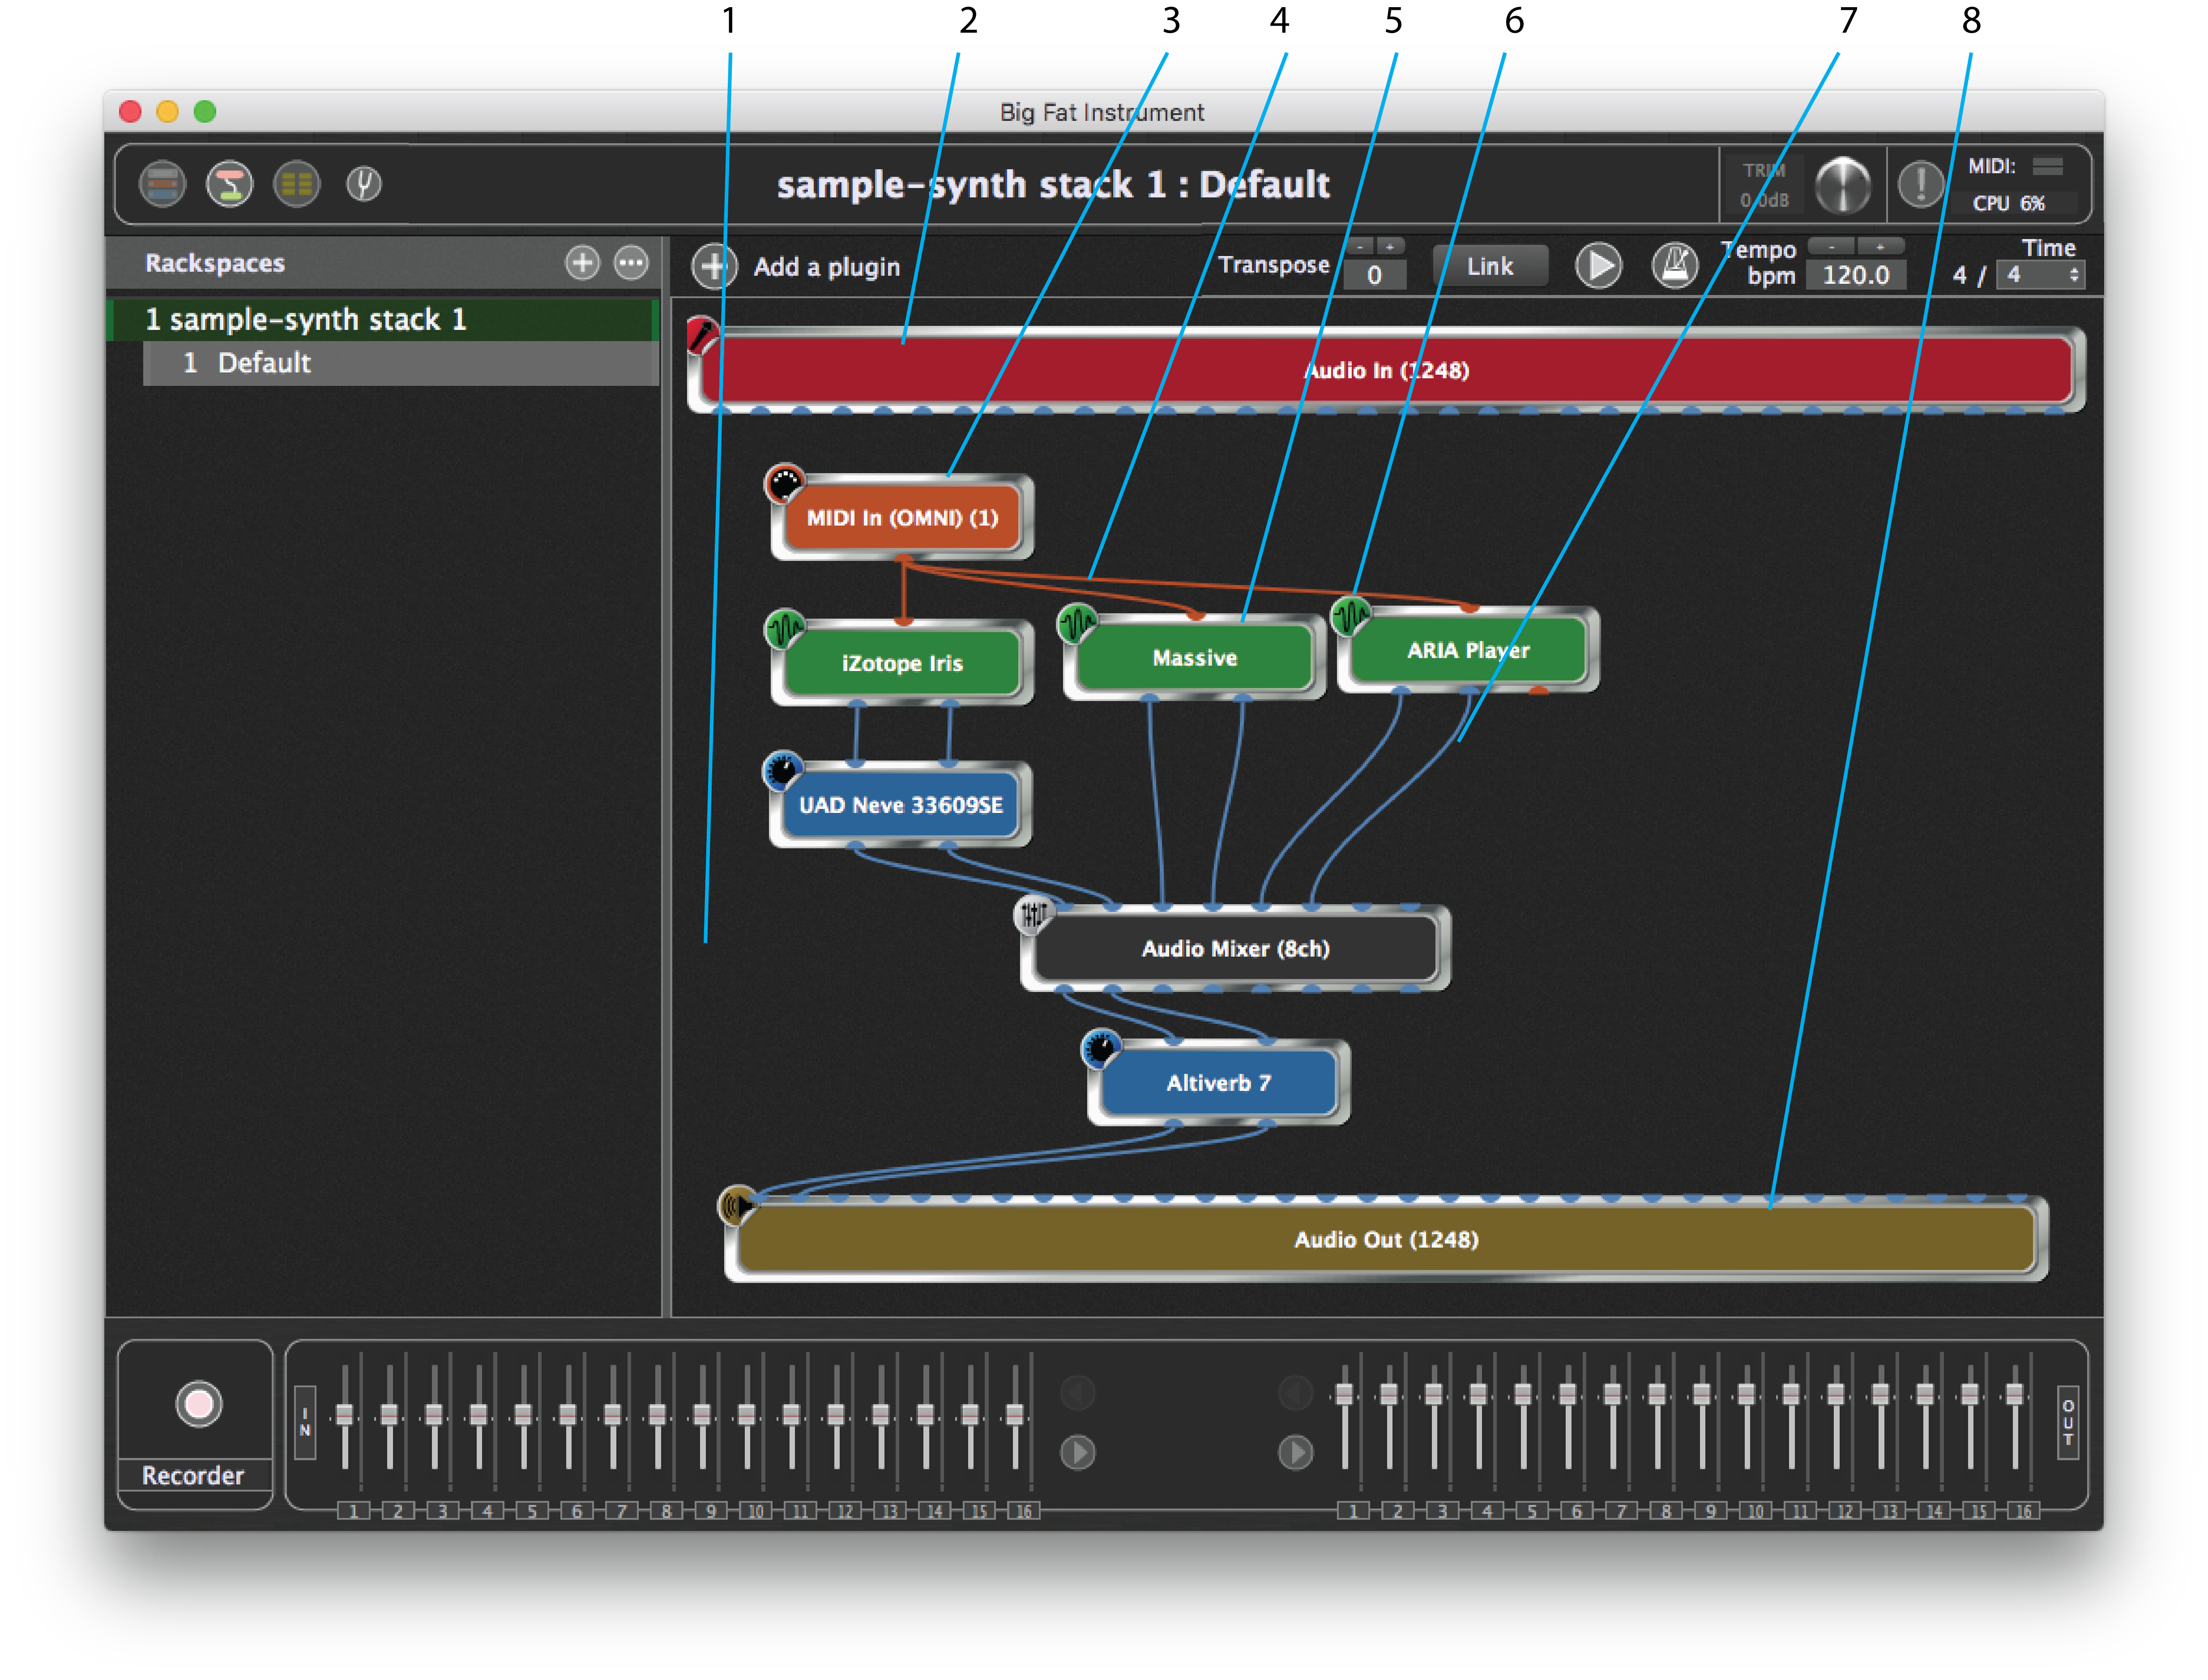
1.Plugin connections area –This large area of the screen is used to display your plugins and their interconnections. Drag a plug into move or reposition it. Double-clicking a plugin opens its plugin editor.
2.Audio interface input module – Gig Performer automatically shows inputs for audio interface device(s) known to the operating system.
3.A MIDI In device – Gig Performer inserts a MIDI In (OMNI) plugin by default. Other MIDI devices can be added in the same fashion as any other plugin. MIDI plugins are colored orange.
4.MIDI connections – Shown as orange lines between from MIDI Out ports to MIDI In ports.
5.Audio plugin –Virtual instruments are colored green, audio processors are colored blue, Gig Performer included plugins are colored black.
6.Plugin edit button – Clicking this button opens the editor for the plugin. A plugin editor also can be opened by double-clicking the plug-in or right-clicking and choosing from the menu that pops up.
7.Audio connections – Shown as blue lines from audio outputs to audio inputs.
8.Audio interface output module – Gig Performer automatically shows outputs for audio interface device(s) known to the operating system.
Hovering the cursor over a plugin brings up a tool tip with basic information:

The tooltip can be disabled by unchecking the Show plugin information when mouse is over the plugin block box on the General preferences tab. Right-clicking on any plugin opens a popup menu that allows you to do the following:
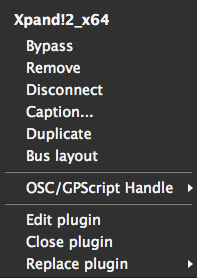
- Places the plugin in bypass mode. Click here for more information.
– Deletes the plugin. This is the only way to remove a plugin.
- Removes all connections to and from this plugin.
–Changes the displayed name (useful if you are using the same plugin more than once).
– Creates a duplicate of the plugin.
– Opens the Channel and Bus Layout dialog.
– Allows you to set a handle to be used by GPScript, OSC, and/or the Advanced Extra MIDI messages to send out feature, as well as to enable OSC and/or GPScript.
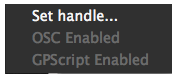
Enter a name in this field that can be used to identify this plugin in OSC or GPScript code, or in the Advanced: Extra MIDI messages to send feature in the Song Part Properties dialog. Only alphanumeric characters and underbars are allowed.
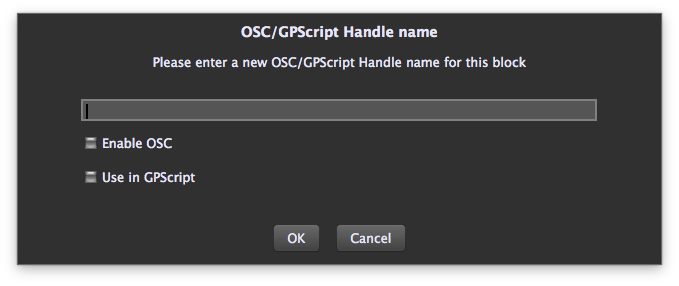
Enable OSC –When a handle name has been entered, this checkbox enables OSC functionality for this plugin. This box does the same thing as the command, and checking this box causes the command to appear checked, as well.
Use in GP Script -When a handle name has been entered, this checkbox enables GPScript functionality for this plugin. This box does the same thing as the command, and checking this box causes the command to appear checked, as well.
When an OSC/GPScript handle name has been assigned, choosing this command enables OSC functionality for this plugin. This box does the same thing as the Enable OSC checkbox in the Set handle dialog, and choosing this command causes that box to appear checked, as well.
When an OSC/GPScript handle name has been assigned, choosing this command enables GPScript functionality for this plugin. This box does the same thing as the Use in GPScript checkbox in the Set handle dialog, and choosing this command causes that box to appear checked, as well.
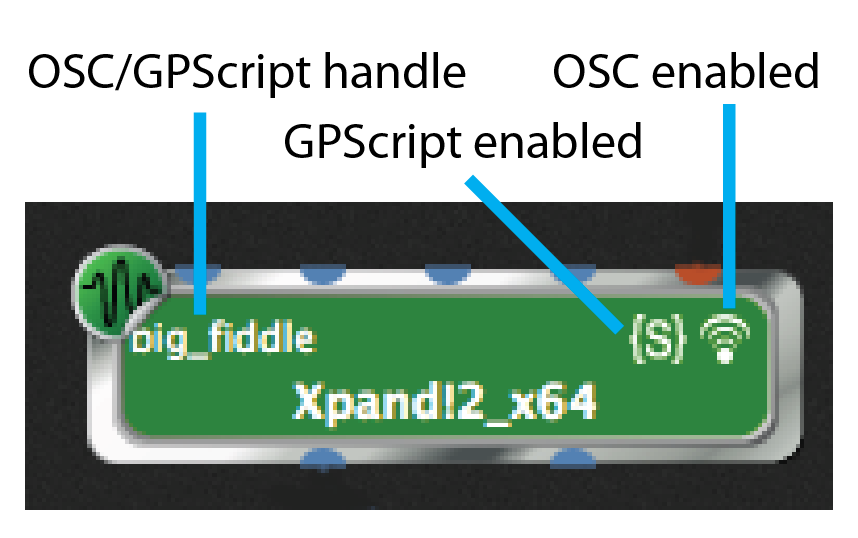
Assigning a handle, enabling OSC for a plugin, and enabling GP for a plugin are all indicated by symbols on the plugin in the Connections view.
–Opens the plugin’s editor.
– Choose a plugin from the menu that pops up to replace the current plugin with another.
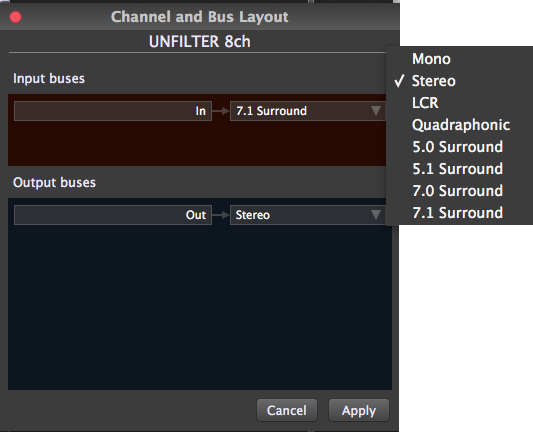
Channel and Bus Layout dialog
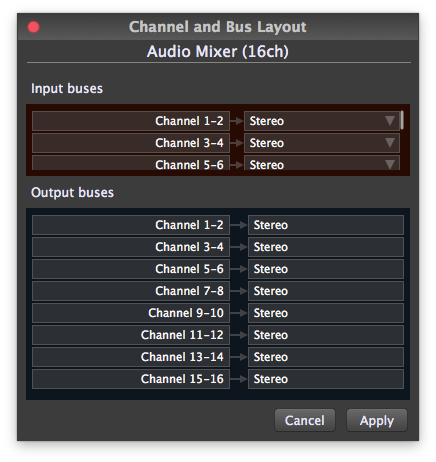
Each plugin supports some configurations of inputs and outputs, usually stereo, sometimes mono, sometimes even multichannel. In a DAW environment, the DAW deals with configuring these input and output buses. In Gig Performer, you can access a plugin’s bus options directly in the Channel and Bus Layout dialog.
Many plugins will simply show a stereo output bus, but some plugins, such as the eight-channel Zynaptiq Unfilter shown here, offer many more configurations.