The Audio Input Recorder is a basic utility to allow live performance to be captured raw, before it has entered your Gig Performer plugin network. Assuming you save your Gig Performer gig, you can make a quick capture recording, and in post-production use the WAV files that are captured in a DAW or other music or audio program. Also see Audio Input Recorder in the reference section.
A MIDI Recorder is also available that captures incoming data from each MIDI device to a track in a Standard MIDI File. Generally, a device corresponds to a physical MIDI port.
Tip: You can see a list of MIDI devices known to Gig Performer by right-clicking any MIDI In module and moving the cursor to the Change MIDI Input Device command to see its associated drop-down menu.
1.Click the Recorder button or choose to open the
Recording Options dialog.
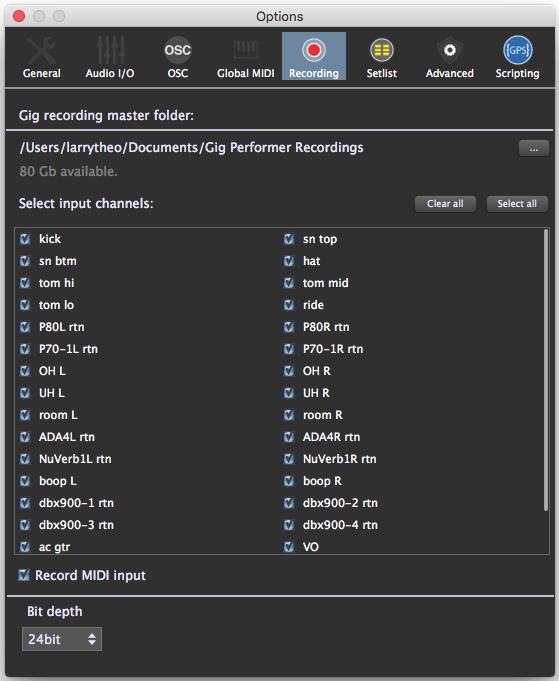
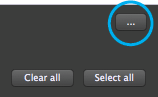
2.Click the Set Destination Folder button and navigate to a destination for the recorded files.
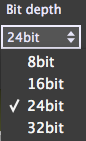
3.Choose a bit depth for the files from the menu in the lower left corner. The sample rate is set by the audio interface. Technically, the 32-bit setting uses floating point representation, whereas the other settings use fixed point.
4.We only want to record from a few inputs, so the fastest way to set up for that is to click the Clear All button to disable all inputs, then record-enable the channels you want to capture.
5.If you want to record real-time MIDI data from your controllers, click the MIDI Record box. Data from all physical MIDI In ports known to Gig Performer will be captured to a Type 1 Standard MIDI File, with data from each port recorded onto its own track.

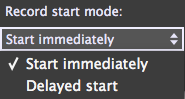
6.Make sure that Start Mode is set to . Recording begins the moment the Start button is clicked.
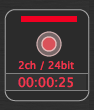
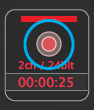
7.Click the Start button to begin recording. The Recorder button changes to a small record panel that tells you how many channels you are recording and at what bit depth, along with the current record time.

The Recorder button changes into a small record panel with information and a stop button.
8.Click the Stop button in the record panel to stop recording.
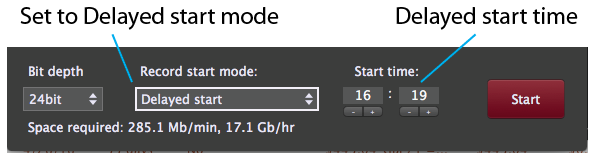
9.Now let’s try a recording set to start at some other time. For instance, we might want to set Gig Performer at sound check to begin recording at the show’s scheduled start time. Set Record start mode to Delayed start. New Start time fields appear. Enter the time when you want the recording to start in hours and minutes.
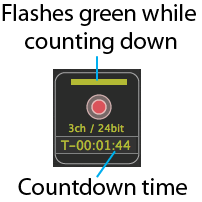
10.Click the Start button to start recording. The Recorder button changes to a countdown panel. The panel flashes green while it is counting down, then turns to red when it begins recording. When you are done recording, click the record stop button to stop recording.
11.Your recordings are located in the destination folder chosen in the Recording Options dialog. Inside that top-level folder is a folder named for the current Rackspace, and inside of that are folders named with date and time of the recordings. These folders contain the WAV files recorded at the indicated dates and times.

Since each recording session will include the show date as part of the name, you can start a recording session every night of a tour without having to worry about documenting when the recordings were made.