The Audio Mixer/Router is a flexible plugin that eliminates the need for a Gain plugin on the output of each source. Functions like level, mute, and output routing can be controlled from widgets so you can, for example, mute and unmute different sources, route channels to various effects devices connected to the outputs, or, of course, mix levels.
There are three versions of the plugin, with two, four or eight inputs. Each input hosts a stereo channel pair, or can be switched to mono operation. This yields between two and 16 input channels.
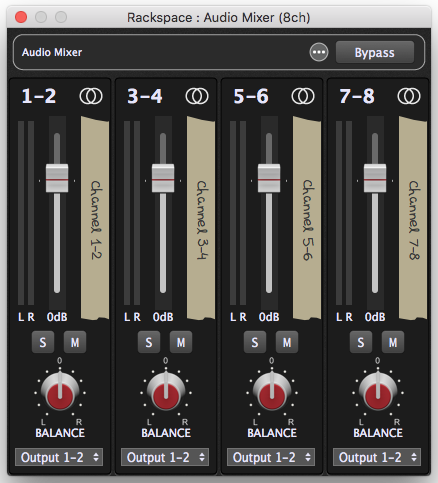
Each input has a fader, mute button, and solo button, and can be routed to one of two, four, or eight stereo output pairs, depending on which mixer plugin you’re using. For more details, see Audio Mixer/Router in the Reference section.
Tutorial:
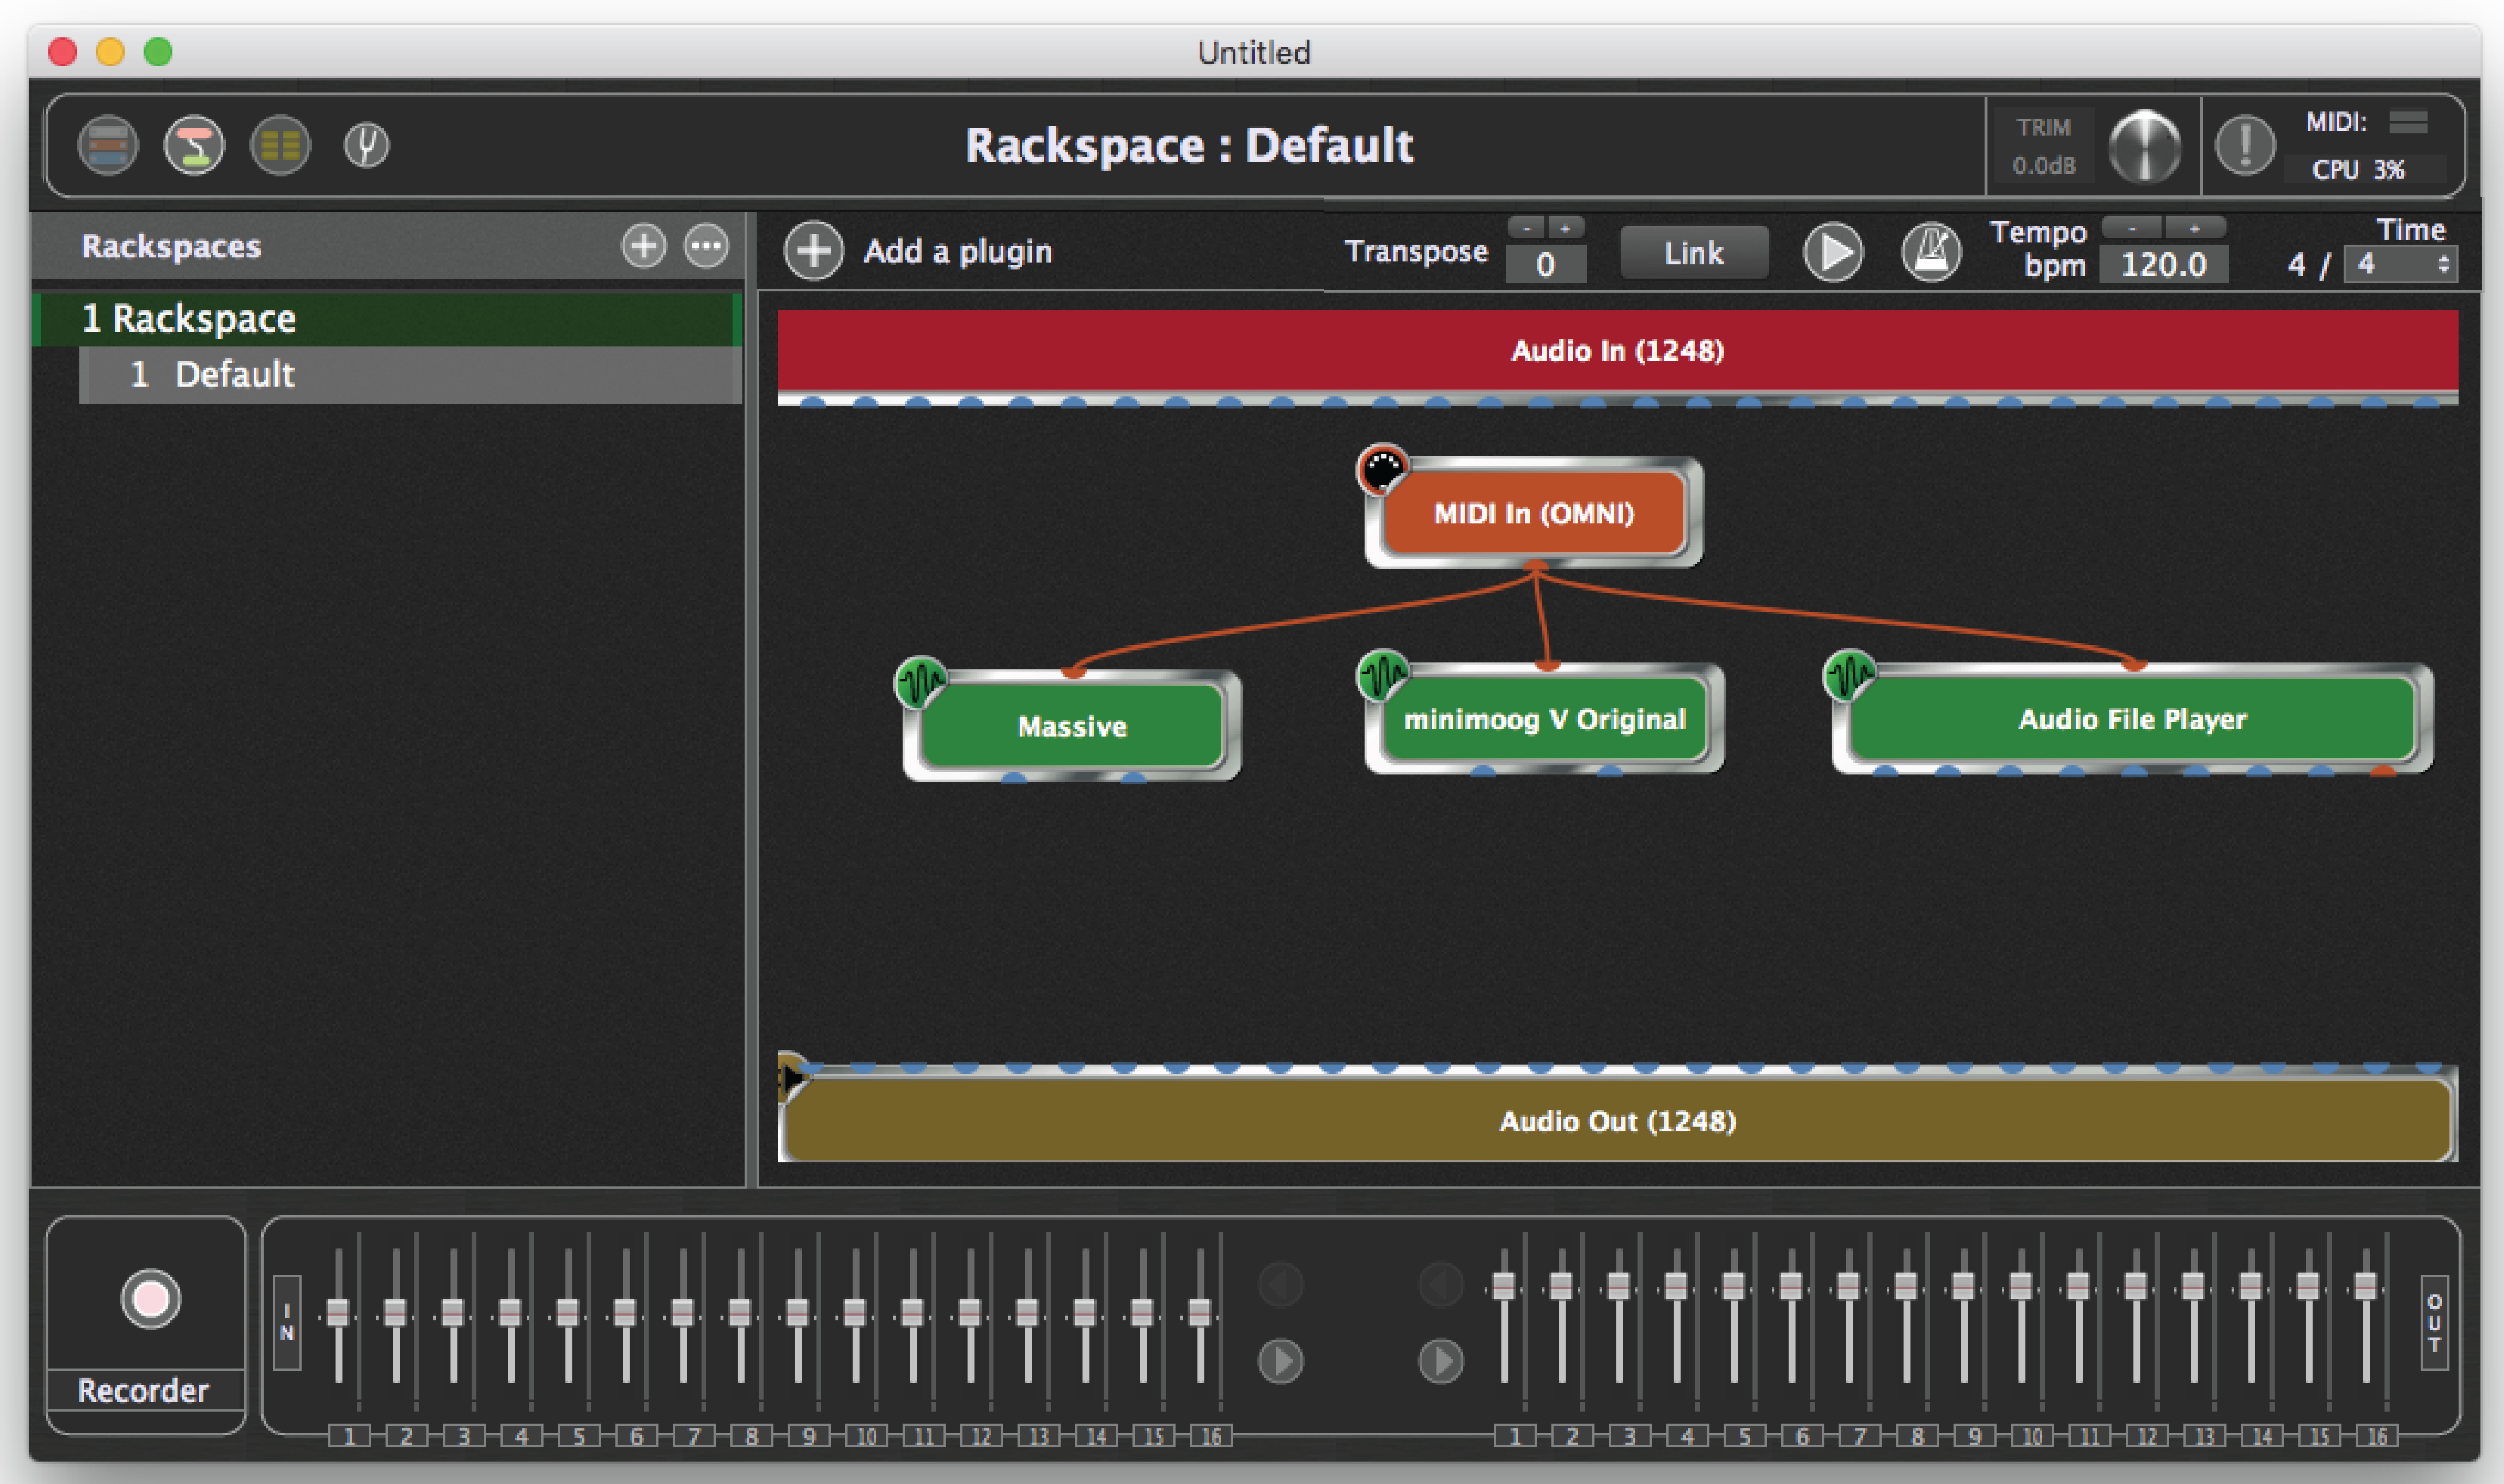
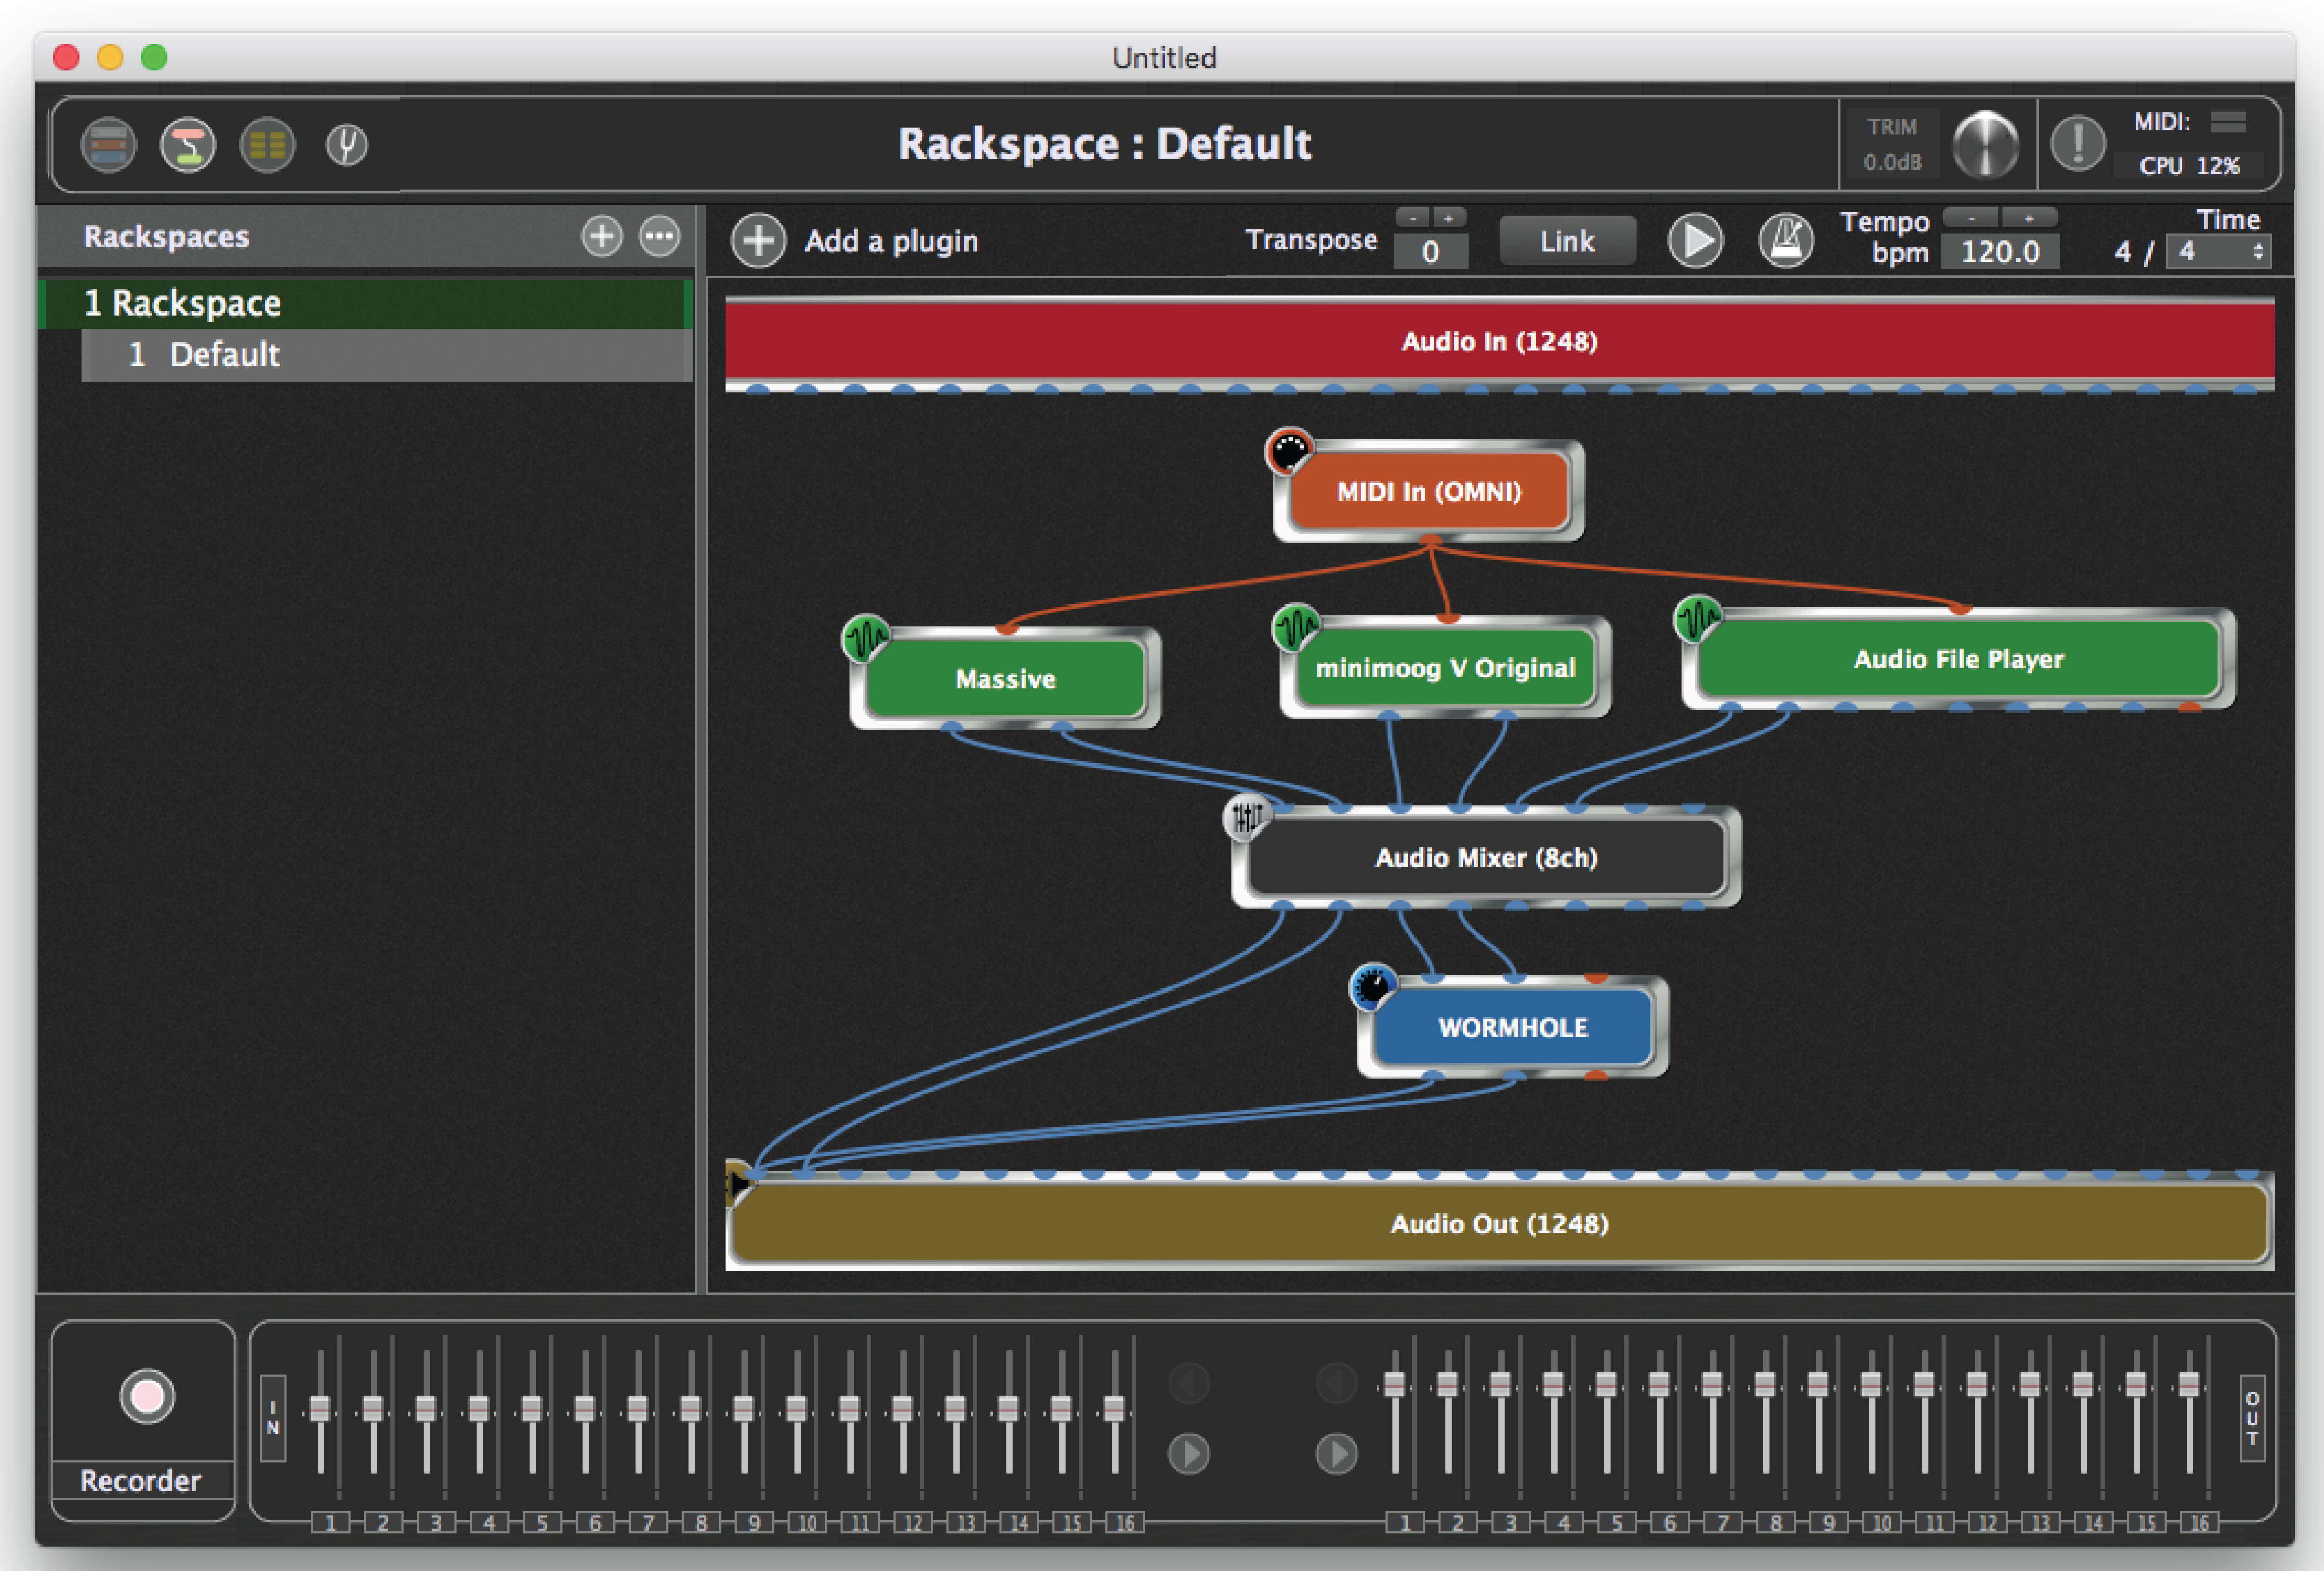
1.Make a new rackspace and add a few sound sources. Your screen should look something like this:
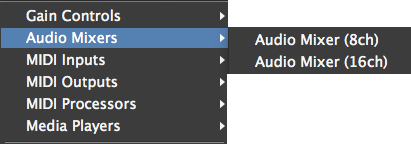
2.Now click the Add a plugin button and choose an eight-channel mixer.
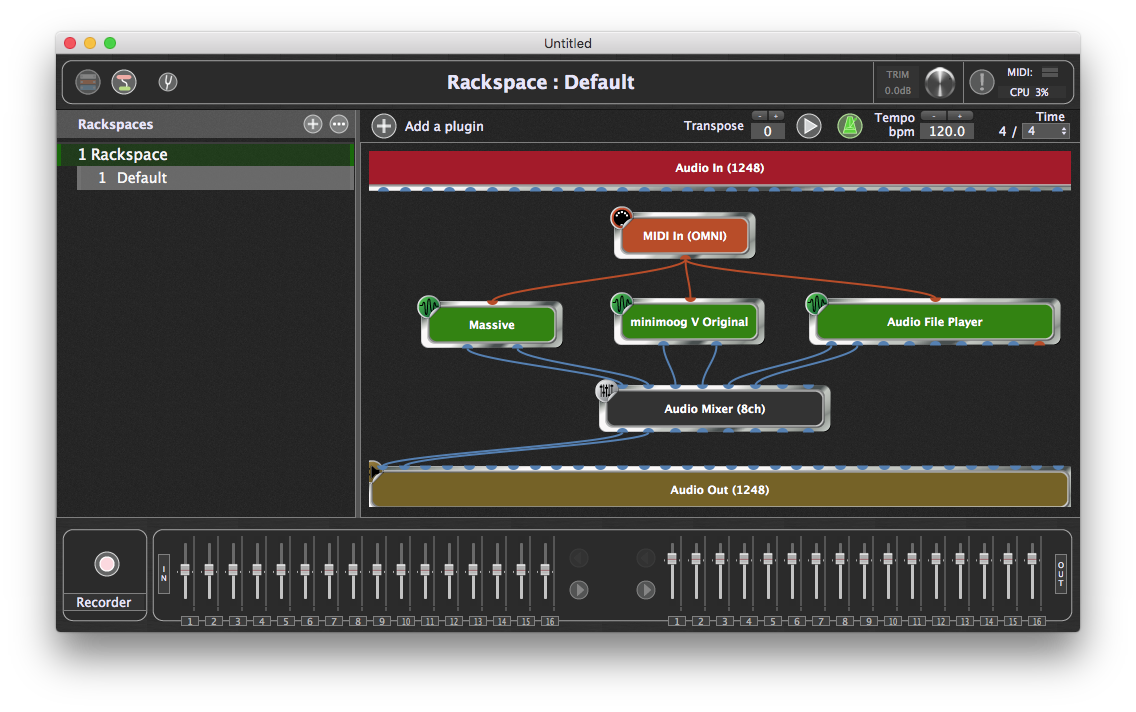
3.Drag from the outputs of the source on the left (in this example, Massive) to mixer inputs 1 and 2 to feed them into the mixer. To route stereo pairs, you can shift-drag, but you have to respect odd/even pair numbering: the left output from a plugin has to be dropped on an odd-numbered input of the mixer, or the right output dropped on an even-numbered input. Try shift-dragging from an output of one of the other sources. Shift-drag from output 1 of the mixer to an odd-numbered interface output, and the outputs 1 and 2 will be connected for monitoring.
4.Double-click the mixer in the Connections view to open the editor for the plugin.
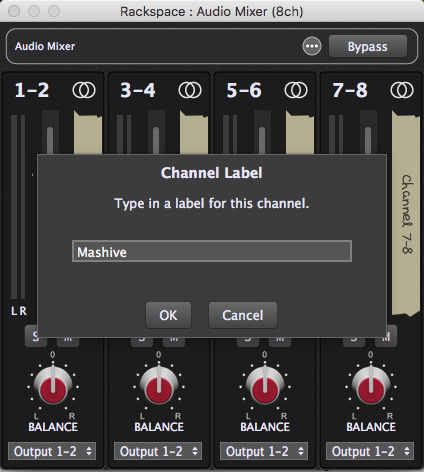
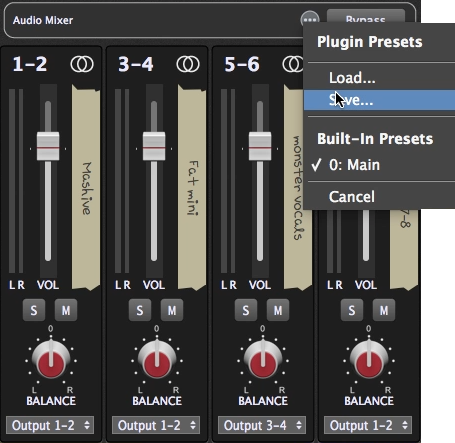
5.Let’s rename a channel. Double-click on a label to edit the name.
6.Now add an effect of some sort. Drag from mixer outputs 3 and 4 to the inputs of the effect, and from the outputs of the effect to inputs 1 and 2 of the interface. These will simply mix in equal amounts to other signals connected directly to those interface inputs.
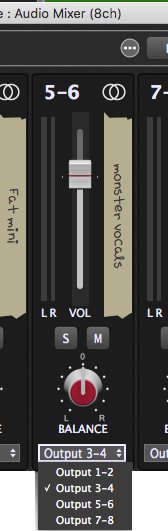
7.We can send the Audio File Player through our effects. Click at the bottom of the third channel strip and choose 3-4 as the outputs. Now the file player is feeding the effects, and the output of the effects is being summed with the outputs from the mixer.
8.Now that our mixer is configured, we can save the setup as a preset. Click on the Presets menu button.
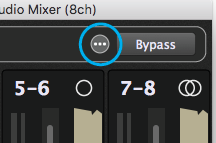
9.Choose from the popup menu and name your setup.
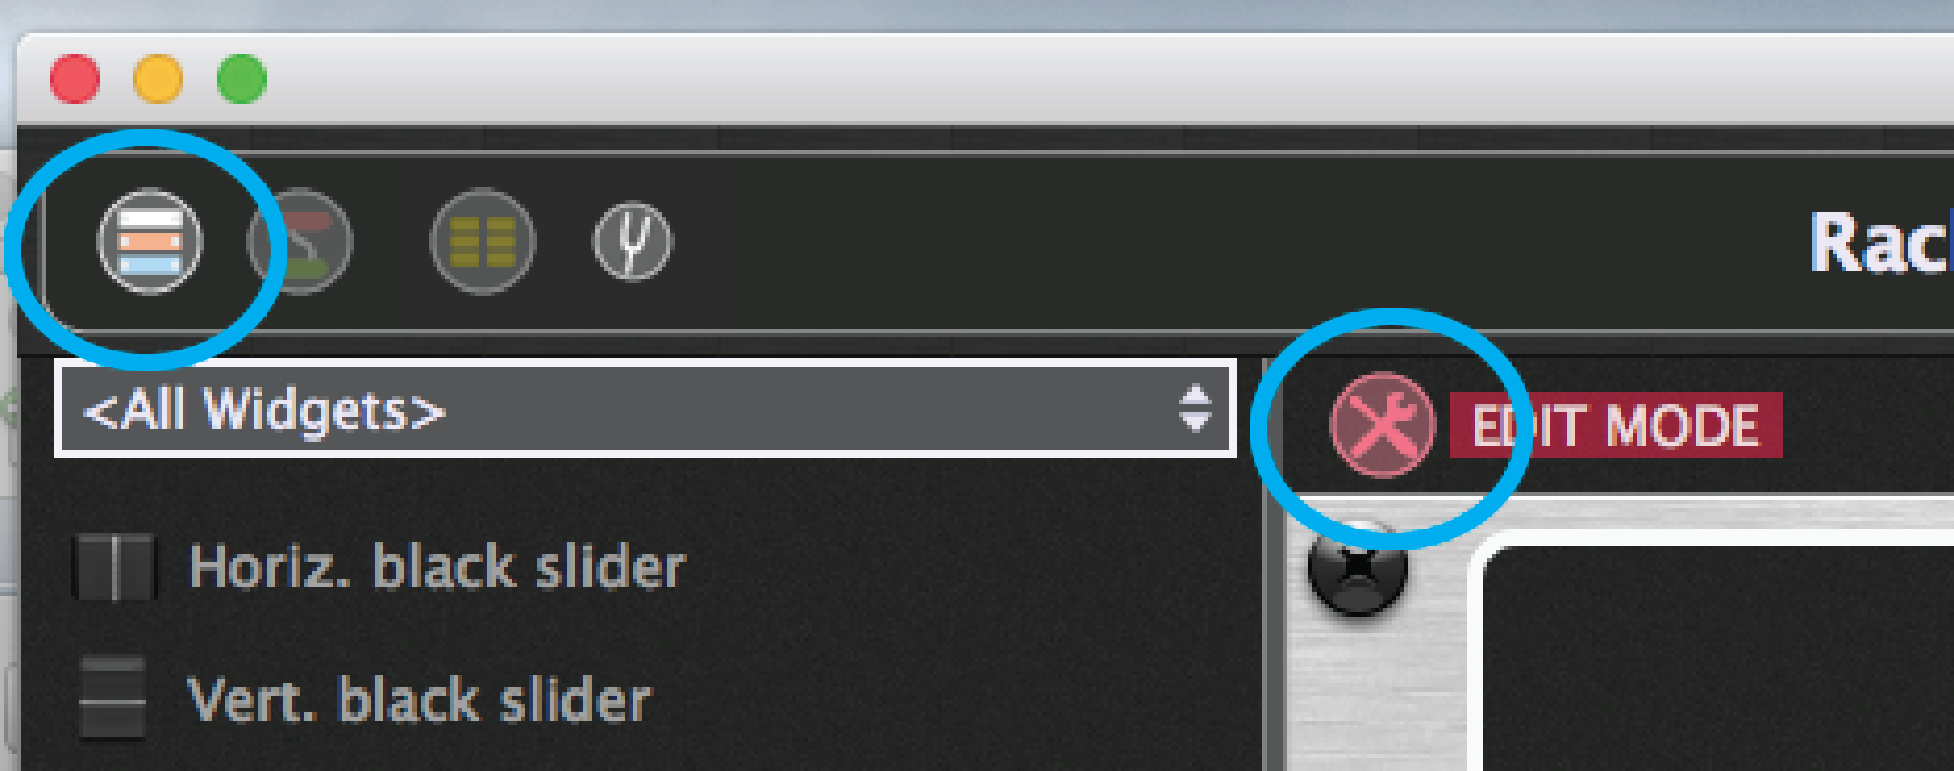
10.Now, let’s attach a few widgets to mixer controls. Click the Rackspace front view button in the upper left corner so you can see the rack panels, then click the Edit Mode button to start editing the panel.
11.Now add some widgets. In the example below, there are mute buttons, balance controls, level faders, and meters for two inputs to the mixer. All except the meters can easily be mapped to physical controllers, such as on a keyboard. For more information on how to do that, see the Controlling Plugins From the MIDI Controller tutorial.
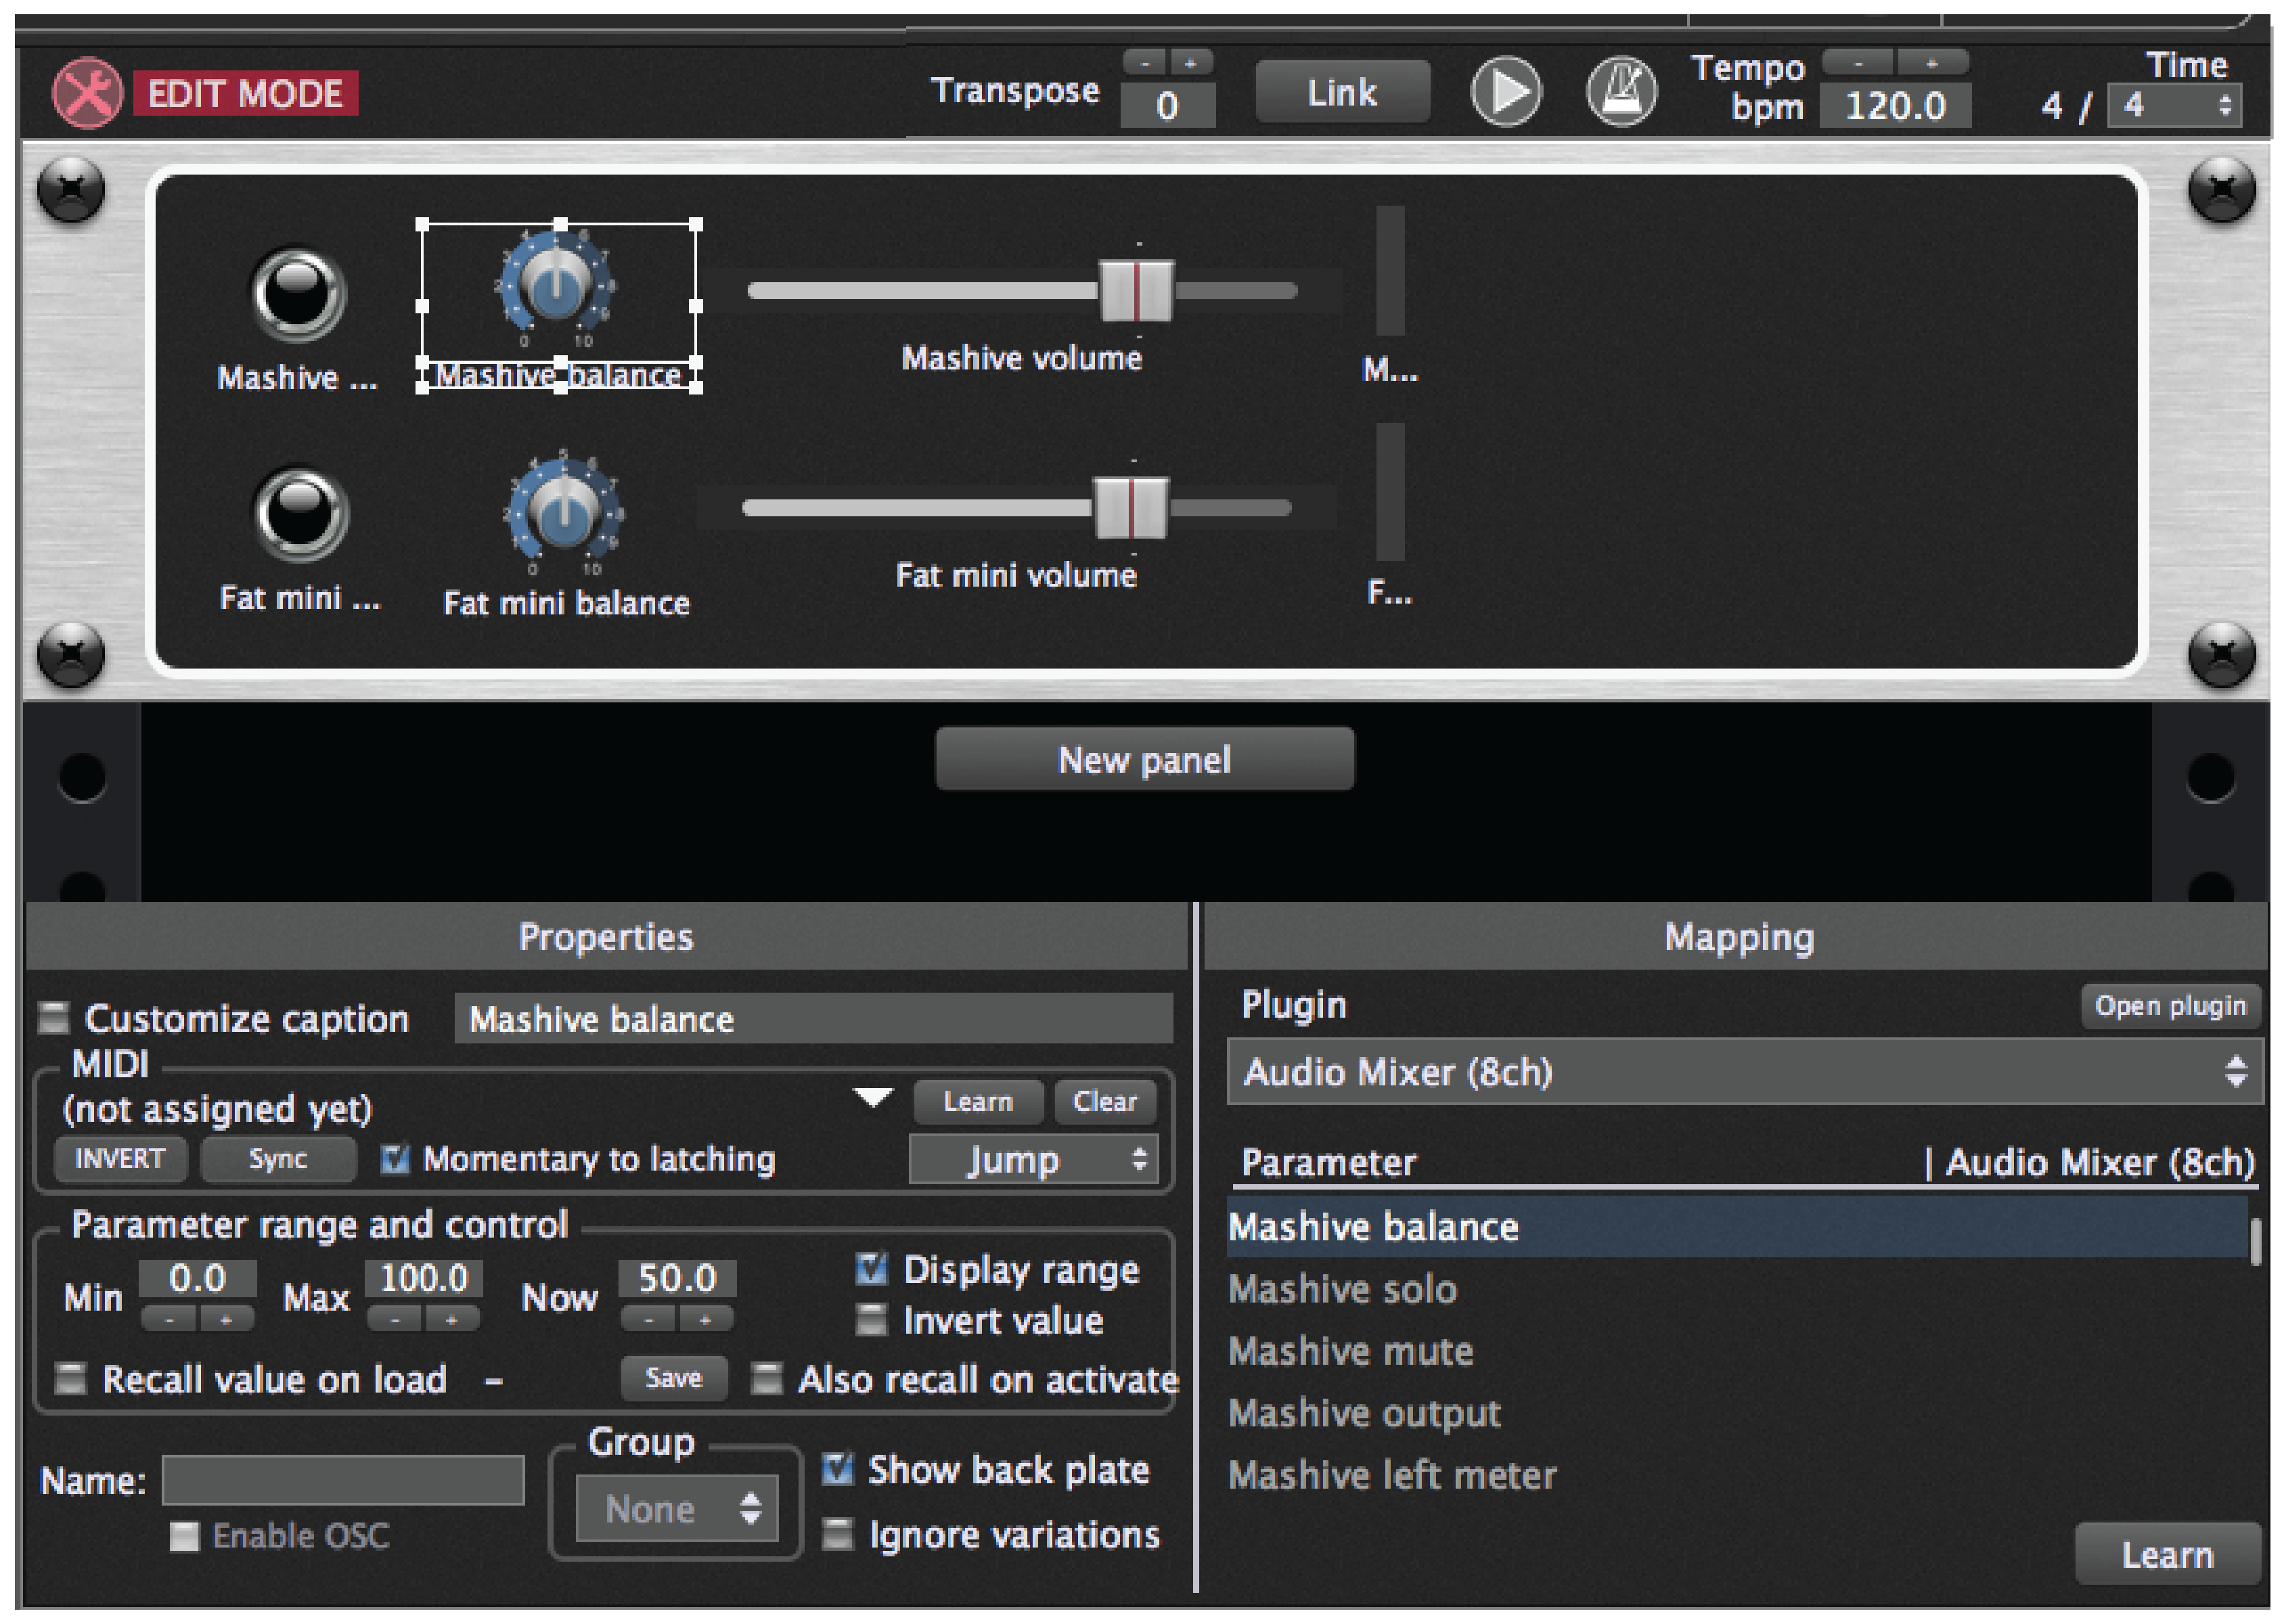
12.Click the Edit Mode button to return to using the Rackspace and you are ready to mix.
Applications
There are many tasks that can be accomplished with the mixer/router plugin. Here are a few examples to get you going.
Simple Mixer
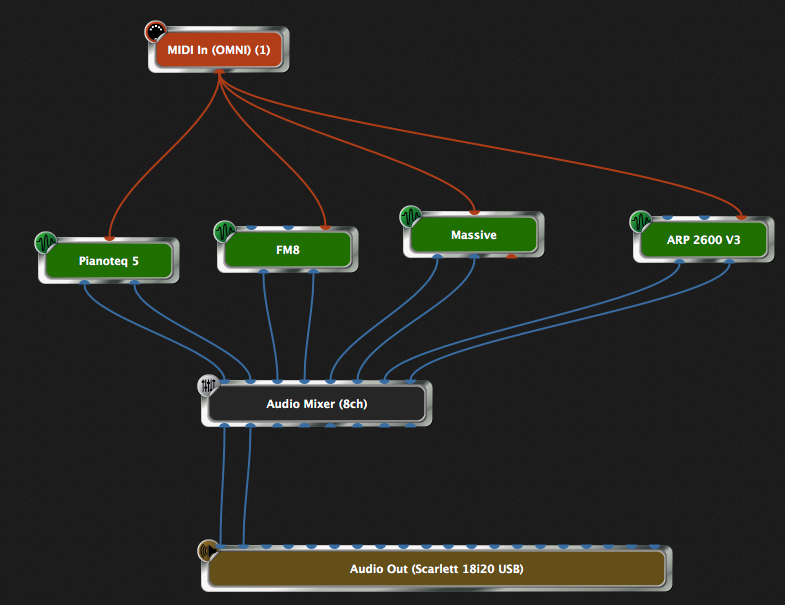
In this example we have four synths with stereo pair outputs feeding the mixer’s eight inputs. Each input has gain and balance controls in the Audio Mixer plugin, so it is unnecessary to add gain and balance plugins on each individual synth output. All the inputs feeding the mixer in the figure are then routed to outputs 1 and 2 of the mixer plugin, which is connected to the first stereo pair of audio interface outputs.
Each channel pair can be soloed or muted as desired and of course these can be controlled from front panel widgets (and so from your keyboard controller, once you map them to those widgets) as needed.
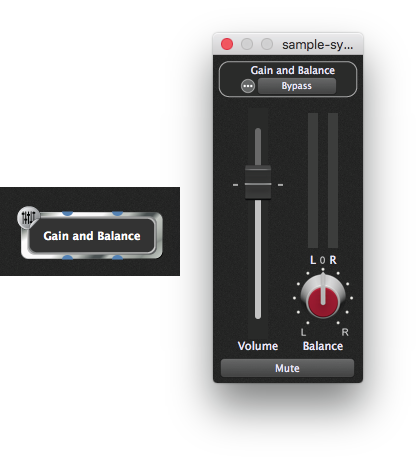
You can easily add a master volume for a mixer output pair, if you need, by feeding the mixer outputs to a Gain and Balance plugin. For a classic VCA-style approach, create a widget for the level of each output pair, then form them into a widget group and map them to a single physical knob or slider.
Input router
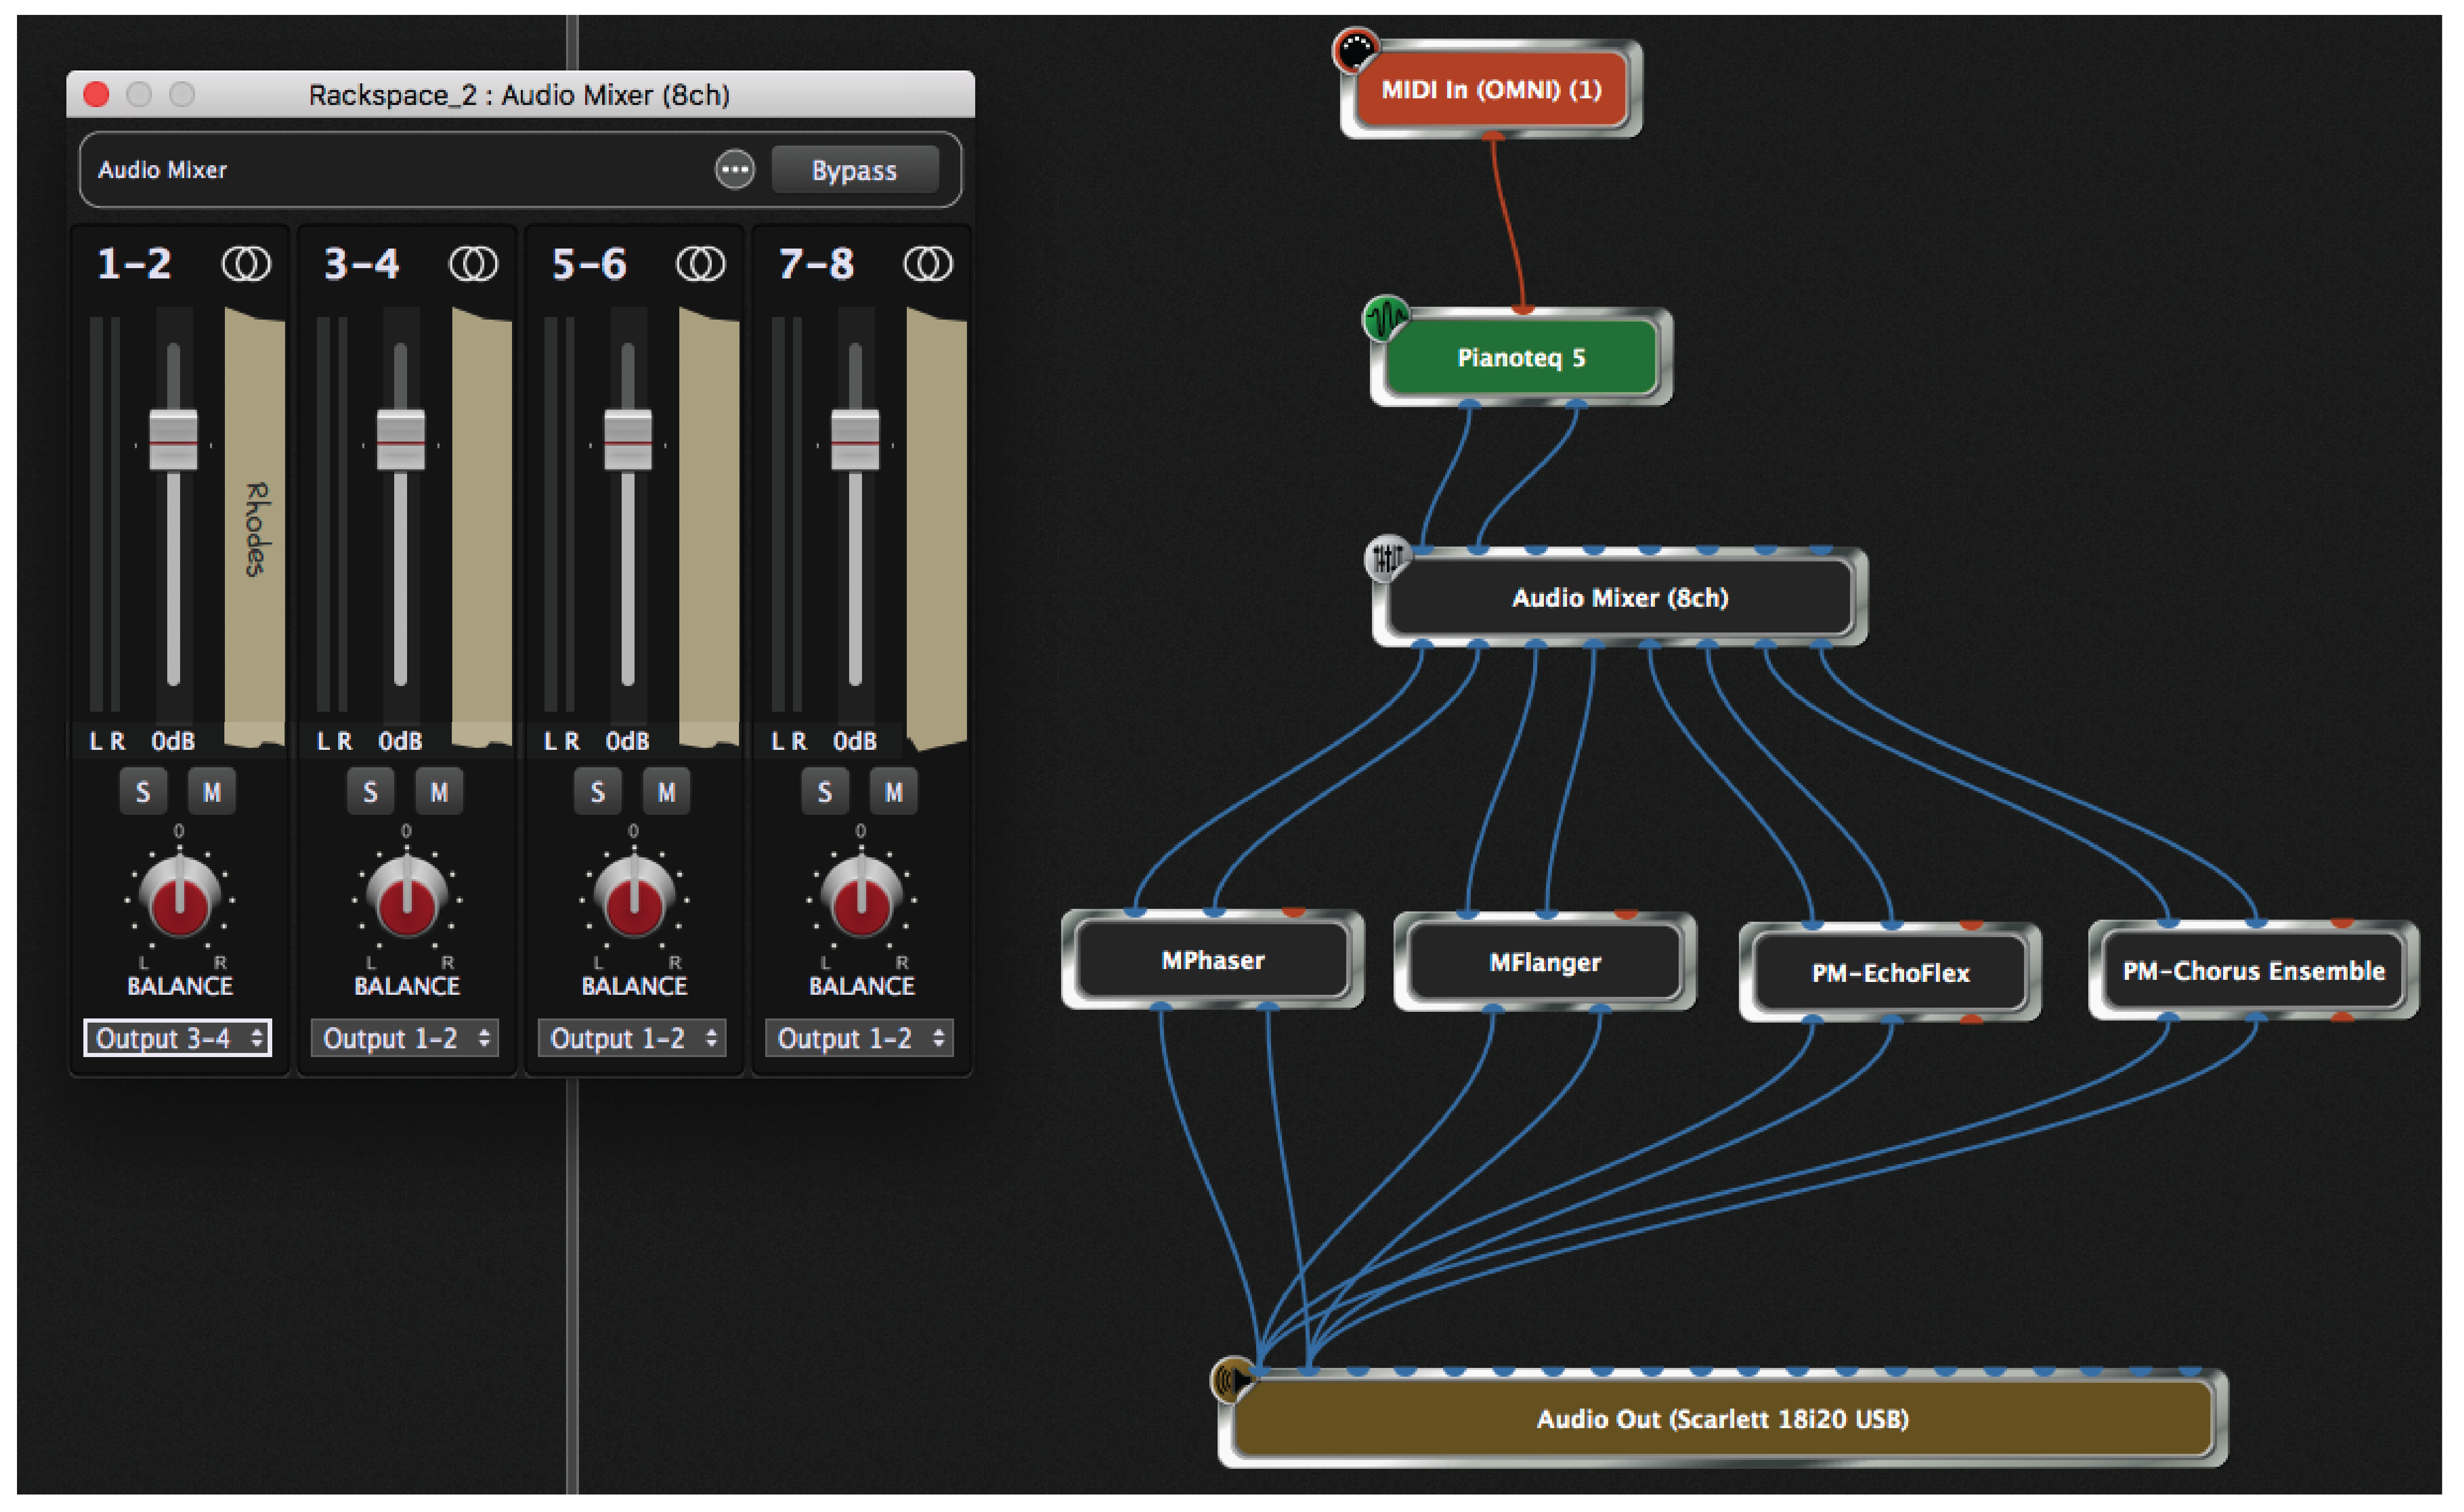
On the right, in the Connections view of a rackspace, you can see that we have a single synth (the Modartt Pianoteq) connected to the Audio Mixer. The four output pairs of the (eight-channel) Audio Mixer are connected to the inputs off our different effects. If you look at the first channel strip in the mixer on the left, the Pianoteq is currently being routed to Output 3-4, which feeds the Flanger. By changing the output routing, you can quickly switch from one effect to another. Output routing also can be attached to a slider, knob, or switch widget, letting you control effects switching from your controller.
Feed multiple effects (aux sends)
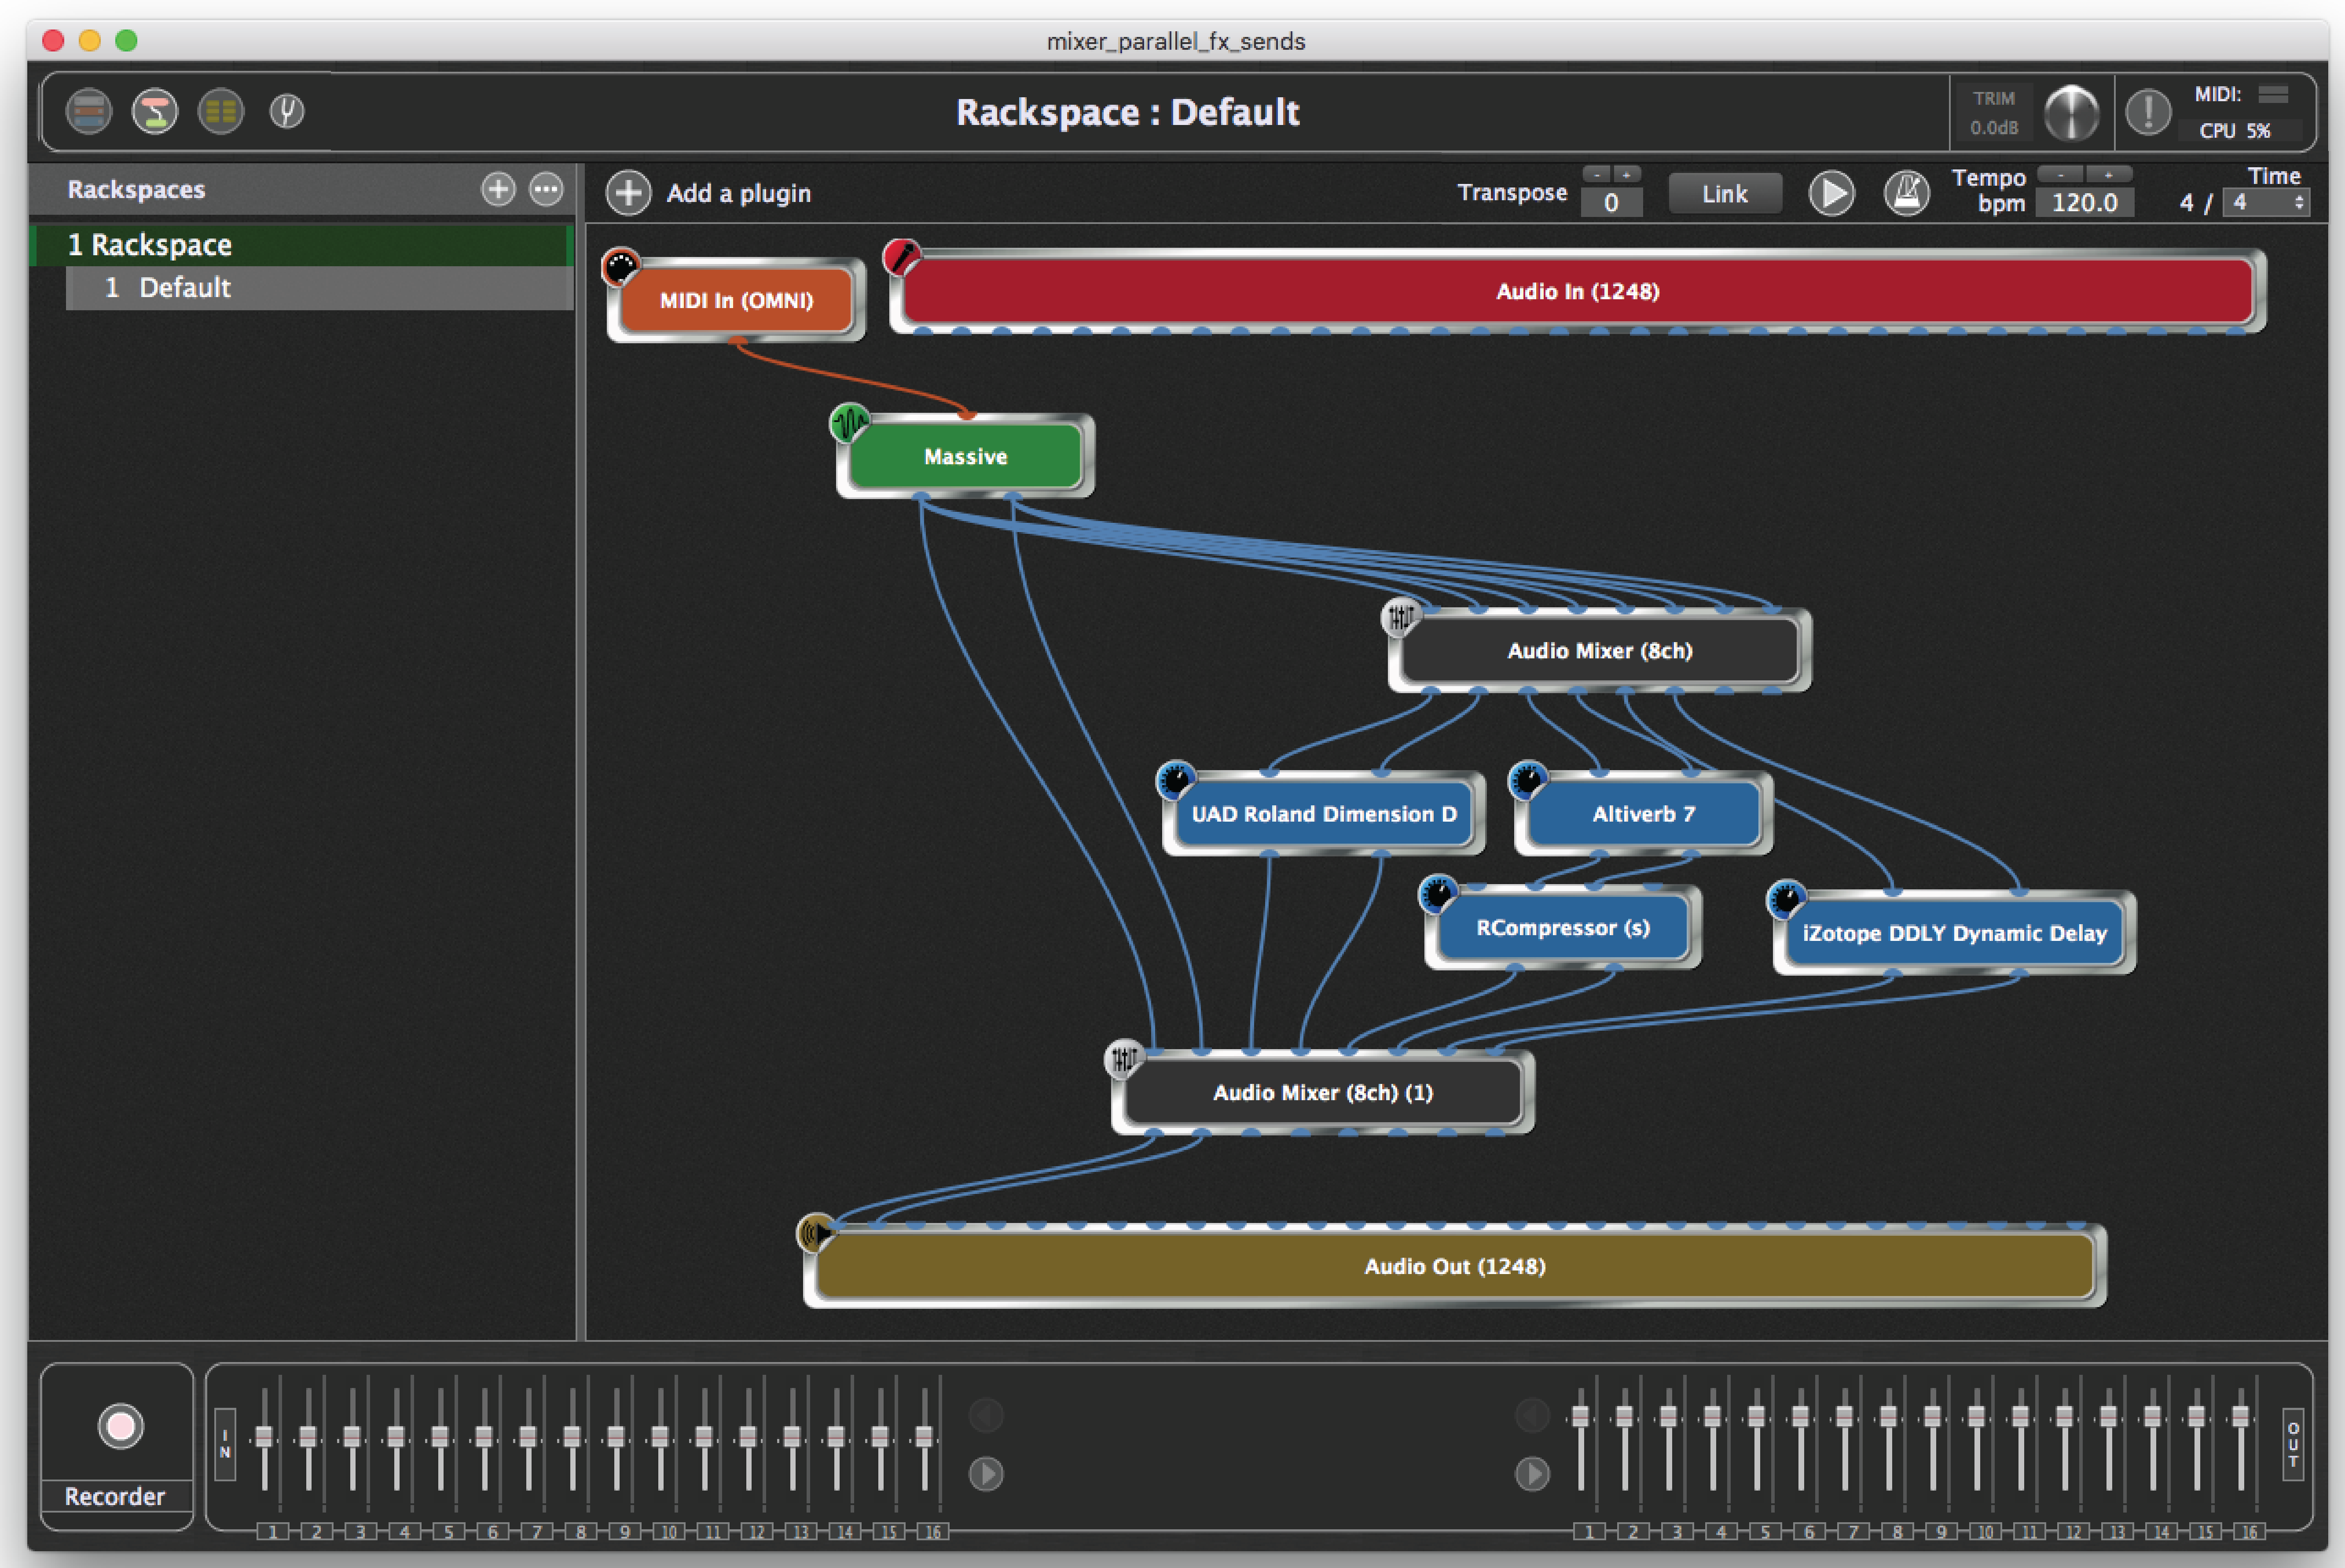
Assigning the source to all of the inputs turns the mixer into a bank of aux sends. Each channel sends the source signal to one pair of outputs, with a separate level control for each. In this case, the outputs of the effects and the original synth source are all mixed at the end through another eight-channel mixer.
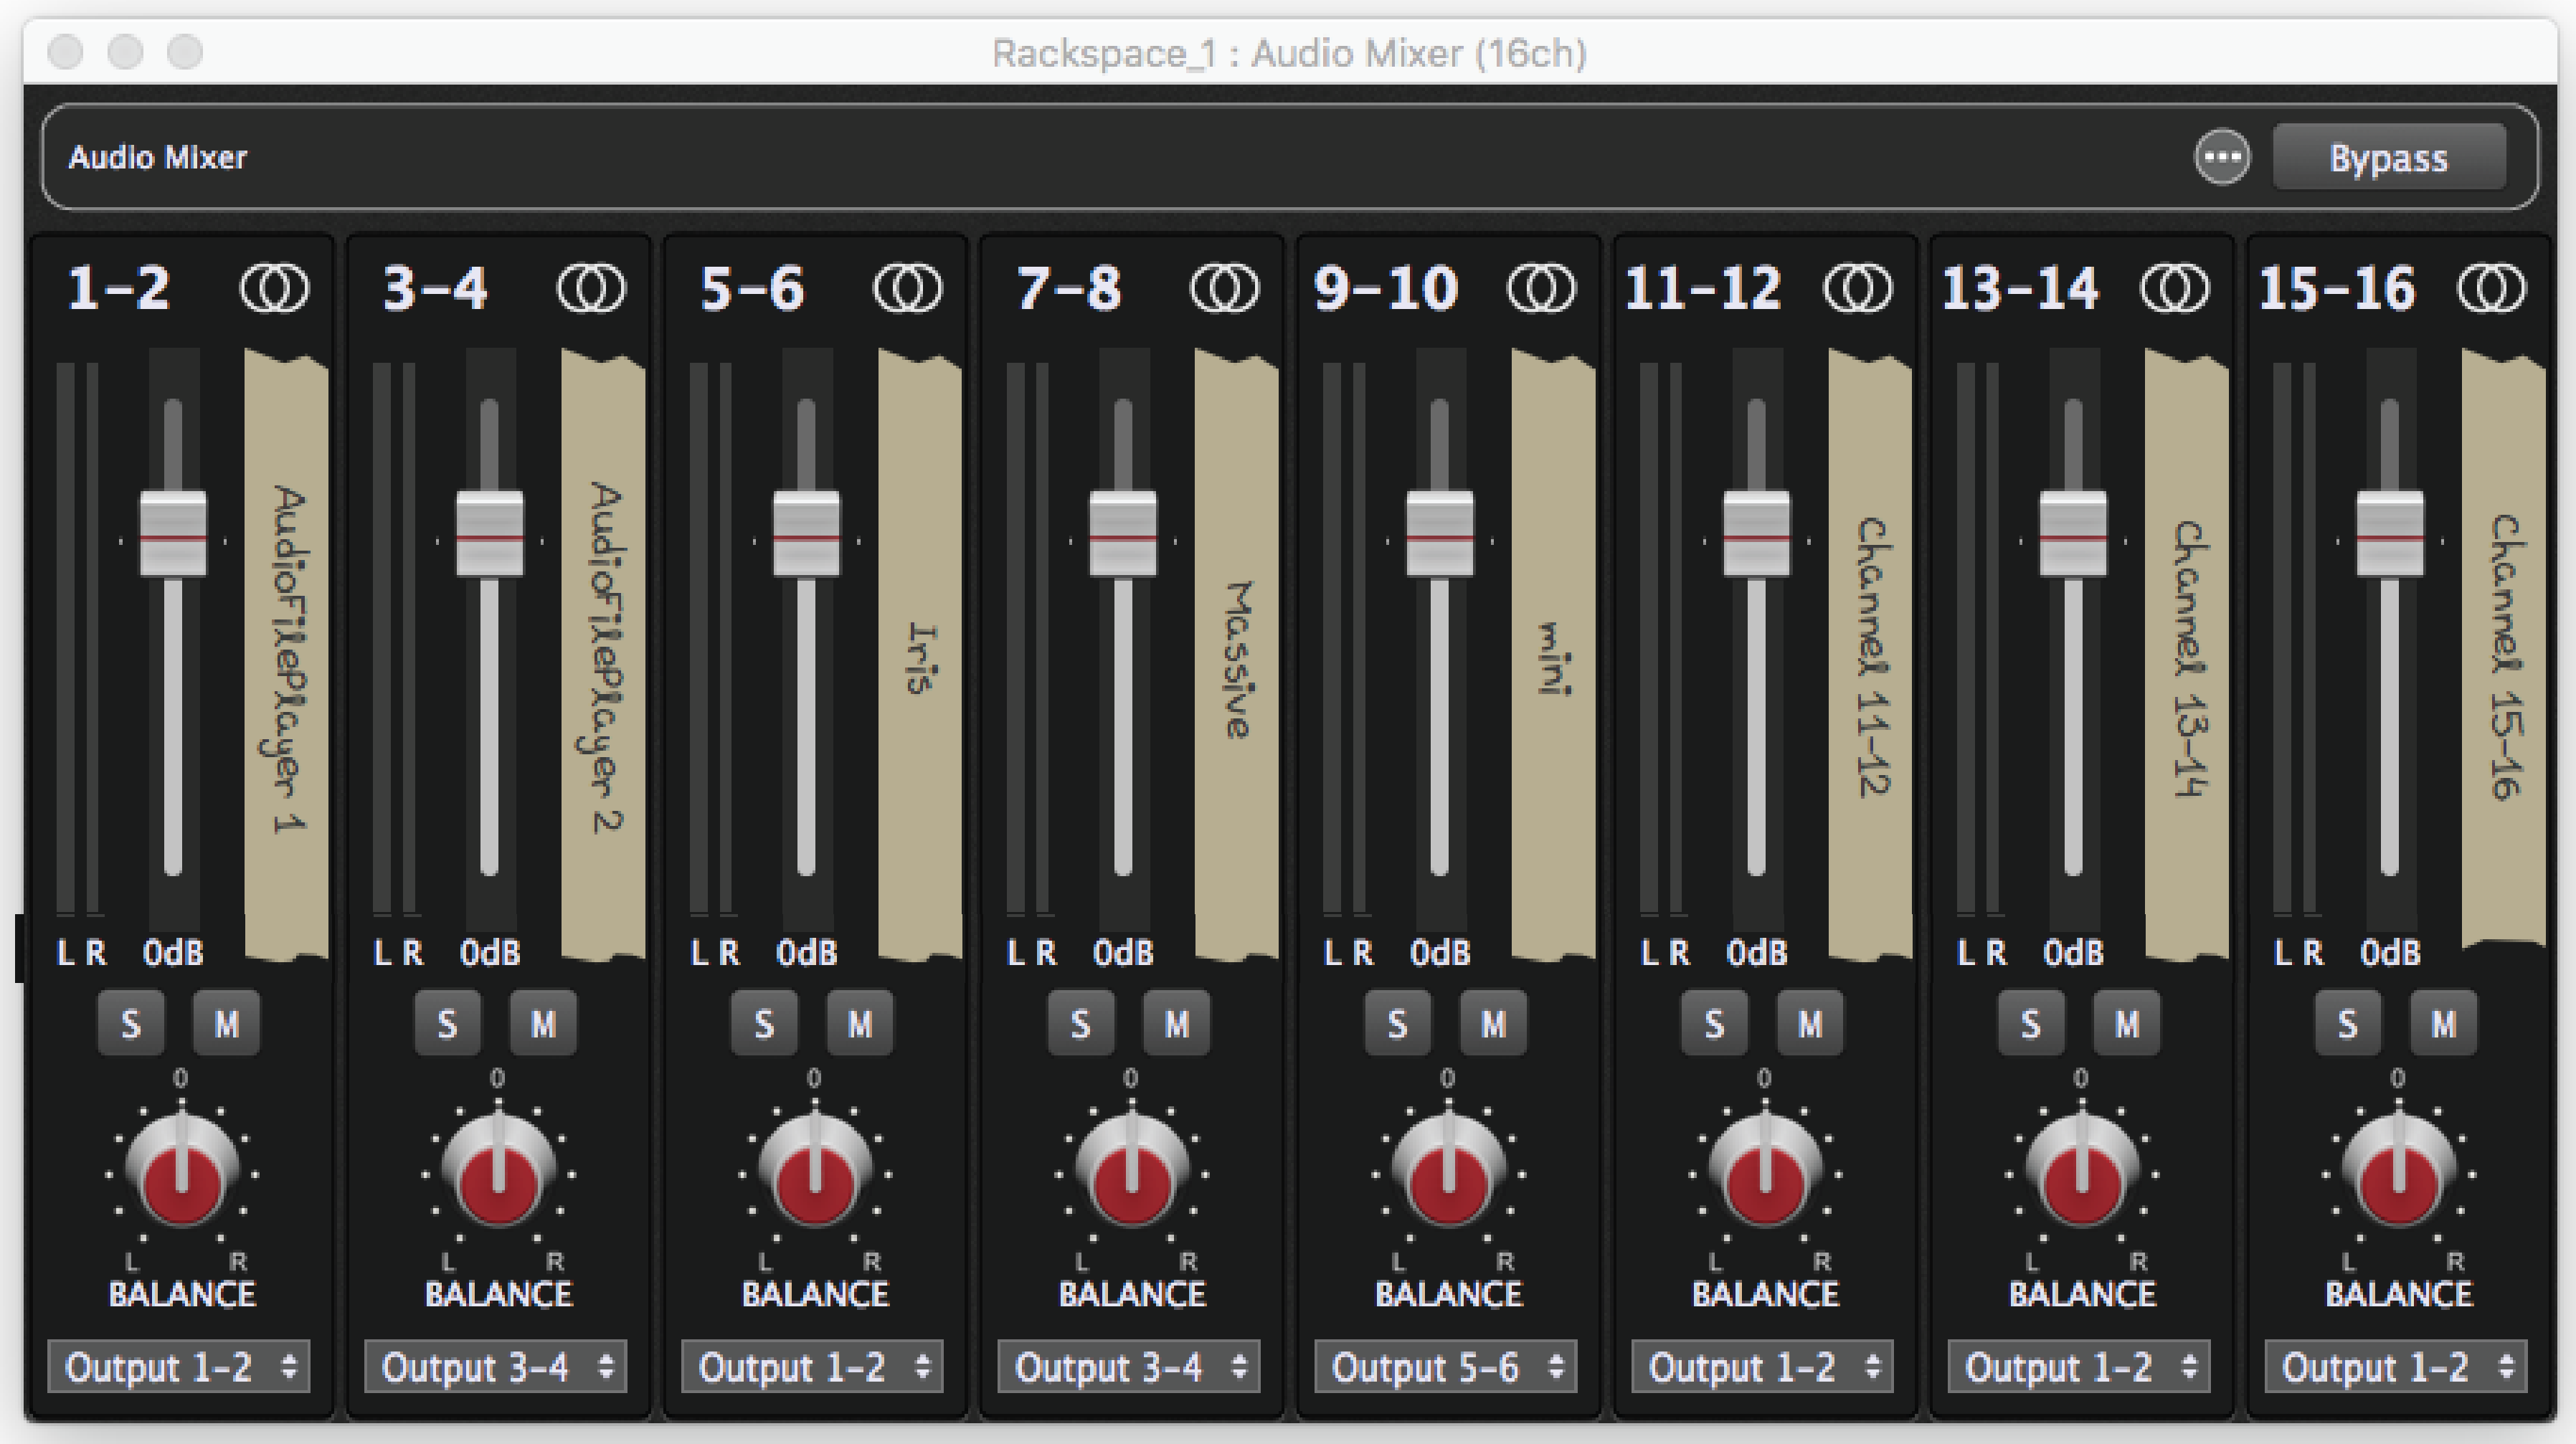
Multiple submixers in one plugin
Since inputs can be independently assigned to outputs, a single 16-channel mixer can be used as if it were a few small submixers in one package.
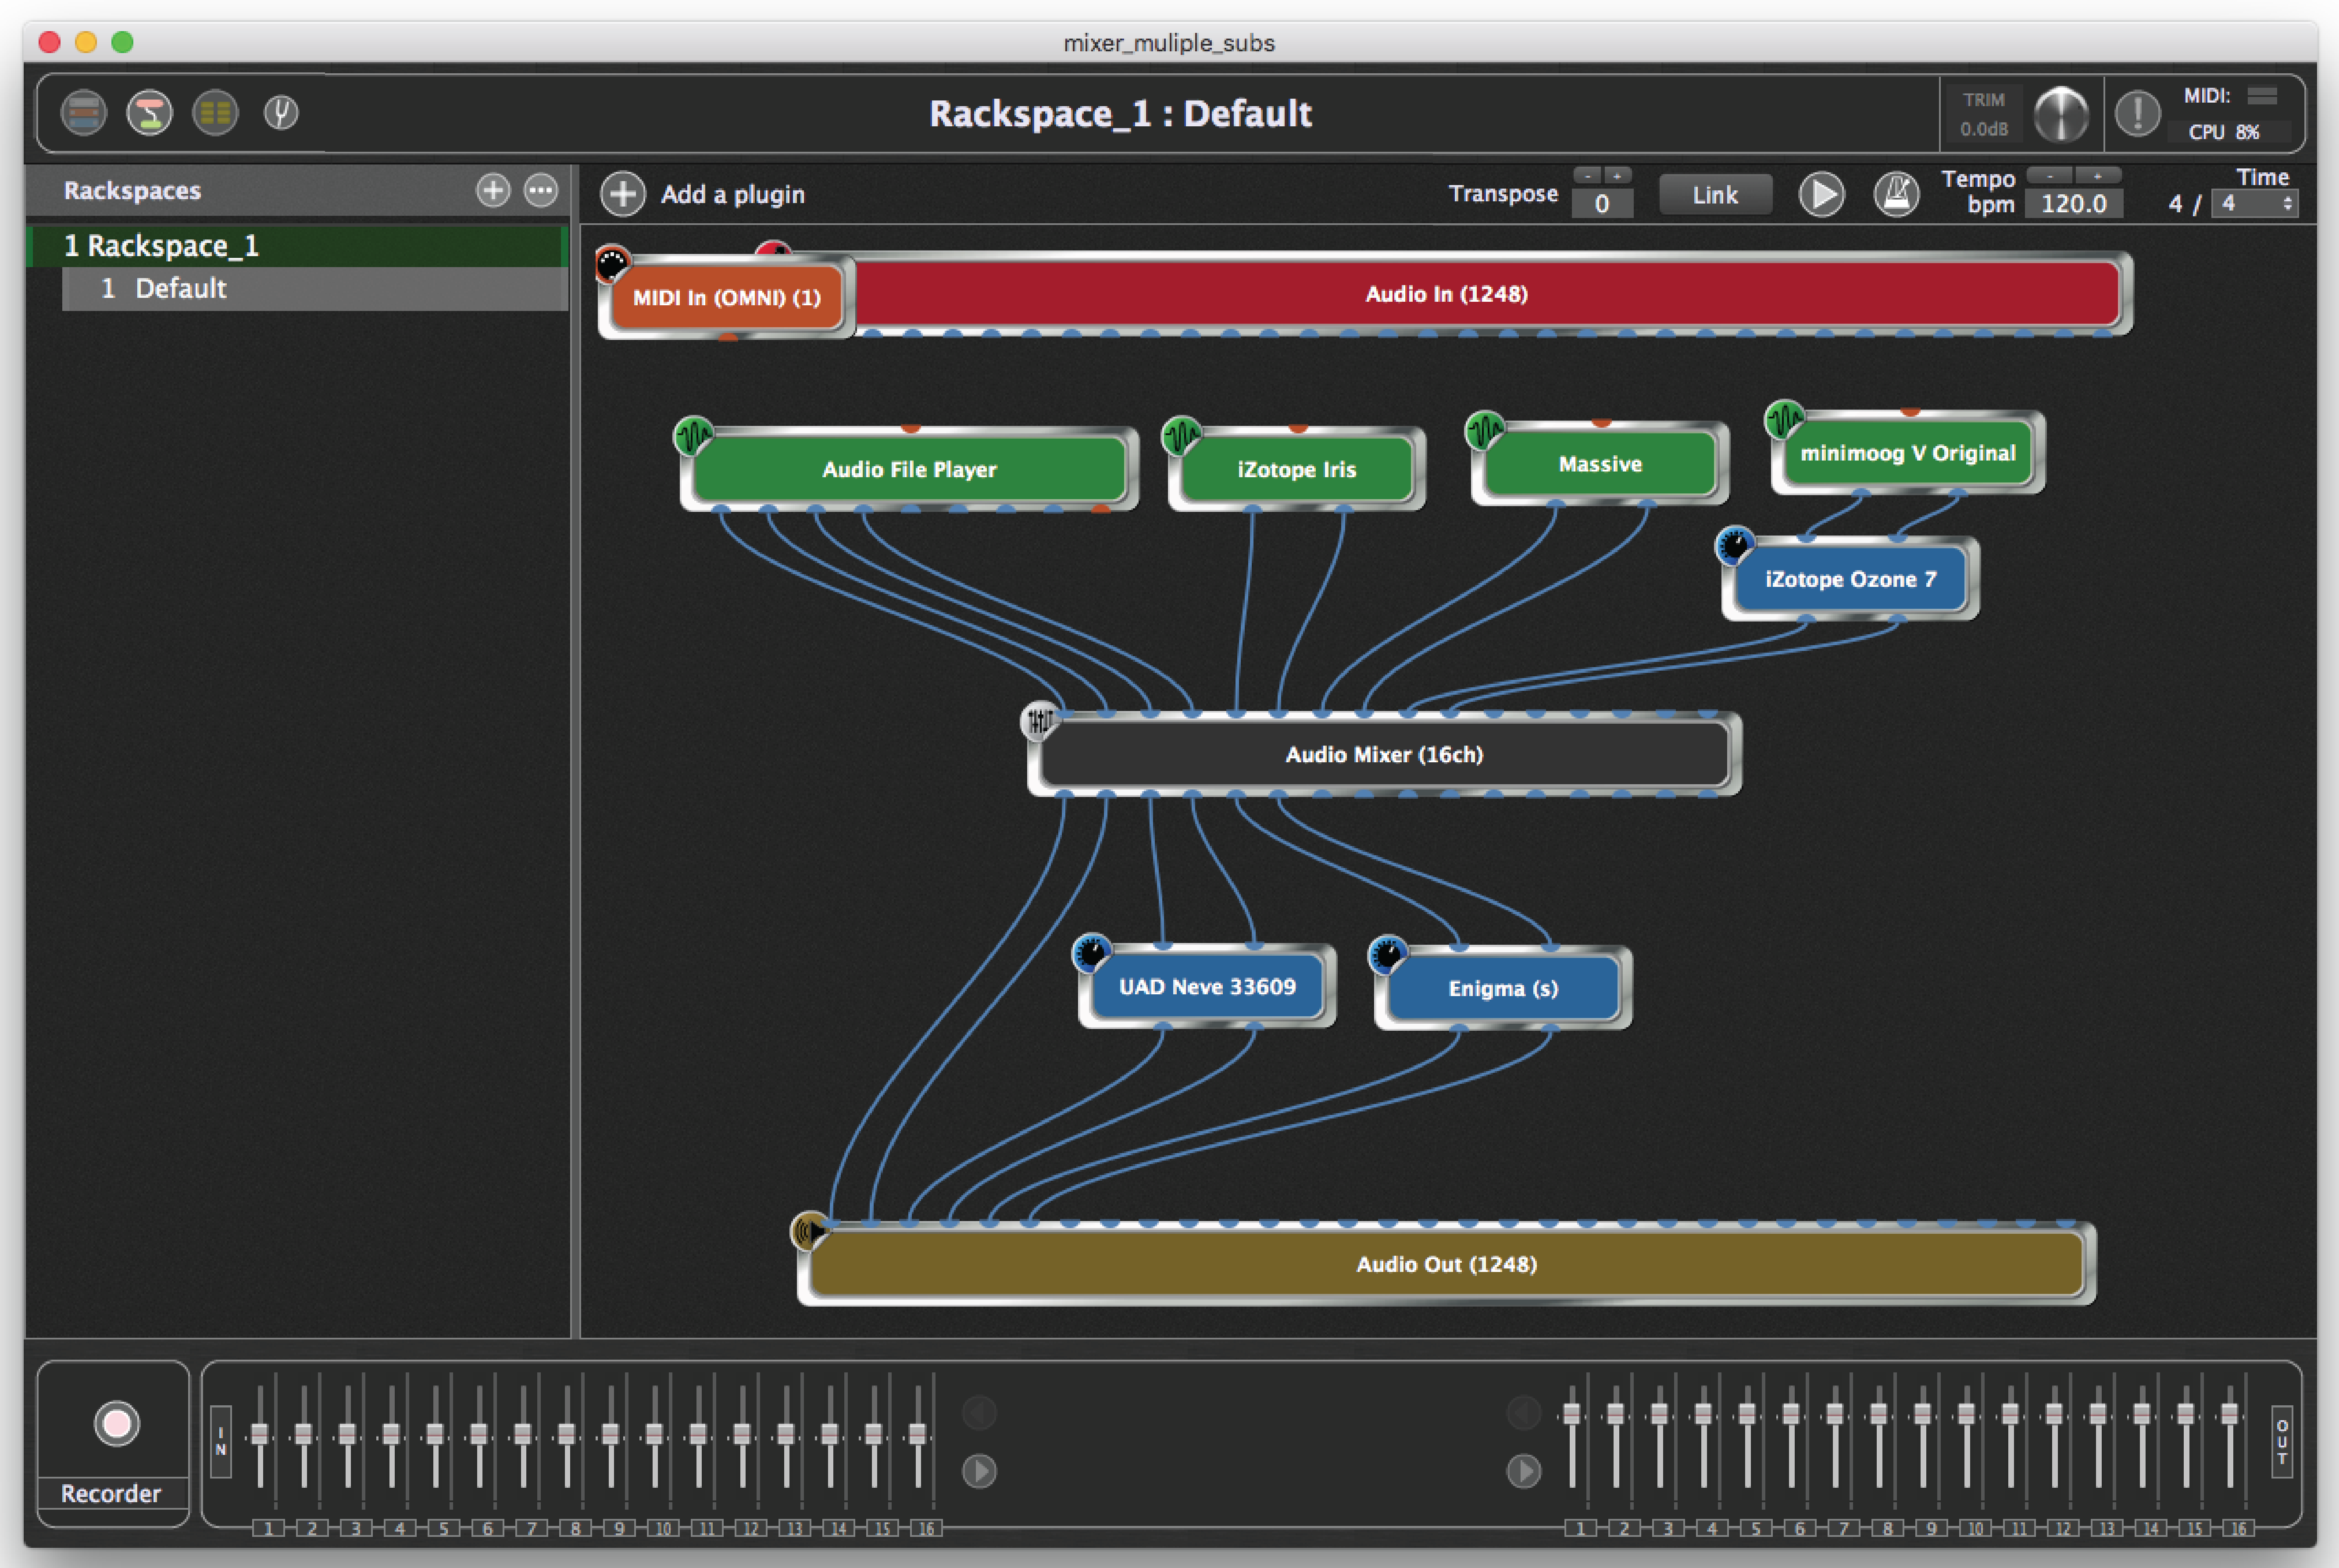
The first and third channel strips, channels 1-2 and 5-6, feed one mix, the second and fourth strips a different mix, and the fifth strip, for the moment, is routed out a third output pair that feeds an effect.
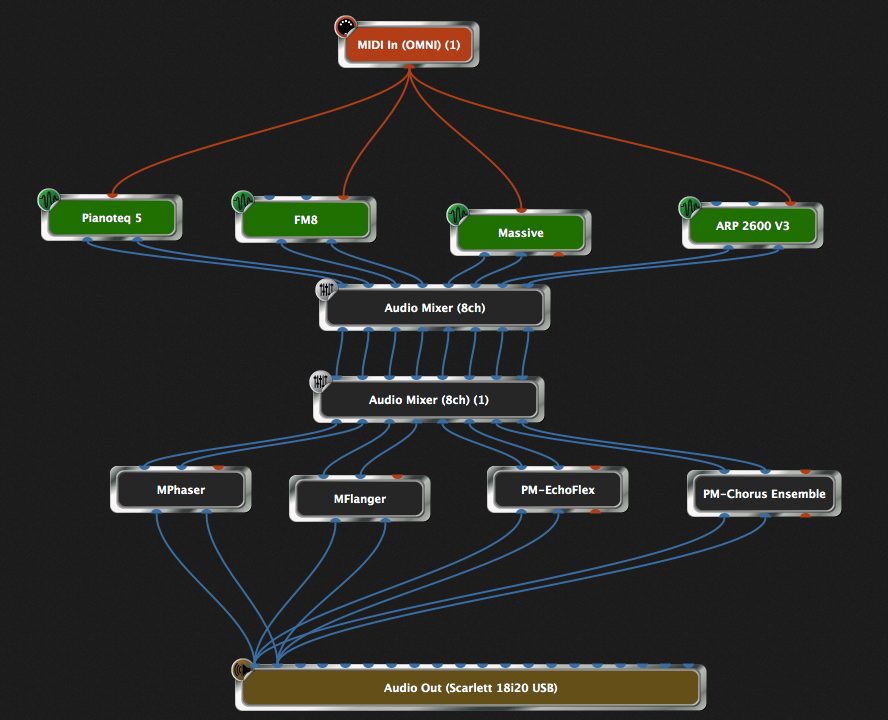
Mixer and Router Together
In this example, we can instantly route combinations of inputs to combinations of outputs so you can route your piano to the phaser and chorus while routing your pads (ARP 2600) to chorus and echo. By using rackspace variations in Gig Performer you can instantly switch among arbitrary combinations, using a controller to switch, if you like.