The Rig Manager is designed to speed workflow by eliminating the need to teach controllers to Gig Performer every time you use a different keyboard or controller setup. Rig Manager constructs a map of physical input devices like keyboards, and the controllers they host, like sliders, buttons, faders, and knobs, to virtual controllers that are linked to widgets. Virtual controllers decouple the physical controller from the control paths in Gig Performer, which makes it easier to swap out different physical controllers while maintaining your usual controls.
Say, for example, you’re sharing backline instruments with another performer and so have to use someone else’s keyboard controller for your performance. Rig Manager’s controller mapping means that you only need to map the new physical controllers to the existing virtual ones and all of your widget controls are reestablished. That can be accomplished in a few minutes around soundcheck. Similarly, if you use one controller for rehearsal and a different one for gigs, Rig Manager can make it much easier to switch between them. If you play multiple identical keyboards, Rig Manager simplifies distinguishing among those.
See the Reference section on the Rig Manager for additional details.
What’s a rig?
In Gig Performer, a “rig” is a collection of three sets of information: a set of physical MIDI controllers, a set of virtual controllers that can be attached to widgets, and a map that relates the two sets, thereby connecting your physical controller, through widgets, to parameter controls.
A MIDI Input Device is a physical controller, which often has multiple knobs, sliders, buttons, or other individual controllers on its surface, while MIDI Controls are the virtual controllers that get mapped to parameters. Once the lists of MIDI Input Devices and MIDI Controls are established, they appear as drop-down menus in fields where they are used, for example, as MIDI sources in plugins.
The following tutorial walks through adding MIDI Input devices and MIDI Controls, and linking them appropriately to let you quickly switch between a rehearsal setup and a performing setup.
1.Press Cmd/Ctrl (Mac/Win) – R or choose the command to open the Rig Manager.
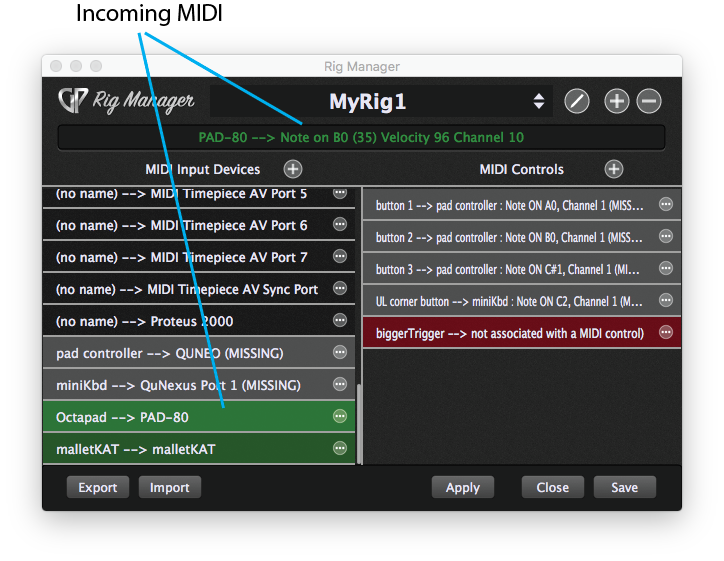
2.The Rig Manager window will open showing a default configuration.
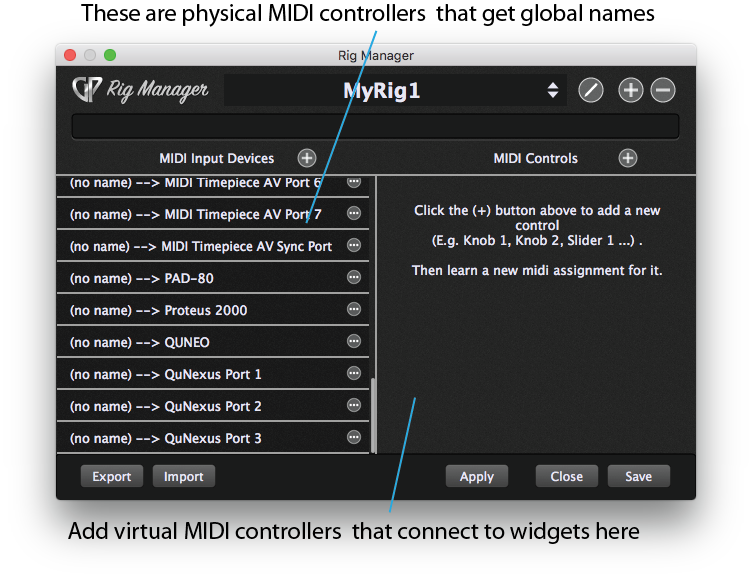
The main area of the window is divided between two columns. On the left are the MIDI Input Devices – physical control devices like keyboards, pad controllers, and control surfaces. In the screenshot above, none of the devices shown have been given global names.
The column on the right is MIDI Controls.
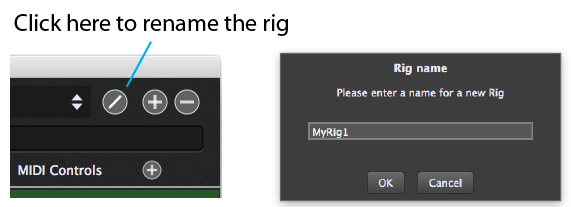
3.Click the Rename Rig button and enter a new name for your rig.
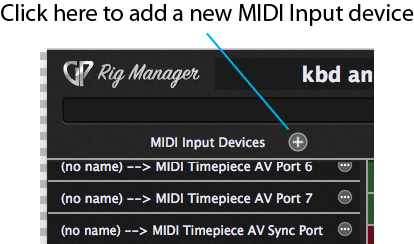
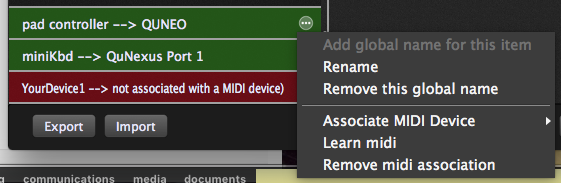
4.Let’s add another input device. Click the plus sign at the top of the MIDI Input Device list. If you needed to remove a device, you just would click the “three dots” button next to the device and choose from the popup menu.
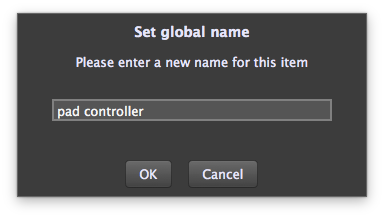
5.In the dialog that appears, give the device a global name. This step is key to using the Rig Manager.
6.The new device name needs to be linked to a physical MIDI controller. Click on the “three dots” button or right-click on the input device and choose a source device from the submenu.
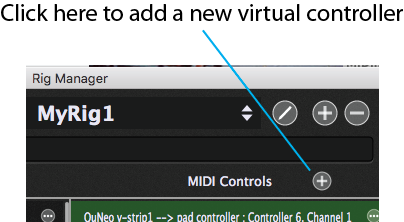
7.Now let’s add a new MIDI control by clicking the plus sign at the top of the MIDI Controls column. In the dialog that appears, name the MIDI control.
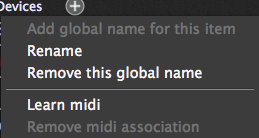
8.Now it remains to map the new virtual controller to a physical controller. Double-click the MIDI control you just created to put the control into Learn mode, or right-click it and choose from the popup menu.
9.Move a knob, fader, or other physical controller and it will be mapped to the virtual controller.
The MIDI Control right-click menu also enables renaming the virtual control or removing it from the rig (by removing its name). Finally, you can disconnect a physical controller from a virtual one with the Remove MIDI association command.
10.Repeat the Learn MIDI process for each parameter you want controlled from your MIDI input device.
By now, Rig Manager should look something like this: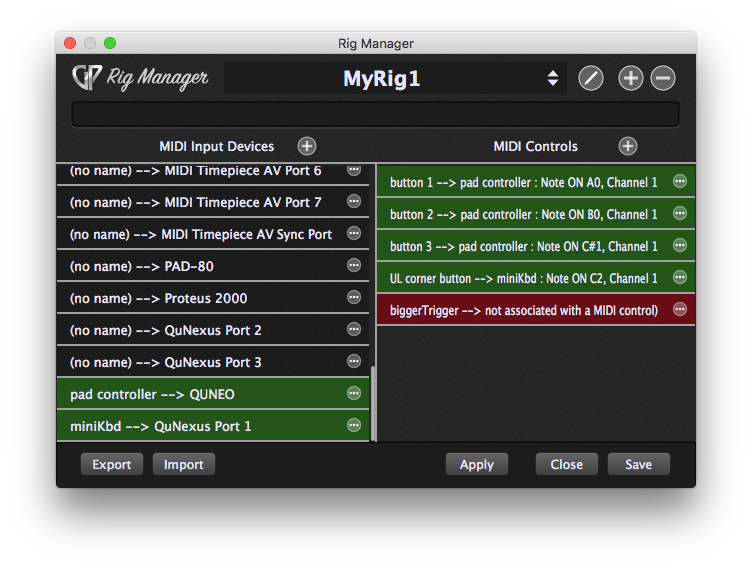
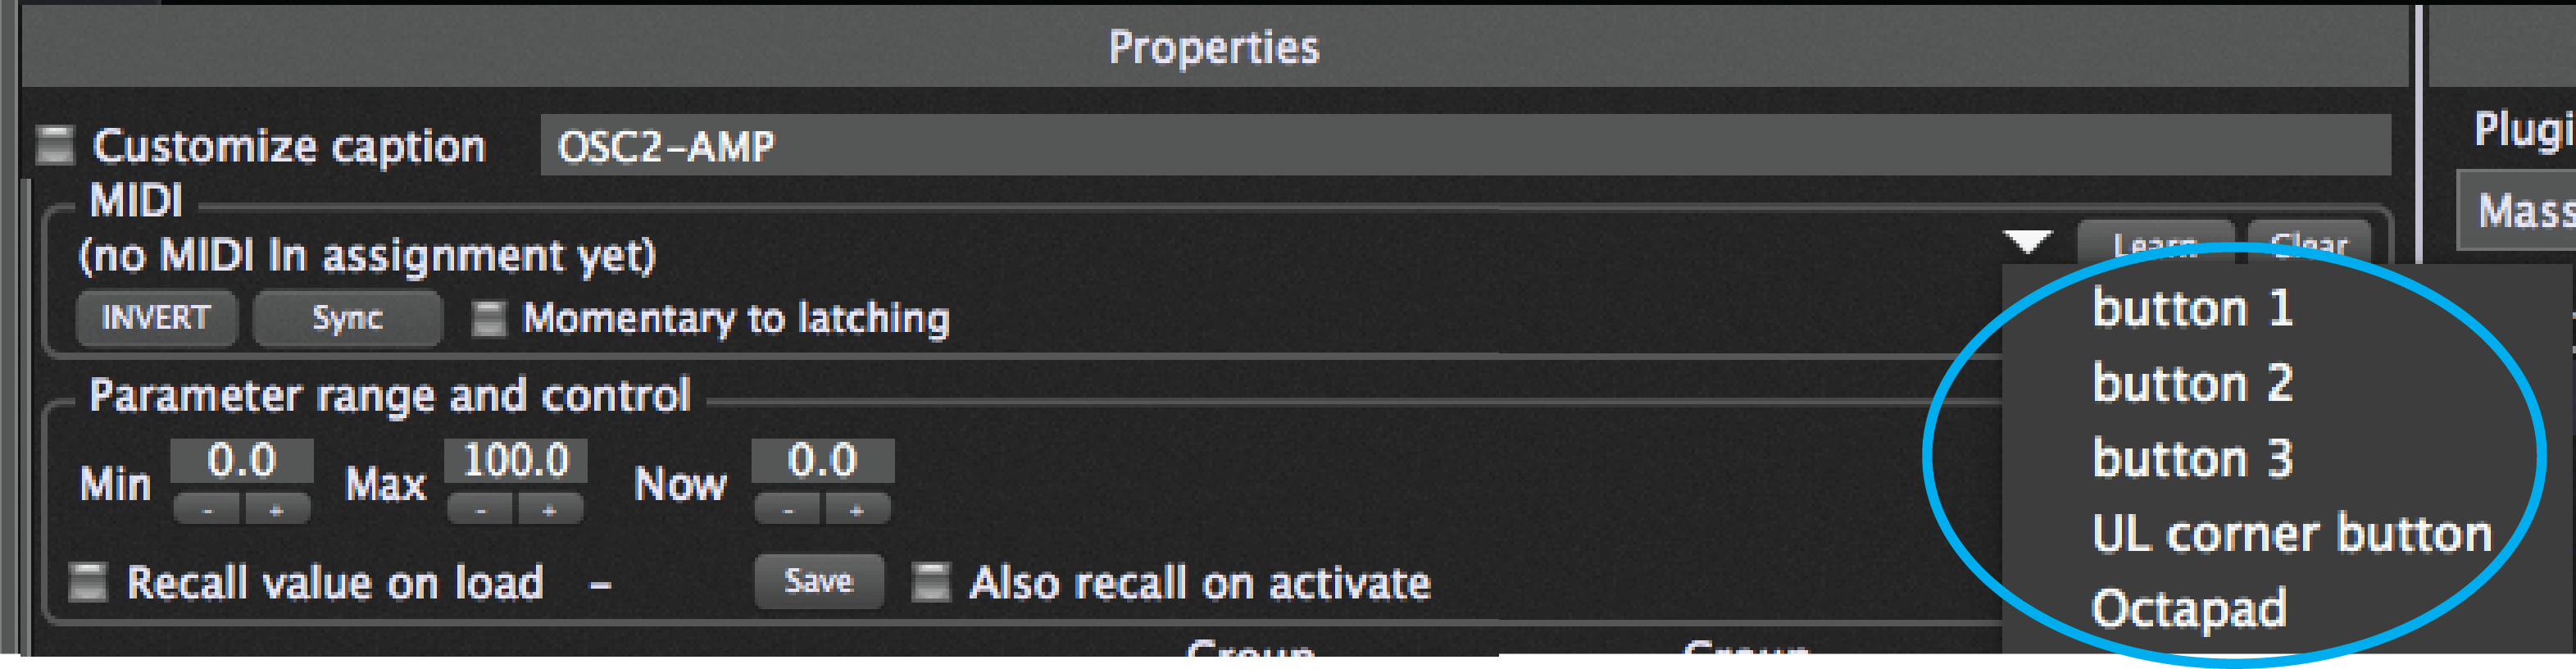
11.Connect the virtual controllers to widgets to control parameters. The MIDI controls that have been named and defined show up as sources, for example, in this list of sources to be mapped to a switch widget.
In the studio, QUNEO and QuNexus are the primary controllers. In performance, however, the controllers are a malletKAT and an old Roland PAD80. We will setup another rig for live performance.
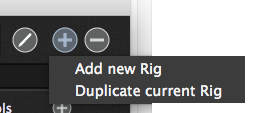
12.Click the large plus button at the top of the window and choose to make a copy of the rig.
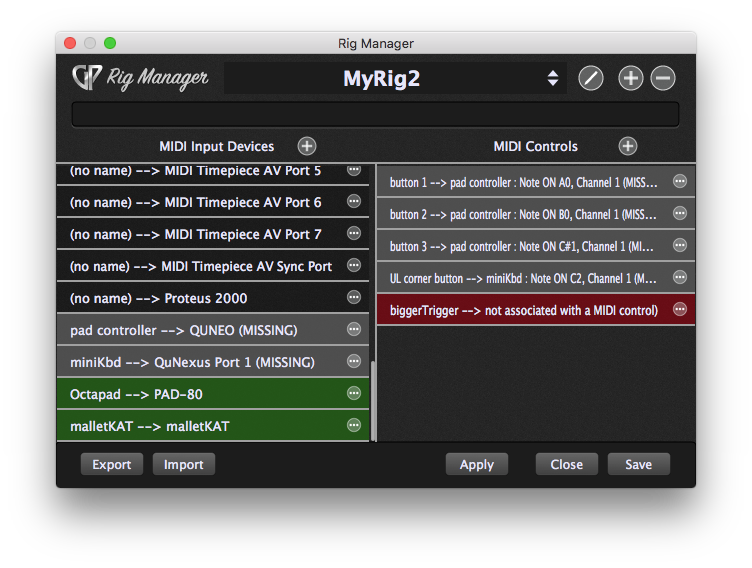
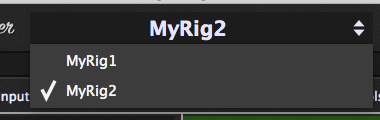
13.Rename the new copy MyRig2
14.Create two new MIDI Input devices and rename them. In this example, they are named “Octapad” and “malletKAT.”
15.Choose for each of the new input devices and play on them to establish the link.
This performance rig now looks like this:
16.Each MIDI Control must be trained once for a new physical controller. Double-click on the name of the MIDI control and then move a knob or other physical control. You can also enter Learn mode for a control by clicking the “three dots” button to the right of a control and choosing.
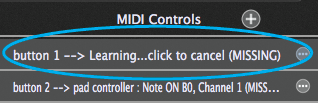
17.When MIDI events from the physical control arrive, the item lights up in the MIDI Input Devices and Controls lists, and the events that came in will be displayed at the top of the window.
18.Repeat the Learn midi process for each controller.
19.Save your work.

20.Switch back and forth between the studio and performance rigs by clicking on the arrowheads and choosing a rig from the dropdown menu.
Note messages
Rig Manager handles remapping switch and continuous controls, which is the hard part of changing to a different controller. The easier part is redirecting the typical stream of note messages from your keyboard, pad controller, or other musical controller. That is handled with MIDI plugins in the Connections view, the other place where a change in controllers must be accommodated.
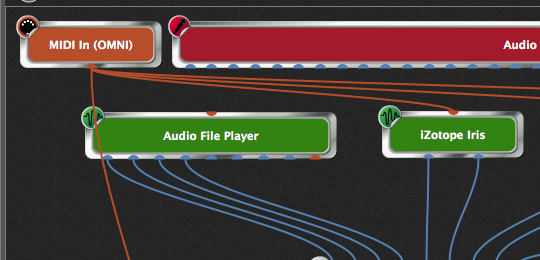
One method is to use the MIDI In (OMNI) plugin. Omni, in this case, means not simply that it responds to messages on any MIDI channel, but also that it “hears” all connected MIDI devices. When you unplug a keyboard at rehearsal and plug a different in for live performance, it makes no difference, since the plugin responds to note messages from any source. If you use MIDI In (OMNI) in your rackspaces, you need worry only about setting up rigs in Rig Manager for each set of controllers you use.
Caution: Be careful if you are using a virtual MIDI port, such as IAC on Mac OS X. Since the MIDI In (OMNI) module receives messages from all MIDI ports, sending a MIDI message out from a virtual MIDI port can create a feedback loop.
Just to be clear, while the Connections view is where note messages for pitch are routed, individual note messages can be assigned to virtual controllers in Rig Manager, so that notes can trigger actions or perform other control functions aside from playing pitches.
An alternative approach is to create a rackspace with one of the controllers, say, the one used at rehearsal, then duplicate it, and modify the MIDI In block to change the MIDI Input source to the performance controller. Now you have rackspaces that are identical except for the controller used.