TIP: Double-clicking an item in a Rig Manager list immediately puts that item into MIDI Learn mode. To map a different controller to your system, just double-click an item, move the control on the new controller, and then move on to the next item.
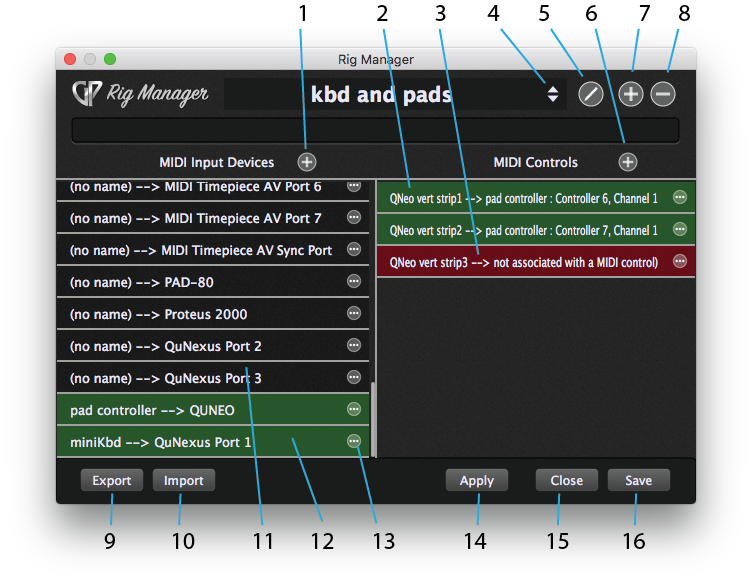
1.Add MIDI Input Device button - Click this to add a physical controller to the MIDI Input Devices list.
2.Assigned MIDI Control – Green background indicates that the indicated virtual controller is mapped to a plugin parameter. On the far left is the name assigned to the virtual controller, for instance “QNeo vert strip1”. The arrow indicates that the virtual controller is mapped to the MIDI Input Device, channel and controller message shown.
3.Unassigned MIDI Control – This virtual controller (“QNeo vert strip3”) was created, so the parameter control is in place, but the red background indicates it has yet to be mapped to a physical controller.
4.Rig list –Clicking this drops down a menu of currently available rigs. Choose one from the list.
5.Rename this rig – Click this to customize the name of a rig.
6.Add a new MIDI Control– Click this to add a named MIDI control to the list. The new control needs to be assigned to a physical controller to be used.
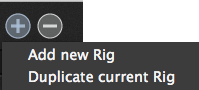
7.Add a new rig– Click this button to duplicate the rig or add a new one.
8.Remove this rig – Click this button to remove the current rig. A confirmation dialog offers you the chance to cancel, if you change your mind.
9.Export Rig button – Click this to save the state of the rig to a new file that can be moved to a new computer and then imported.
10.Import Rig button – Click this to load an existing rig file.
11.Unnamed MIDI Input Device – Gig Performer recognizes the control device, but no global name has been defined for it yet.
12.Named MIDI Input Device – This device has been given a global name by clicking on the Options button and choosing .
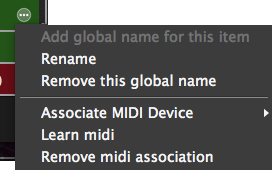
13.Options button – Clicking this button pops up the MIDI Input Options menu.
14.Apply button – Click this to apply changes you have made.
15.Close button – Click this to close the Rig Manager view.
16.Save button – Click this to save the state of the rig to the current rig file. Use this when you will be opening the saved file on the same computer it was created on.
TIP: Each entry in the Rig Manager’s MIDI Input Devices list will be recorded to a separate track by the MIDI Recorder when it is used.
MIDI Input Options menu
The MIDI Input Options menu pops up when the Options button is clicked for a MIDI input device in the list.
Steps to Make a Rig
See Using Rig Manager for a full tutorial. Here are the basic steps to using Rig Manager:
1Create one or more MIDI input devices and give them global names.
2Create one or more MIDI controls and give them global names.
3Link the MIDI controls to physical controllers on the MIDI input device.
4In the Widget Editor, choose a global MIDI control to link to the widget.
5When all controls have been mapped, save your rig.
6Duplicate and modify the rig or build a new one for a different use, for instance, performing versus rehearsing. Name the second rig.
7Switch between rigs as needed to accommodate different MIDI input devices.