In this section you will learn more about useful tips that may help you to get things done quicker.
Entering values
You can easily set values in various fields by clicking on the field and moving the mouse up or down:
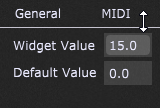
Additionally, if you also hold the Shift key, values are increased or decreased by 0.1. Note that the dragging speed is also taken into account; moving your mouse faster will make greater changes in values.
By default, clicking on the field opens a mini pad for entering values:
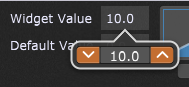
Click on up/down arrows to change value by 1, hold the Shift key to change value by 0.1, or simply type in the desired value.
Turning on the Touch-friendly number editing toggle button in Display Options shows a larger keypad instead of the mini pad:

Use this option if you run Gig Performer on a touchscreen device such as a Microsoft Surface tablet.
Note: you can also directly enter values using MIDI numbers, by adding the letter "m" at the end of the value. For example, if you type in "64m", Gig Performer will interpret it as an exact value of 50.39 (roughly 50% of the maximum MIDI value of 127).
Temporary Startup Options
Hold the Shift key down while Gig Performer is starting and it will open the Temporary Startup Options dialog:
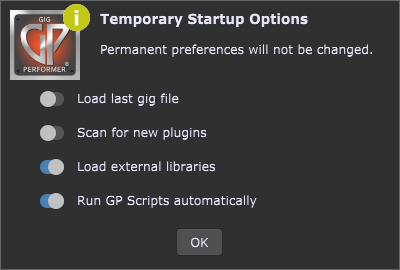
This is a one-time menu, and permanent options and preferences will not be changed. For example, Gig Performer will not load the previous gig file, even if you have the toggle button "Reload the last gig startup" turned on in the General Options window. Visit this blog article to learn more.
Dragging rackspaces and songs
Holding the Shift key while dragging rackspaces (or songs in the Setlists view) prevents the dragged rackspace/song from being activated (this can be very useful for adjusting your setlist order when Predictive Loading is enabled).
Quick stereo connection
To make a quick stereo connection, you can either hold the Shift key down and drag a wire from an output port of one plugin to the input port of another plugin or hold the Shift key down while dragging a plugin until its output pins touch the input pins of another plugin, then release (unclick) the mouse. If there is already a connection, this operation will cause it to be removed instead.
Fine control
Hold down the Cmd (Mac OS X) or Ctrl (Windows) key for fine control while adjusting a widget.
MIDI In plugin channel toggling
In the MIDI In plugin editors, if you hold the Shift key down while enabling or disabling individual MIDI channels by clicking on their respective check boxes, the other check boxes will be set to their opposite states. This is a convenient way to quickly enable a single channel while blocking all others.
Global MIDI options and Setlist options learn buttons
Holding the Shift key while clicking on the Learn MIDI for selected item buttons in Global MIDI Options and Setlist Options dialog clears the MIDI assignment.
Quickly assign multiple widgets to a group
To quickly assign two or more selected widgets to a widget group "N", select all widgets and press the keyboard key N while holding the Alt key (or Option on Mac).
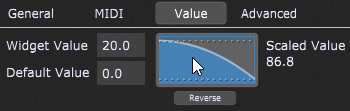
Copy and paste curves
If you hold the Shift key down while clicking on the scaling curve (of a widget, Probabilistic Sound Designer, or velocity curves in MIDI In blocks), the curve settings will be copied to the clipboard:
If you then hold down Shift + Ctrl (or Shift + Cmd on Mac) and click on another curve, the previously copied settings will replace settings of that curve:

Pasting Global widgets
You can already copy widgets from the Global rackspace and then paste them into a local rackspace using the Copy and Paste menu options. However, if a global widget is mapped to a parameter in the plugin in the Global rackspace, then if you hold down the Shift key while performing the paste into a local rackspace, (e.g. right mouse click on a panel → Paste or click on the Edit menu → Paste), the pasted widget will be automatically mapped to the actual parameter values of the widgets in the Global rackspace. If it doesn’t already exist, this action will automatically insert a "To Global Rackspace" plugin into the local rackspace.
Widget actions menu
If you click on a widget while holding the Shift key in the Panels view, the Widget actions menu will appear; check the Widget contextual menu chapter to learn more.
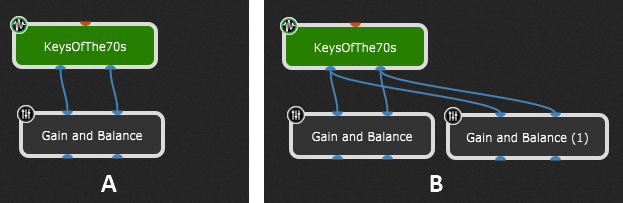
Duplicate a plugin with inputs
If you right click on a plugin while holding the Shift key in the Wiring view, you'll notice the Duplicate with inputs menu item. Clicking on this menu item will preserve connections with the plugin inputs. For example, if you duplicate with inputs the Gain and Balance plugin block in (A), then the duplicate will preserve the connections, as indicated with (B):
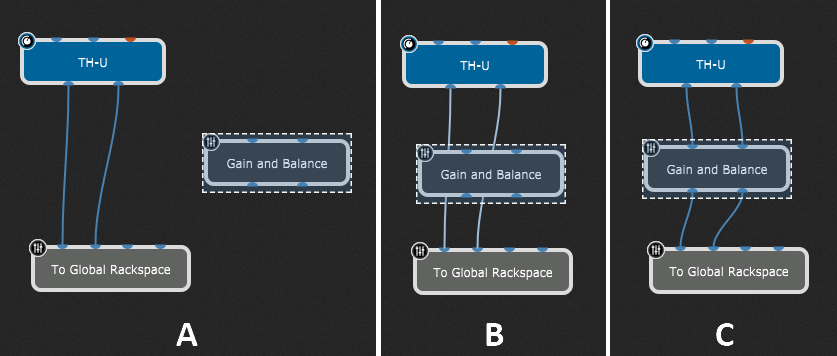
Insert a plugin block into audio or MIDI path
Plugin blocks can be inserted into an Audio/MIDI path automatically by holding down the Shift key while dragging the block over the connection wires. Simply hold Shift and click on the desired plugin block (A), then drag it onto connection wires until they light up (B), and then release the click (C).
Hold Shift and drag an already inserted block to remove that block from the path.