The scaling component was mentioned in the Widget Properties inspector chapter and also other basic terms i.e. the widget value and the scaled value. On the screenshot below you can see how these values are represented on the Blue Knob widget:
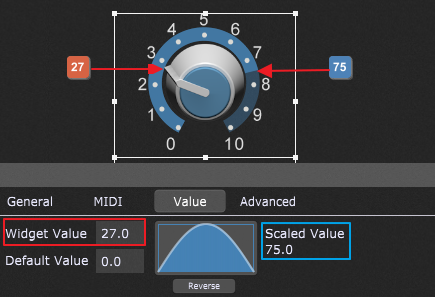
Here it is important to not confuse the widget value with the scaled value. The widget value is used as the input to the scale component and it is not sent to the plugin parameter. The scaled value is the output from the scale component and this is the value that is sent to the plugin parameter.
Clicking on the scale component brings up the following window:
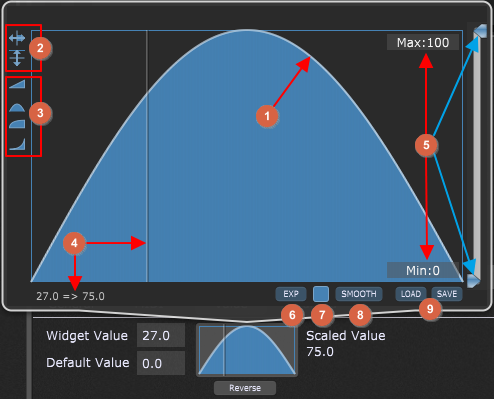
1.Curve - the scaling curve is used to transform the widget values to scaled values. To define a curve:
a.select one of the supplied basic shapes (3) (you can also reverse or invert them),
b.click and hold a mouse to draw a custom shape (like in (8)),
c.use the Curve Designer (6).
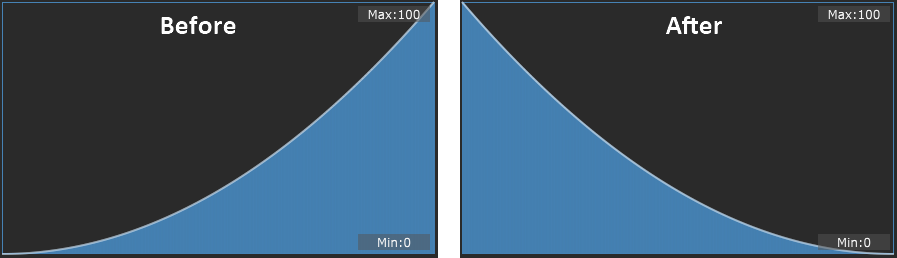
2.Reverse and Invert buttons - click on the Reverse button to reverse the curve (invert it horizontally), for example:
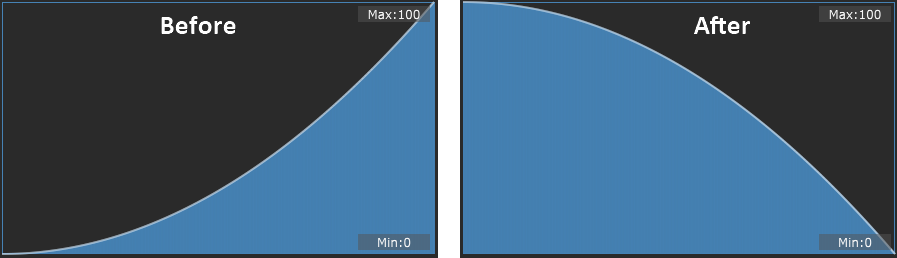
Click on the Invert button to invert the curve vertically, for example:
3.Basic curve shapes - the provided shapes are linear, sine, Log, and X2:
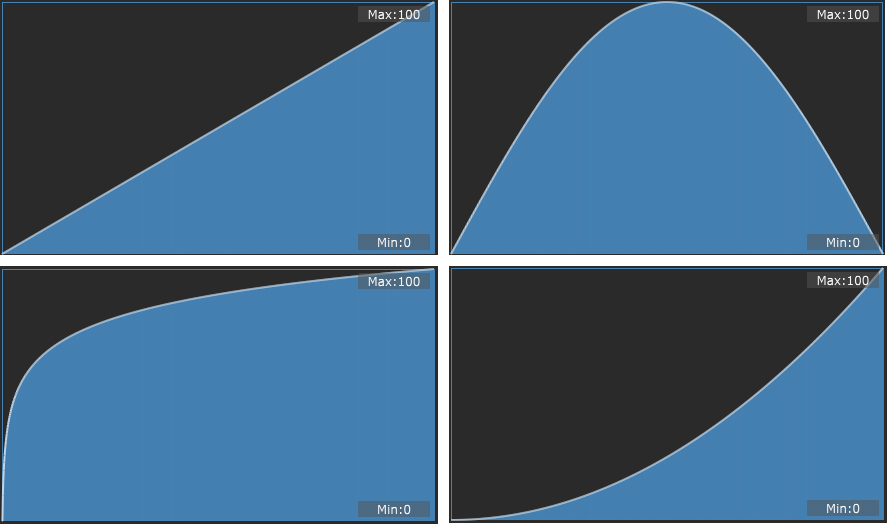
Simply click on the desired shape to apply it.
4.Indicator and values - if you hover with your mouse over the curve, a vertical indicator will appear and the corresponding value will be displayed: Widget Value => Scaled Value (e.g. 27 => 75, as shown in the screenshot). The shape of the curve defines what value will be output for any particular widget value. The vertical indicator lets you easily see what values will be used.
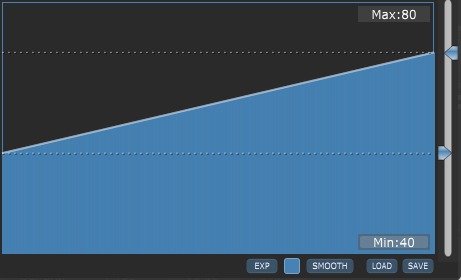
5.Max and Min fields - you can set a maximum and a minimum value for your curve by entering the desired values in the Max and Min fields or by adjusting the sliders (indicated with the blue arrows). Besides knobs, defining Min and Max values is also useful for the momentary widgets, i.e. buttons or switches. Although their widget value can be only 0 or 1, you don't necessarily want the "on" to always set the plugin parameter to 1.0. For example, you might want the button to cause the plugin parameter to toggle between 0.4 and 0.8 (you can define a min and max volume between which you could toggle):
You can also directly enter values using MIDI numbers in the Min and Max fields, by adding the letter "m" to the end of the value. For example, if you type in "64m", Gig Performer will interpret it as an exact value of 50.39 (roughly 50% of the maximum MIDI value of 127).
Note: holding the Alt key (or the Option key on Mac) while moving min or max sliders allows you to fine change the values. Holding the Shift key while moving min or max sliders allows you to move both of sliders at the same time.
6.Curve Designer - clicking on the EXP button opens the Curve Designer:
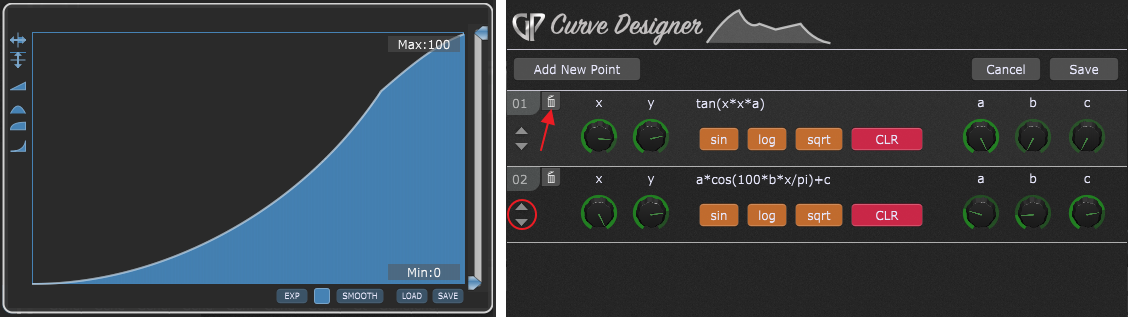
Type in the desired function or click on the one of the provided buttons (sin, log, or sqrt) to insert a supplied function. You can also use other functions, such as cos, tan or cot (as shown in the screenshot above). Move the provided knobs (x, y, a, b, or c) to adjust your curve. If you want to create a curve with multiple points, simply click on the Add New Point button and enter the desired function. Click on the Trash can button (indicated with the red arrow) to remove the point. Click on the up/down arrows (indicated with the red circle) to move the point up or down. When you finish with adjusting the curve, click on the Save button.
7.Color selector - click on this button to choose the desired color for the scale curve:

8.Smooth button - clicking on this button smooths the curve a little bit:
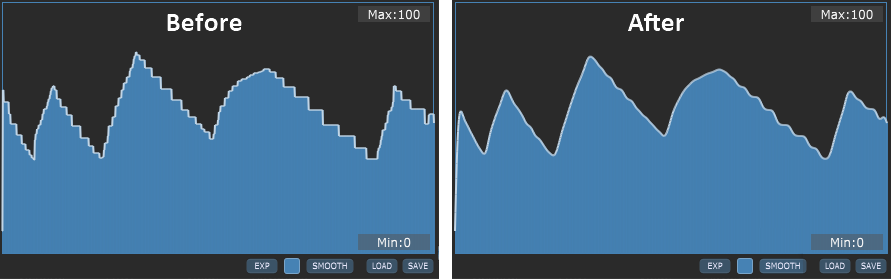
You can click multiple times to continue smoothing the curve.
9.Load and save buttons - clicking on these buttons allows you to load a previously saved gpscale file or to save scale values to a gpscale file. This file can be also used in the scaling component found in the MIDI In block or the Probabilistic Sound Designer.
Tip: holding the Alt key (or the Option key on Mac) while creating a curve with your mouse constrains the horizontal position thereby producing a flat horizontal line as you move the mouse.