Easy combining, inserting and tweaking your plugins is essential for any serious musician. In Gig Performer, plugins are connected easily using virtual wires. First, make sure that Gig Performer successfully scanned and listed your installed plugins like already advised in the Inserting and Wiring your plugins chapter.
Let's get started! Create a new empty gig and enter the Wiring view by clicking on the Wiring button:
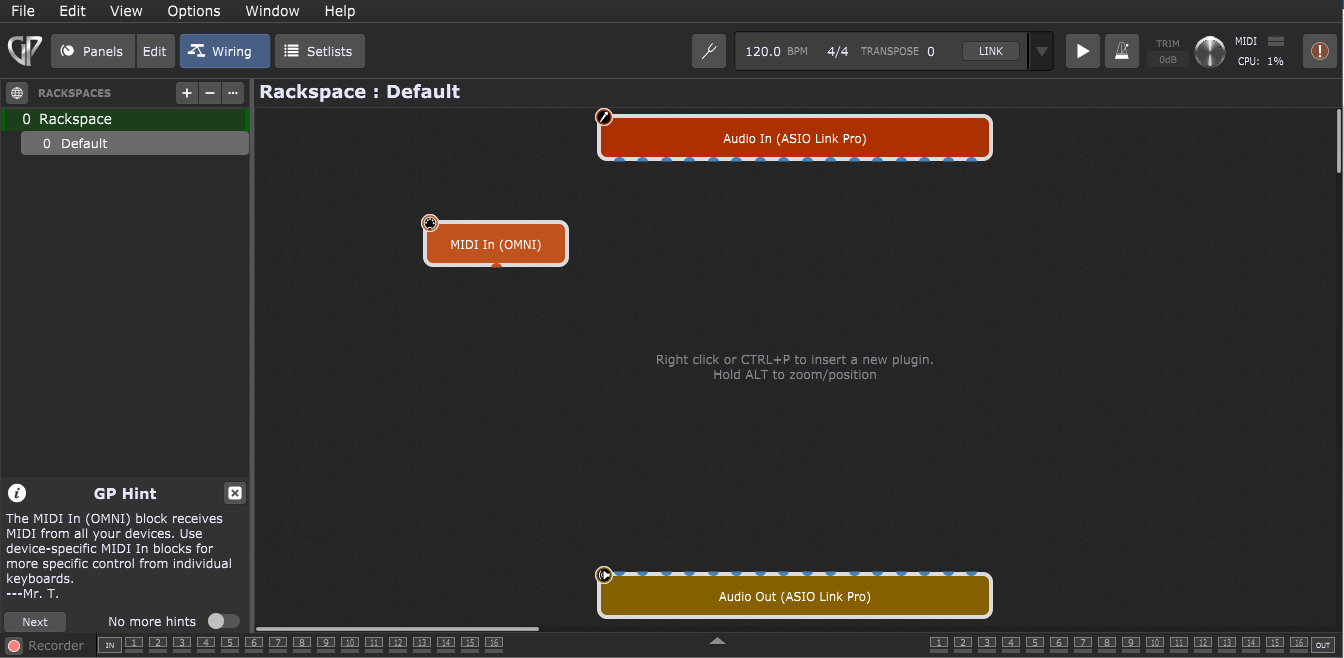
Various elements in this screenshot are explained in detail in the Wiring view chapter. Note: your screen may look slightly different from the one shown above, since the audio input and output blocks will reflect the name of your connected audio interface as well as the number of inputs and outputs it provides.
Right click (or two-finger tap if you are using a trackpad) on the empty surface to bring up the contextual menu and select the desired plugin under the Installed plugins section, e.g. a reverb plugin:
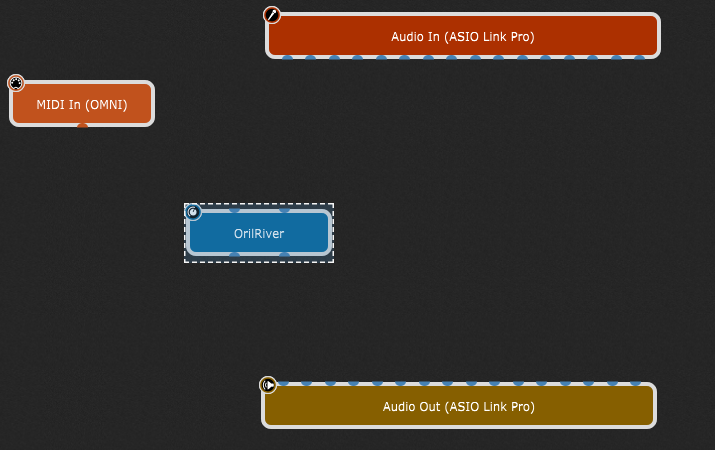
Alternatively, use the keyboard shortcut Ctrl+P (or Cmd+P on Mac) to open the Quick plugin finder window that allows you to search for a particular plugin by part or all of its name and insert it.
As soon as you insert the desired plugin block (or double-click on it), Gig Performer by default opens the editor window for that plugin, allowing you to edit its parameters immediately (note: you can turn off this default behavior in the Display Options). Make the desired adjustments or perhaps select a preset and then close the window.
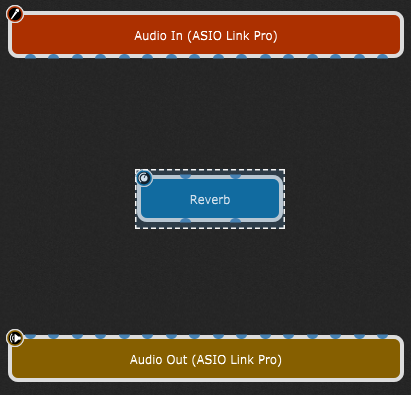
Afterward, simply click on the desired plugin block and drag it to change its position on the design surface. By default, the name of the plugin is displayed, but you can easily rename it with something that represents the actual sound - very useful for distinguishing among multiple copies of the same plugin. Accordingly, right-click on the newly inserted plugin block and select the Rename... option, then type in the name i.e. "Reverb":
To be able to hear the resulting sound, we need to provide an audio source. If you are a guitarist or vocalist, you might connect an Audio In pin directly to the Reverb input pin and a Reverb output pin to the Audio Out block. If you are a keyboard player using a synth plugin, see the next section. To make these connections, simply click on an output pin and, while holding down the mouse button (or keeping your finger on the trackpad), drag the cursor over the desired input pin and then release the mouse button (click here for a shortcut method of making stereo connections):
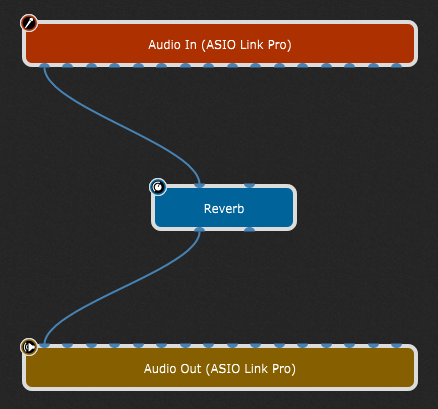
Note: make sure that you connected the right Audio In pin, as your audio interface has multiple audio inputs where sources i.e. microphones, instruments connected via DI (such as electric guitars), or other line-level sources can be connected.
Notice that there are blue and orange plugin pins and connections; click here to find out more.
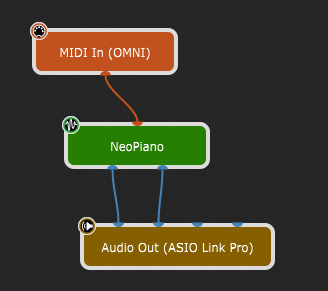
If you are using a MIDI keyboard or a MIDI controller, you can use it immediately thanks to the MIDI In (OMNI) block which is available by default when you create a new empty gig (see the first screenshot). This block receives MIDI messages coming from any MIDI Input device on your system.
Note that you cannot hear the resulting sound immediately, since this block needs to be connected to the a sound generating block first, and then to the Audio Out block:
At this point, if you play a few notes on your controller (assuming your audio system is turned up), you should be hearing a sound coming from your connected audio interface.
While the OMNI version of the MIDI In block is convenient when just getting started, if you have more than one keyboard or multiple surfaces, we recommend that you use MIDI In blocks specifically associated with those devices rather than the generic OMNI block as this will give you more control over your MIDI signal flow.
To receive MIDI messages from a specific MIDI device, simply right click on the MIDI In (OMNI) block, then expand Replace Plugin and from the MIDI Inputs list select the desired MIDI device. All connected MIDI devices are listed in this menu. Alternatively, select the MIDI In (OMNI) block and press the Delete key (or the Backspace key) to remove the MIDI In (OMNI) block; afterward, open the contextual menu, insert the desired MIDI device from the MIDI Inputs list and connect its output pin to the orange input pin of your sound-generating plugin:

Note: if you previously created an alias for your MIDI device in the Rig Manager, it will show up in the parenthesis (otherwise, the name of the selected MIDI device will be displayed).
In addition to passing MIDI messages generated by your connected MIDI controller, MIDI In plugins provide a virtual keyboard, so you can play your plugins even if you are not using an external MIDI controller. To do so, double-click on the MIDI In block to open its editor, then play the sound by clicking notes on the virtual keyboard.
To remove (disconnect) a connection, right-click on it and select "Remove this connection" or simply click and drag the connection until it detaches from a plugin and then let go.
To remove all connections from a plugin block, right-click on the block and select "Disconnect" (note: removing a plugin block also removes all its connections; right-click on it and select "Remove" or press either the Delete or Backspace key).
Improvements to the Wiring view such as zooming, scrolling, multi-selection, zoom to fit, etc. are useful while creating your plugin layout. Learn more about these improvements here.
Tip: to learn how to easily insert a plugin block into audio or MIDI path, check the Additional tips chapter.