Gig Performer allows you to quickly and easily organize all of your rackspaces and variations to meet the needs of your performances, by letting you build setlists of your songs. Each song consists of song parts, such as verses, choruses, bridges, interludes, and so forth. A song part is basically a rackspace variation that is called when the part is selected, though there are other song part settings, as well.

Once you have created a number of songs, a setlist can be assembled by dragging songs into it from the song list. The order of songs in the setlist can be changed at any time. Setlists can be duplicated and modified, for gigs that vary only slightly from a usual song order, or a custom setlist can be created for a specific gig.
Gig Performer supports the ChordPro lead sheet file format with both an editor/viewer to enable creating, editing, and viewing ChordPro documents, and the ability to attach a ChordPro document to a song, so that selecting the song opens the ChordPro document to put the chords and lyrics right in front of you.
Of course, there are numerous other options and features that make Gig Performer setlists an extremely powerful and flexible way to navigate your rig through a performance.
For more details, see Setlist/Songs View.
Let’s walk through building and using a setlist.
Since we have already described how to create rackspaces and variations, we will assume for this tutorial that you have already created all of the rackspaces and variations you will need. Of course, if that is not so, you can always pause while making a setlist, create any additional rackspaces and variations you still need, then resume your setlist process.
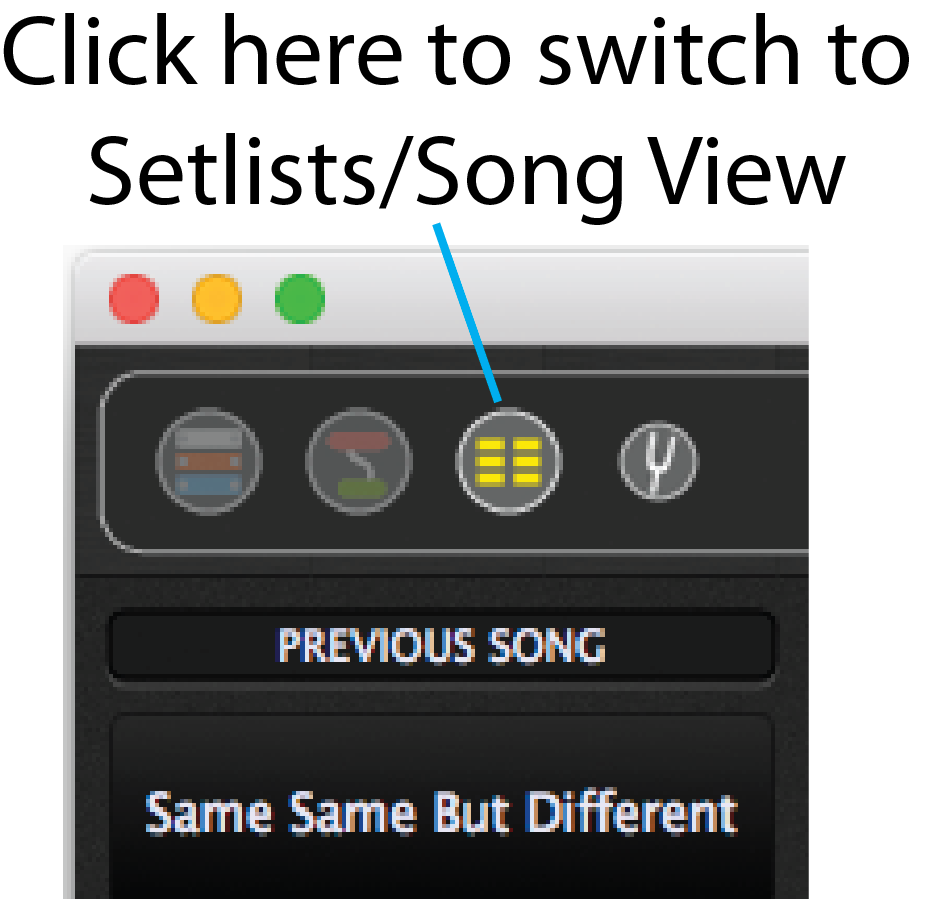
1.Switch to Setlist/Song view. Press Cmd-Shift-L (Ctrl-Shift-L on Windows) or click the Setlist/Song view button to change to the setlist/song view.
The setlists menu has commands for managing setlists, songs, and song parts. We will return to this menu often.
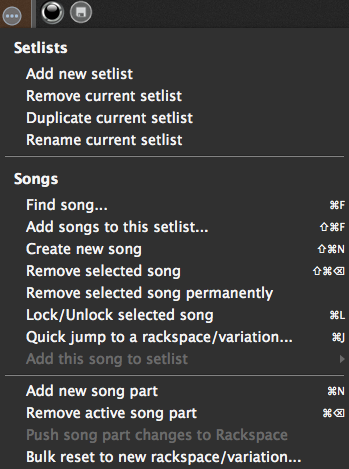
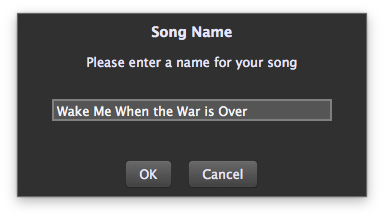
2.Create a new song. Press Cmd-Shift-N (Ctrl-Shift-N on Win) or choose the command from the contextual menu. Enter a name in the dialog that appears.
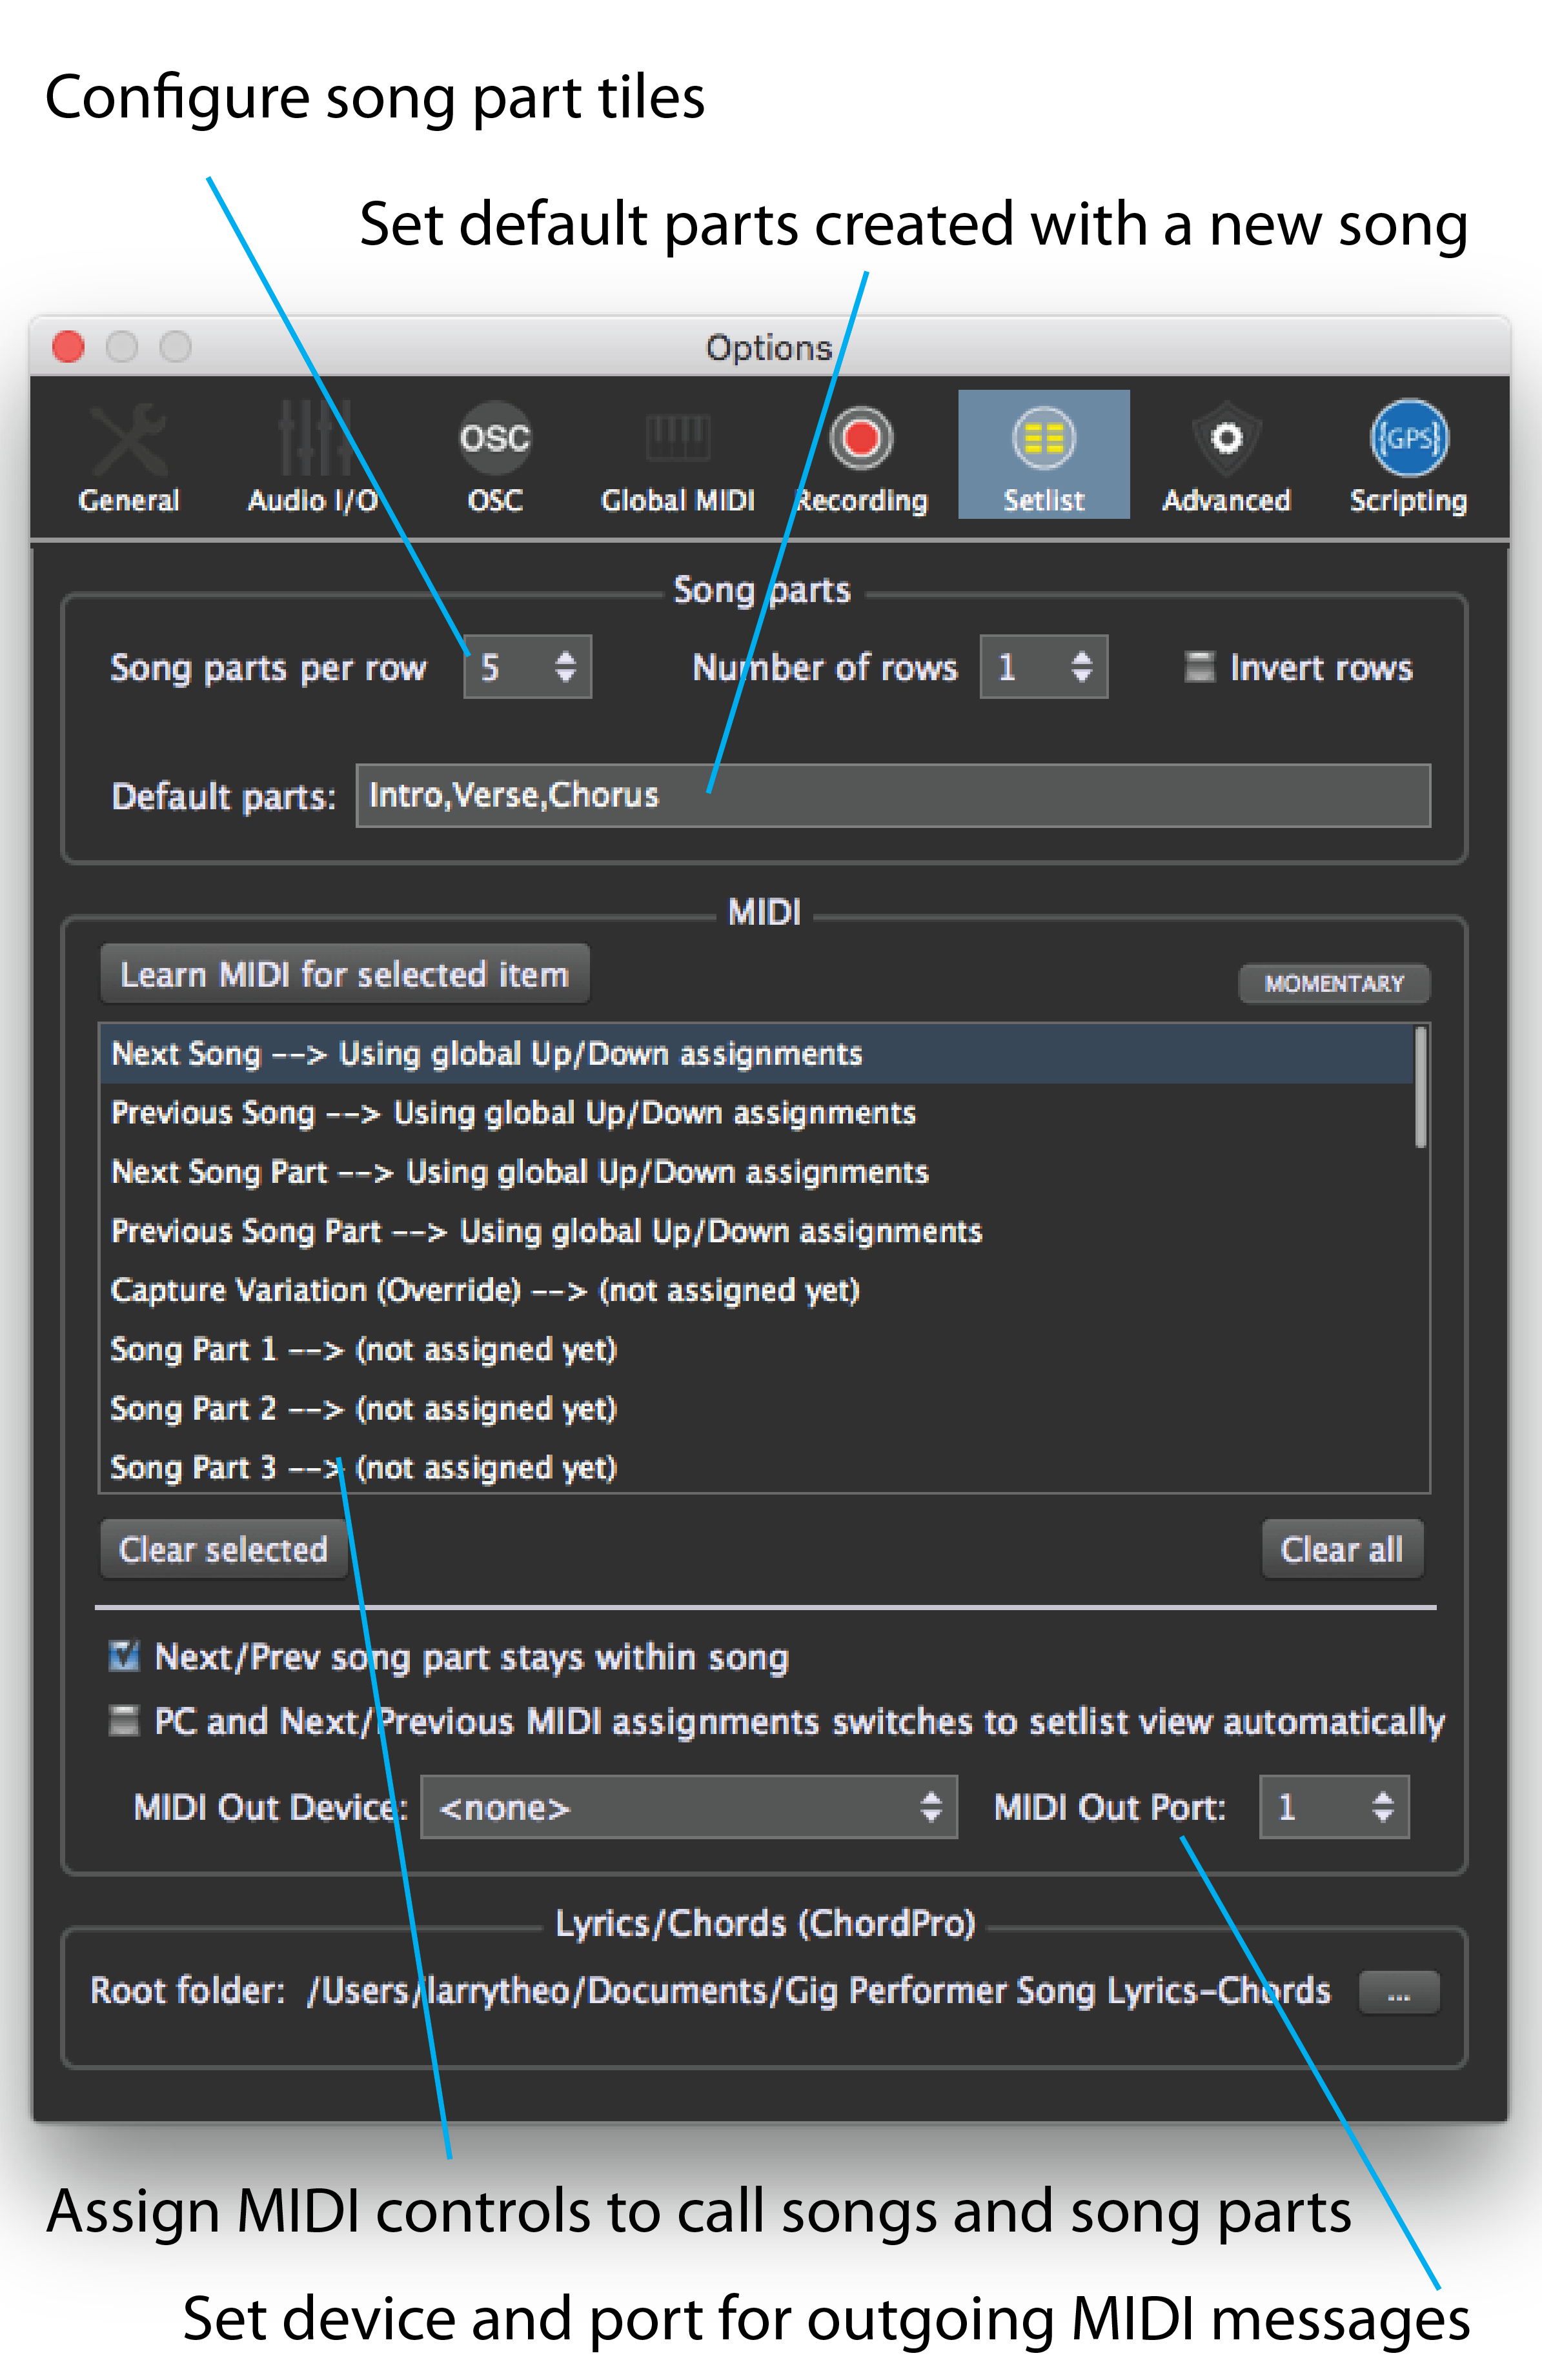
3.Set a MIDI program change to be sent. External MIDI devices can be coordinated by a MIDI program change message that can be sent when a song is selected. The MIDI output device and port over which the program message is sent is set in the Options>Setlist settings.
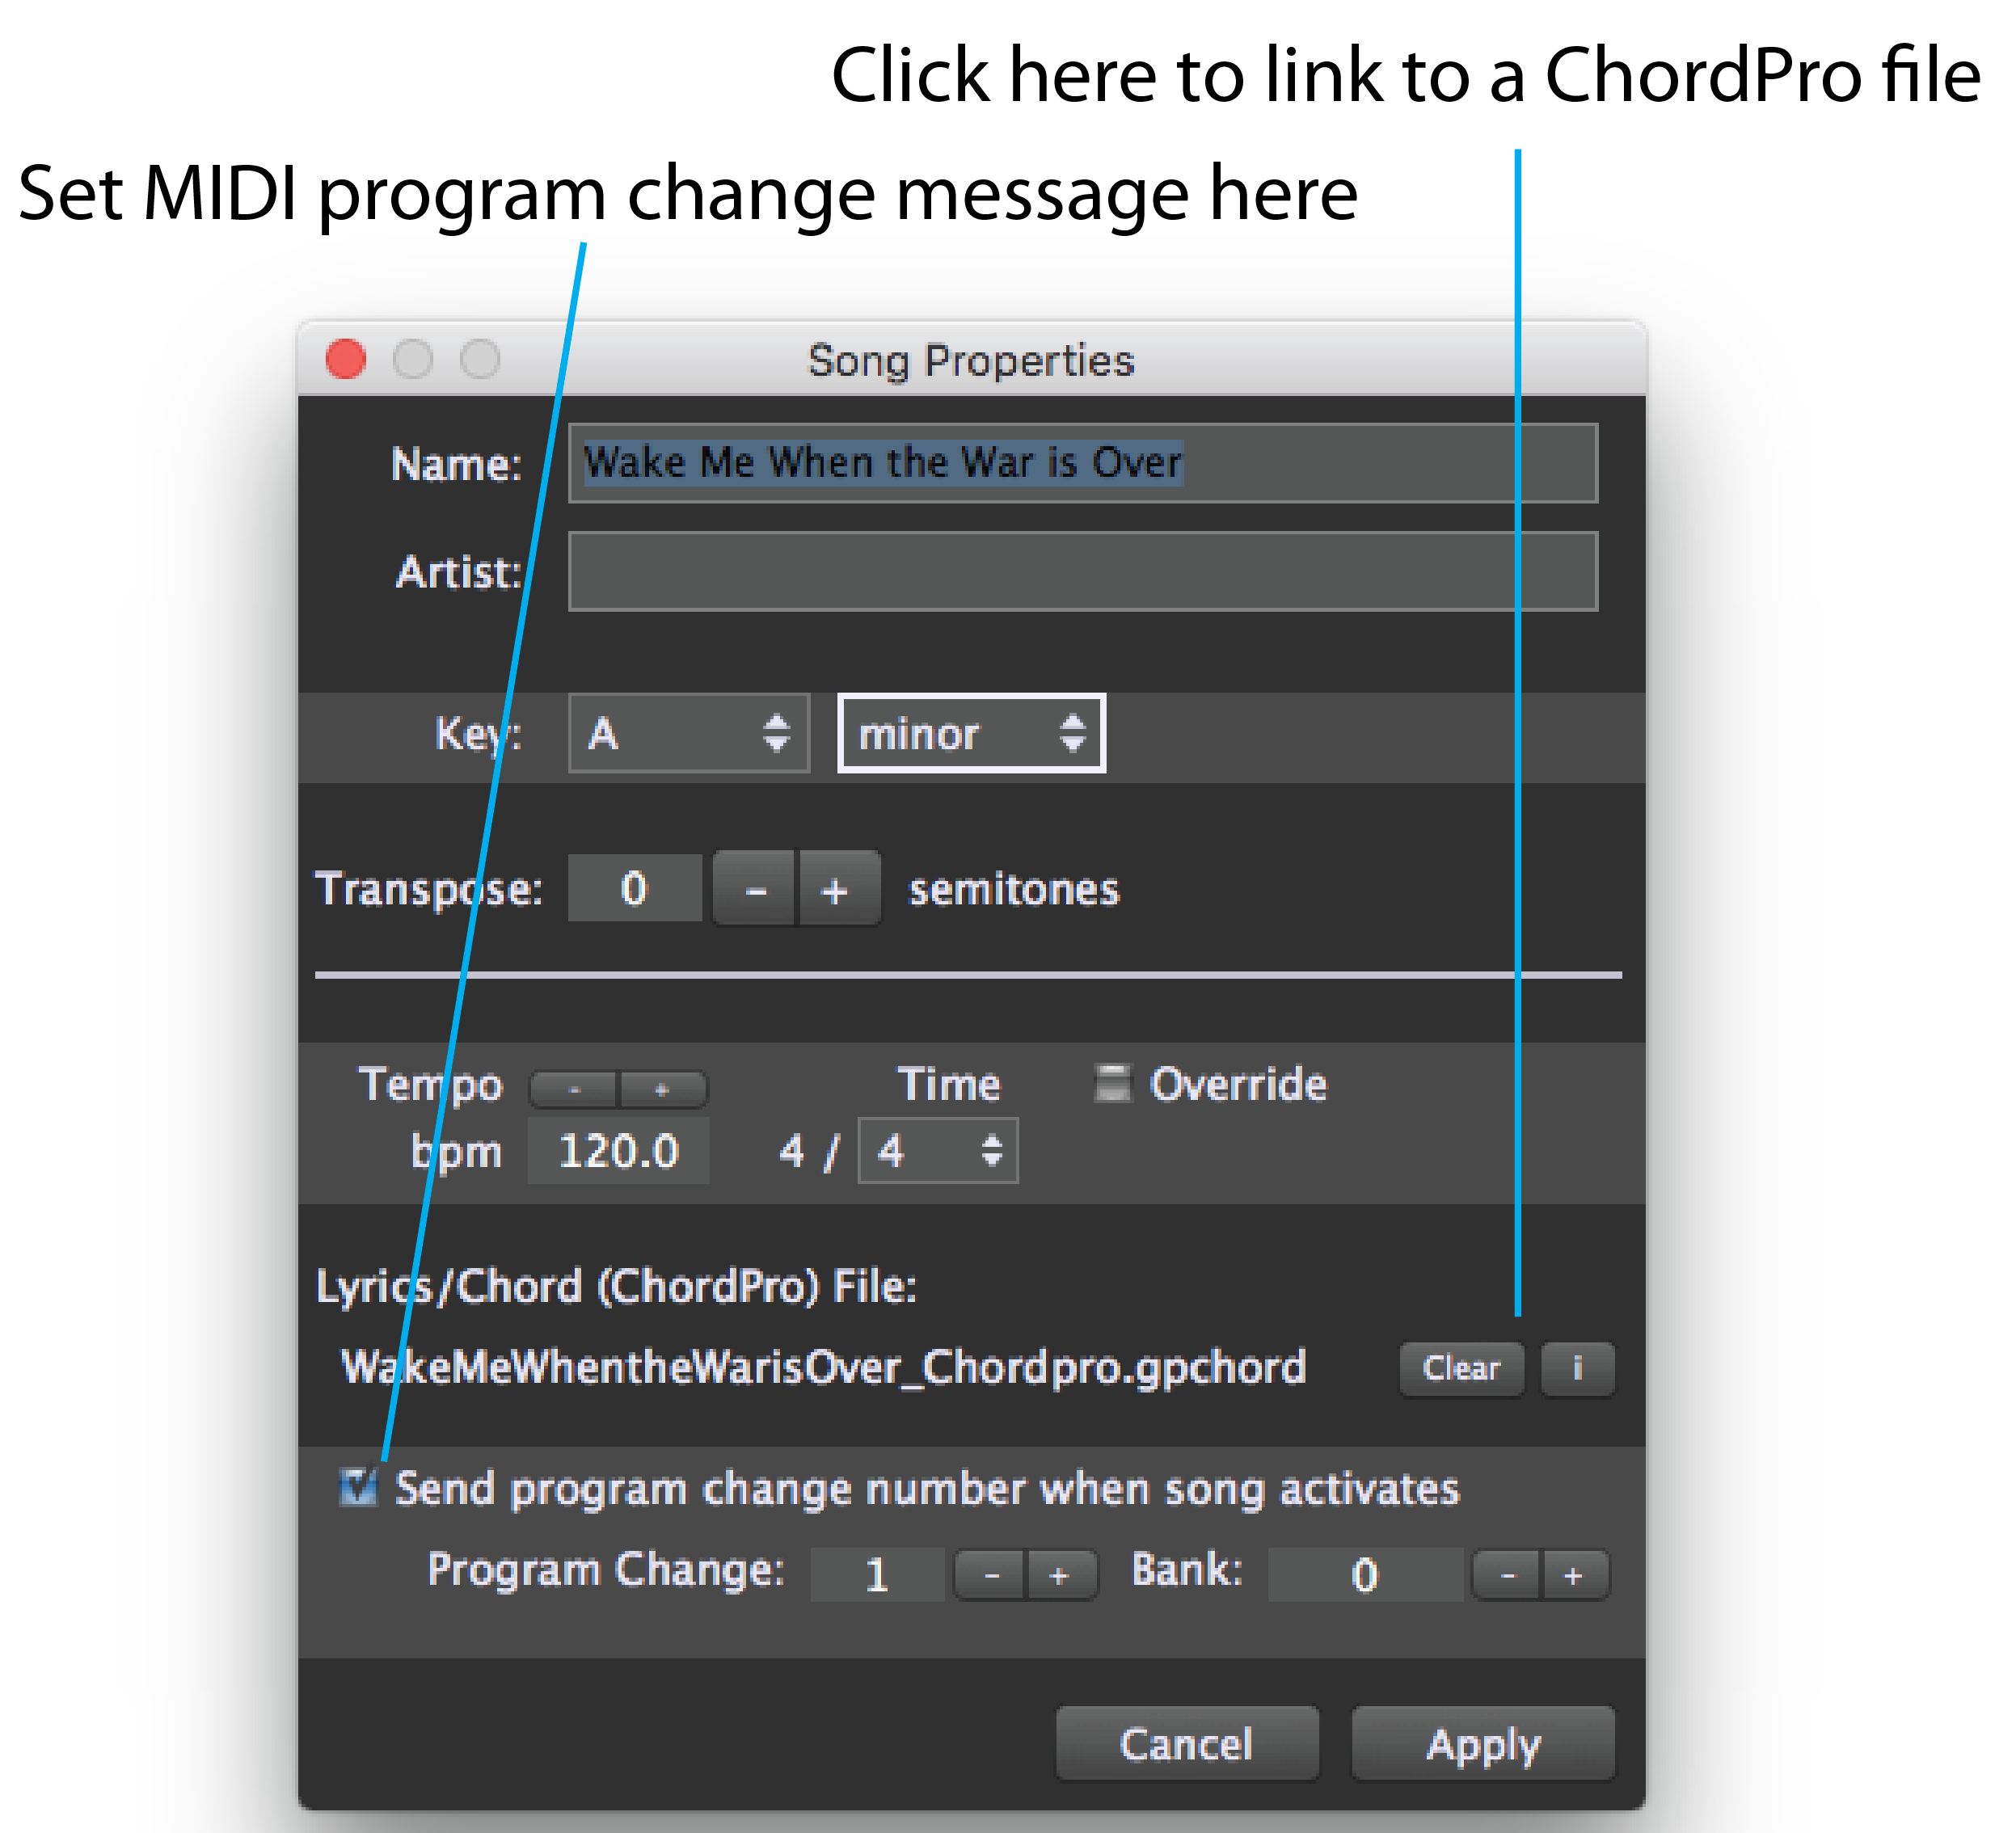
4.Gig Performer supports the ChordPro format. ChordPro is a simple text file format for creating lead sheets with song lyrics and chords. A ChordPro file can be linked to a song in Gig Performer, so that calling the song opens the ChordPro file. Gig Performer also has a text editor for creating, editing, and viewing ChordPro files.
5.Select the song to which you want to attach a ChordPro file.
6.Open the ChordPro editor. Type Cmd-E (Ctrl-E on Win) or choose the command from the menu to open the Song Lyrics/Chords Editor window.
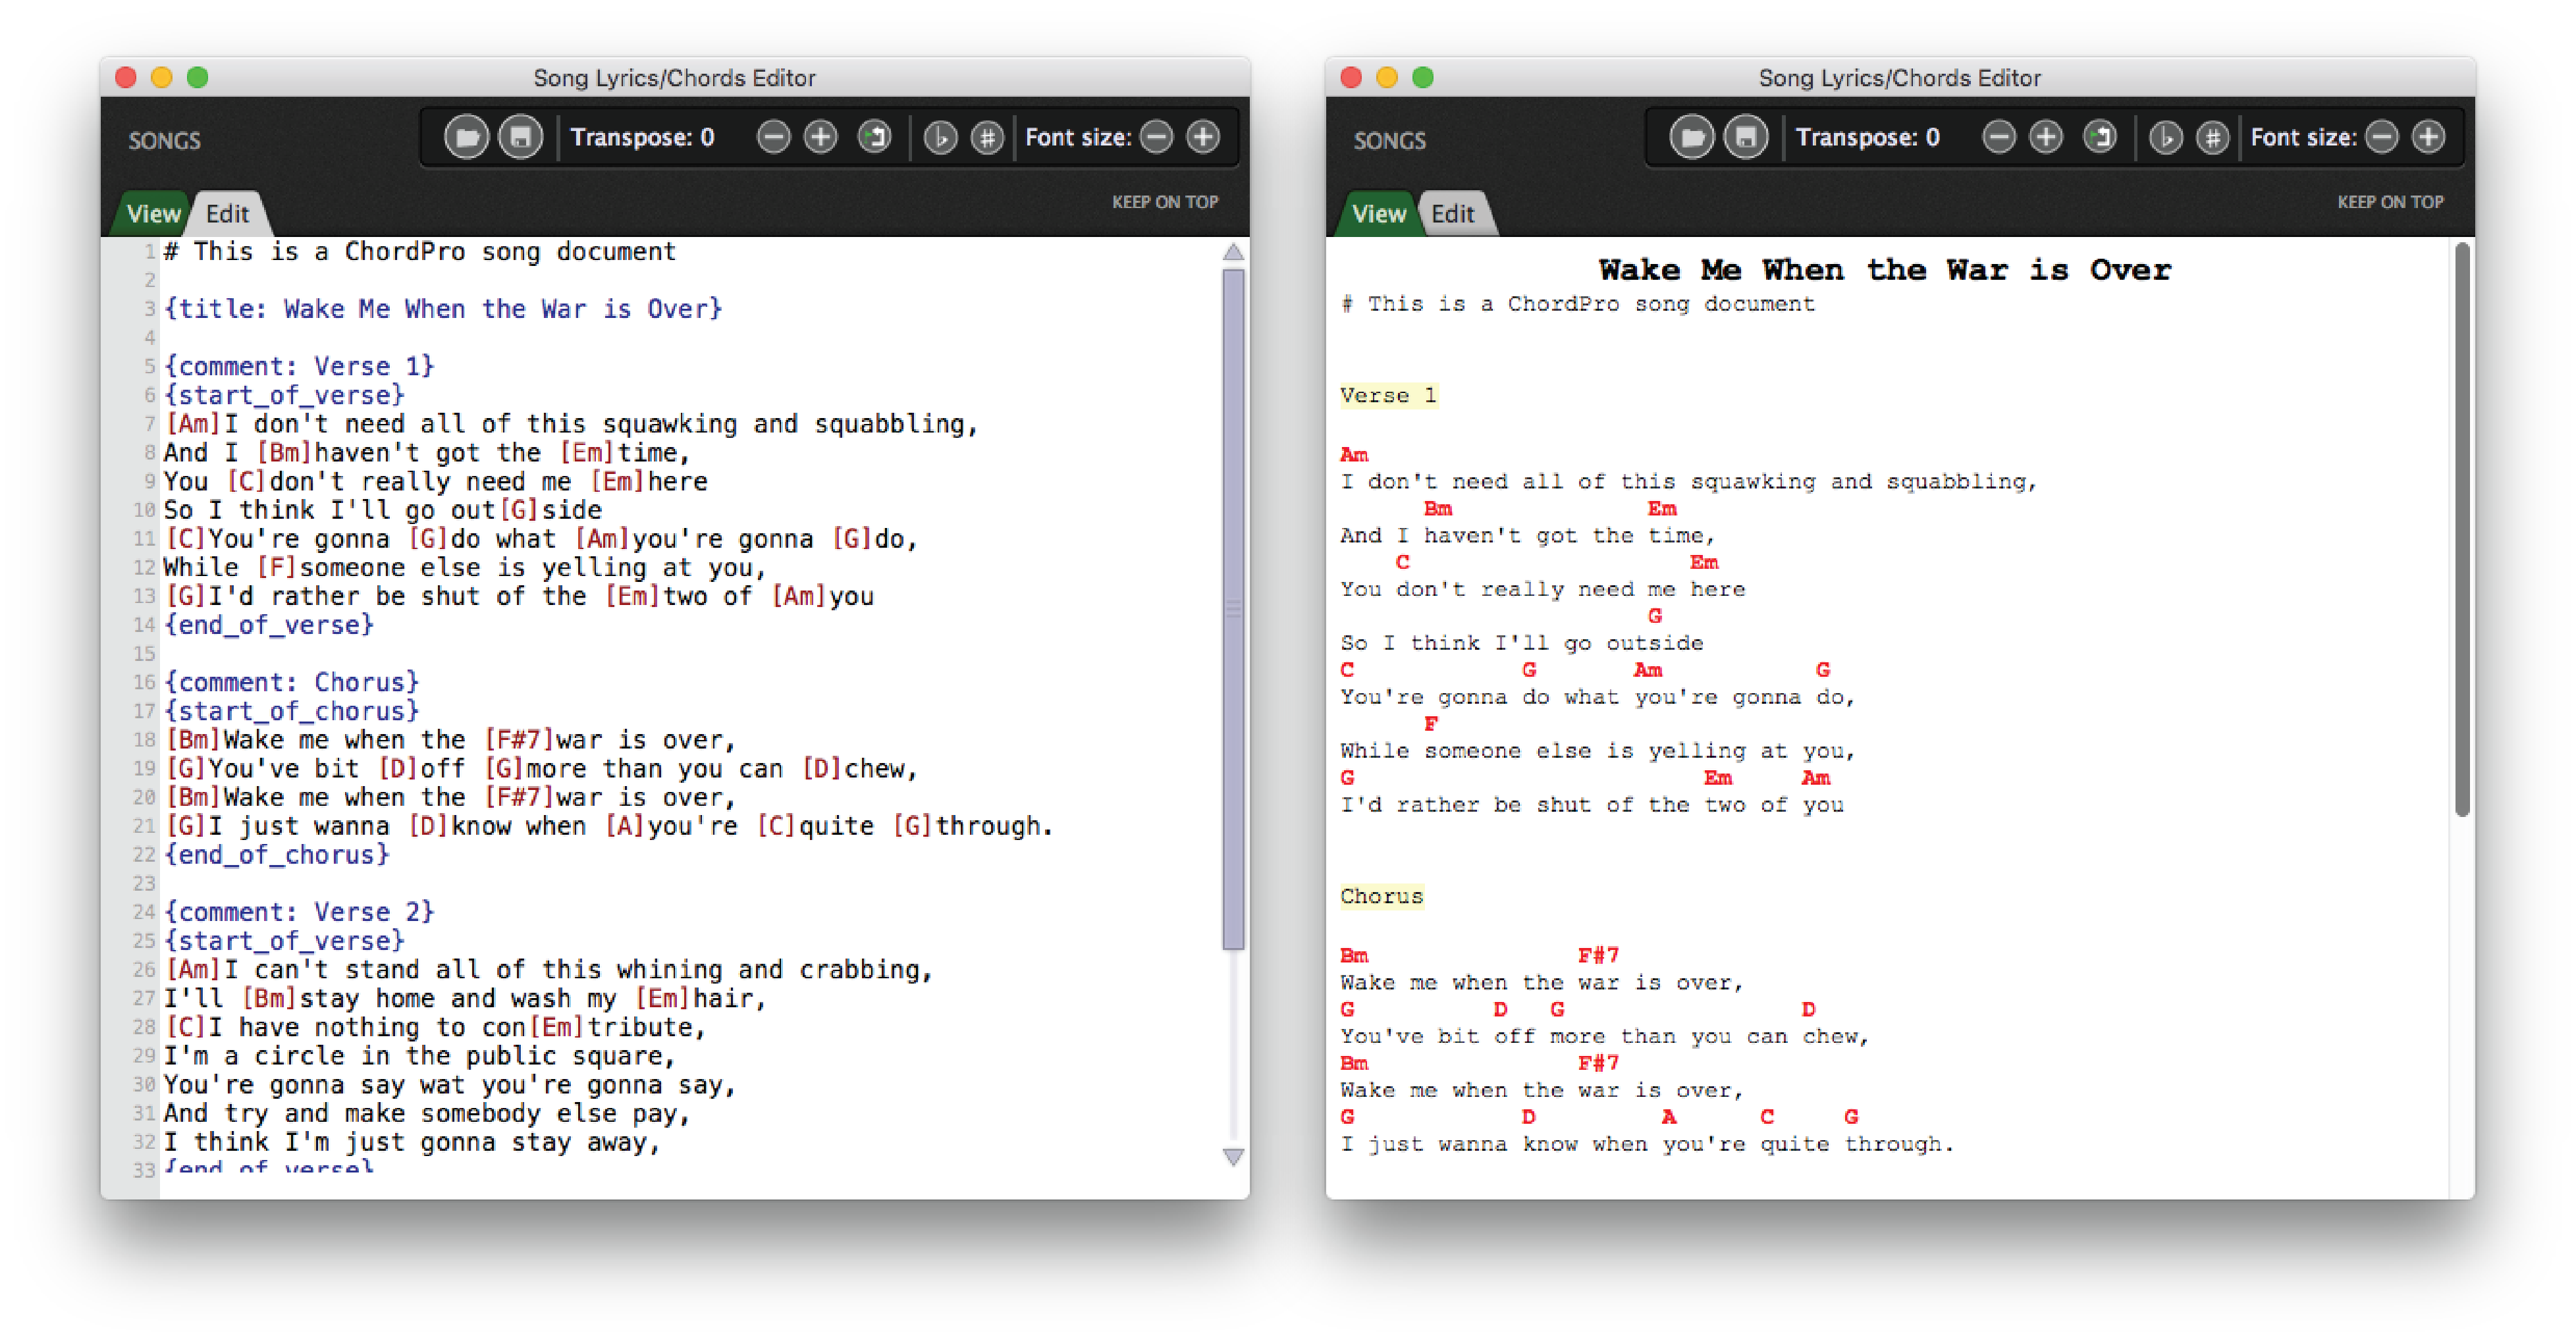
7.Enter the song data. Enter lyrics and chord names for the song, as specified in the ChordPro documentation.
8.View the document. Click the View tab in the Song Lyrics/Chords Editor window to see how the document looks.
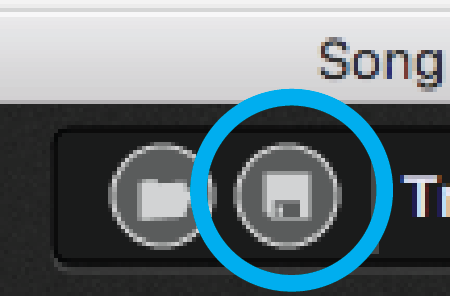
9.Save document. Click the Save to a file button in the Song Lyrics/Chords Editor to save your new ChordPro document.
Notice that there are already three parts in the song when it is created: Verse, Chorus, and Bridge. You can set the default parts created with a new song by choosing Setlist/Song Settings from the menu.
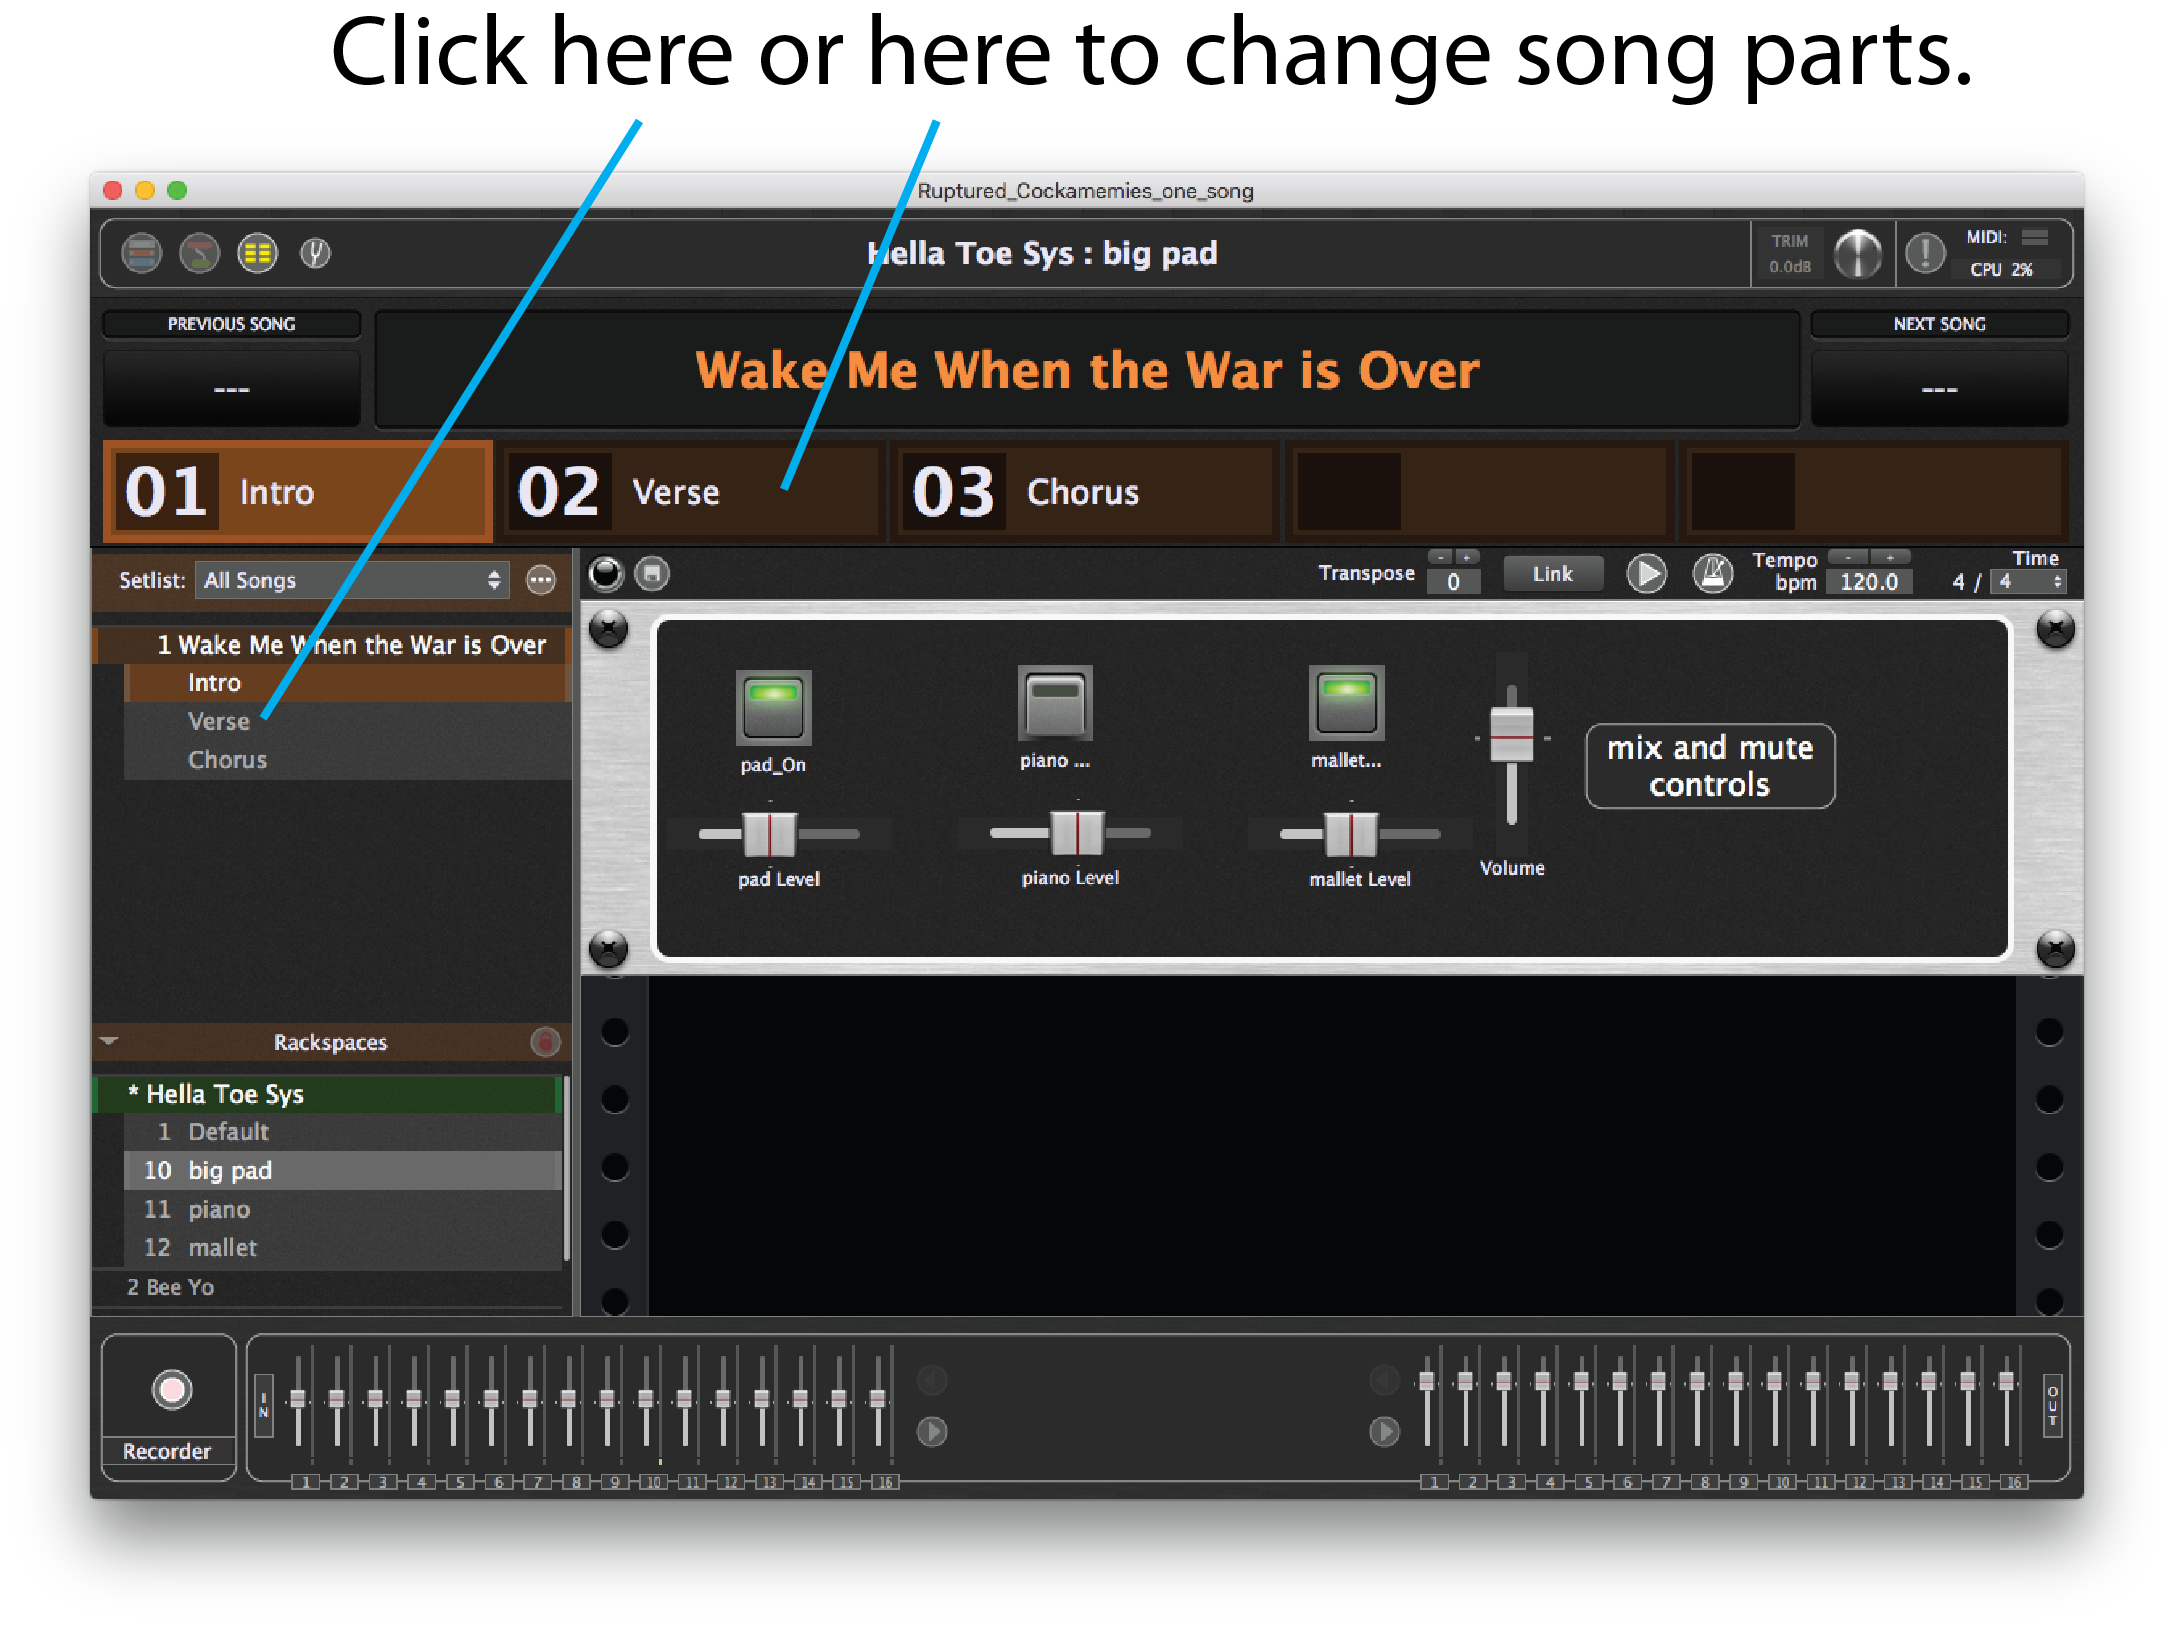
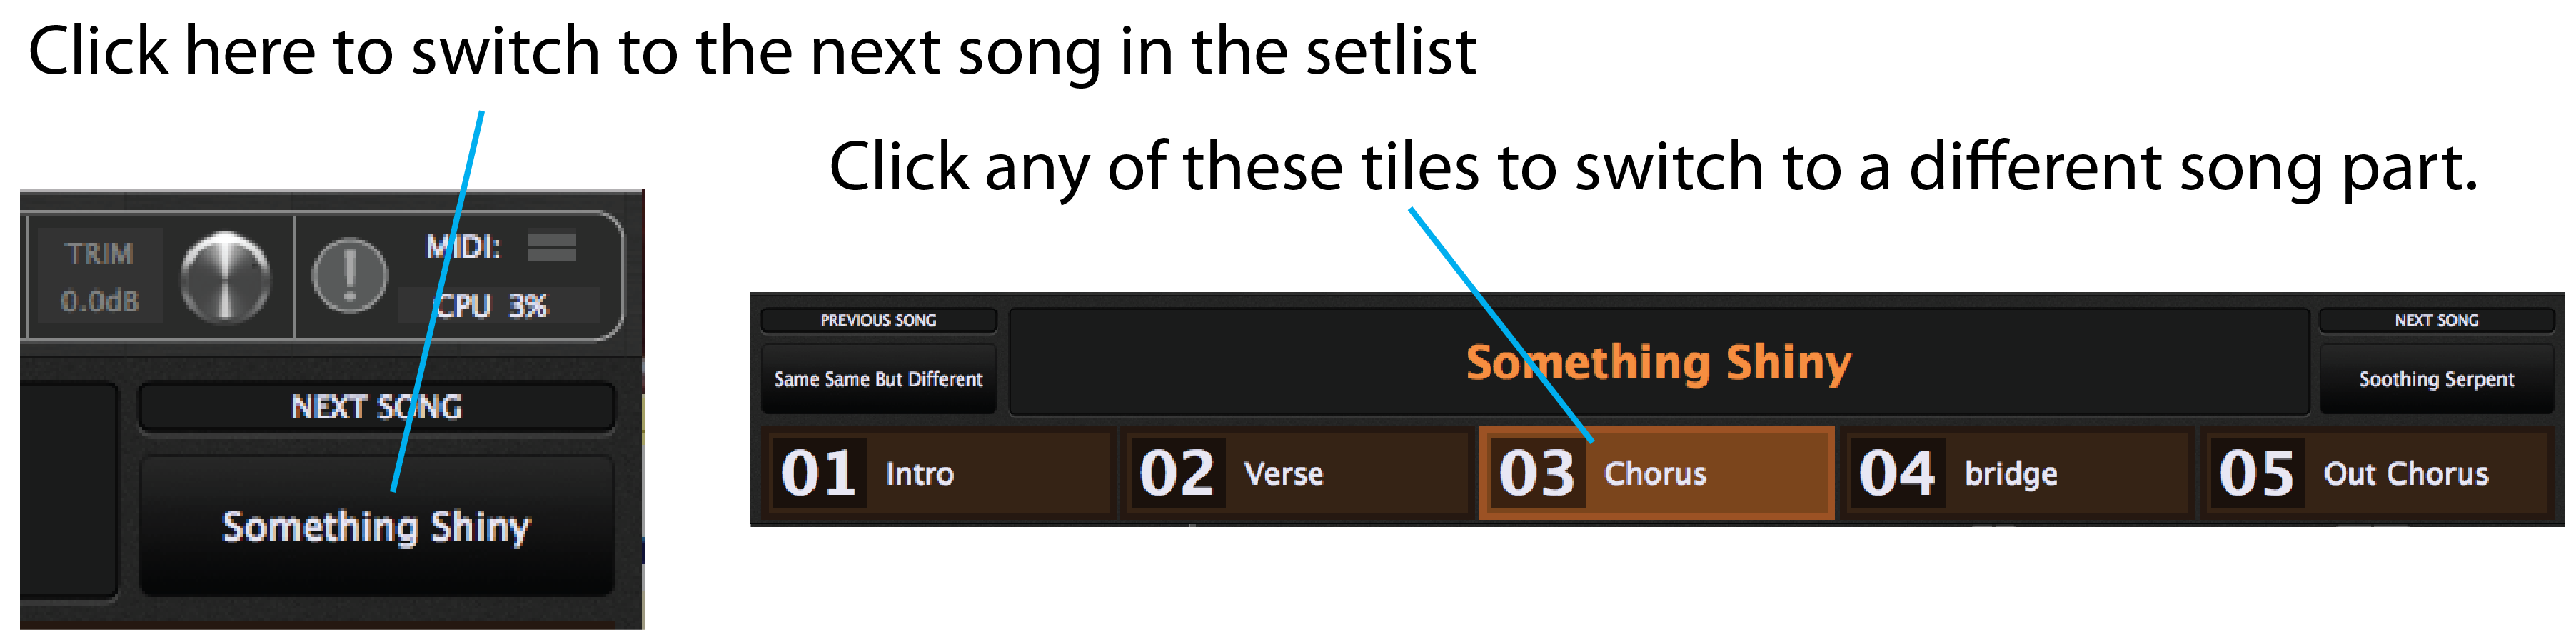
10.Click on a song part to change it. Switching to a different song part is as easy as clicking in the Setlist editor or on one of the song part tiles. The tiles can be useful when using the Lemur template or working on a Windows Surface tablet. Most commonly, a MIDI foot controller calls up song parts by sending MIDI program change messages set up in Gig Performer, as described below.
11.Make a new song part. Press Cmd-N or choose from the Enter a name in the Song Part Name dialog that appears. Click on the variation you want attached to the song part to select it.
Note: Gig Performer attaches the variation that is selected at the time you leave a song part and switch to another, so if you try different variations, be sure the correct variation for the song part is selected when you change to a different one.
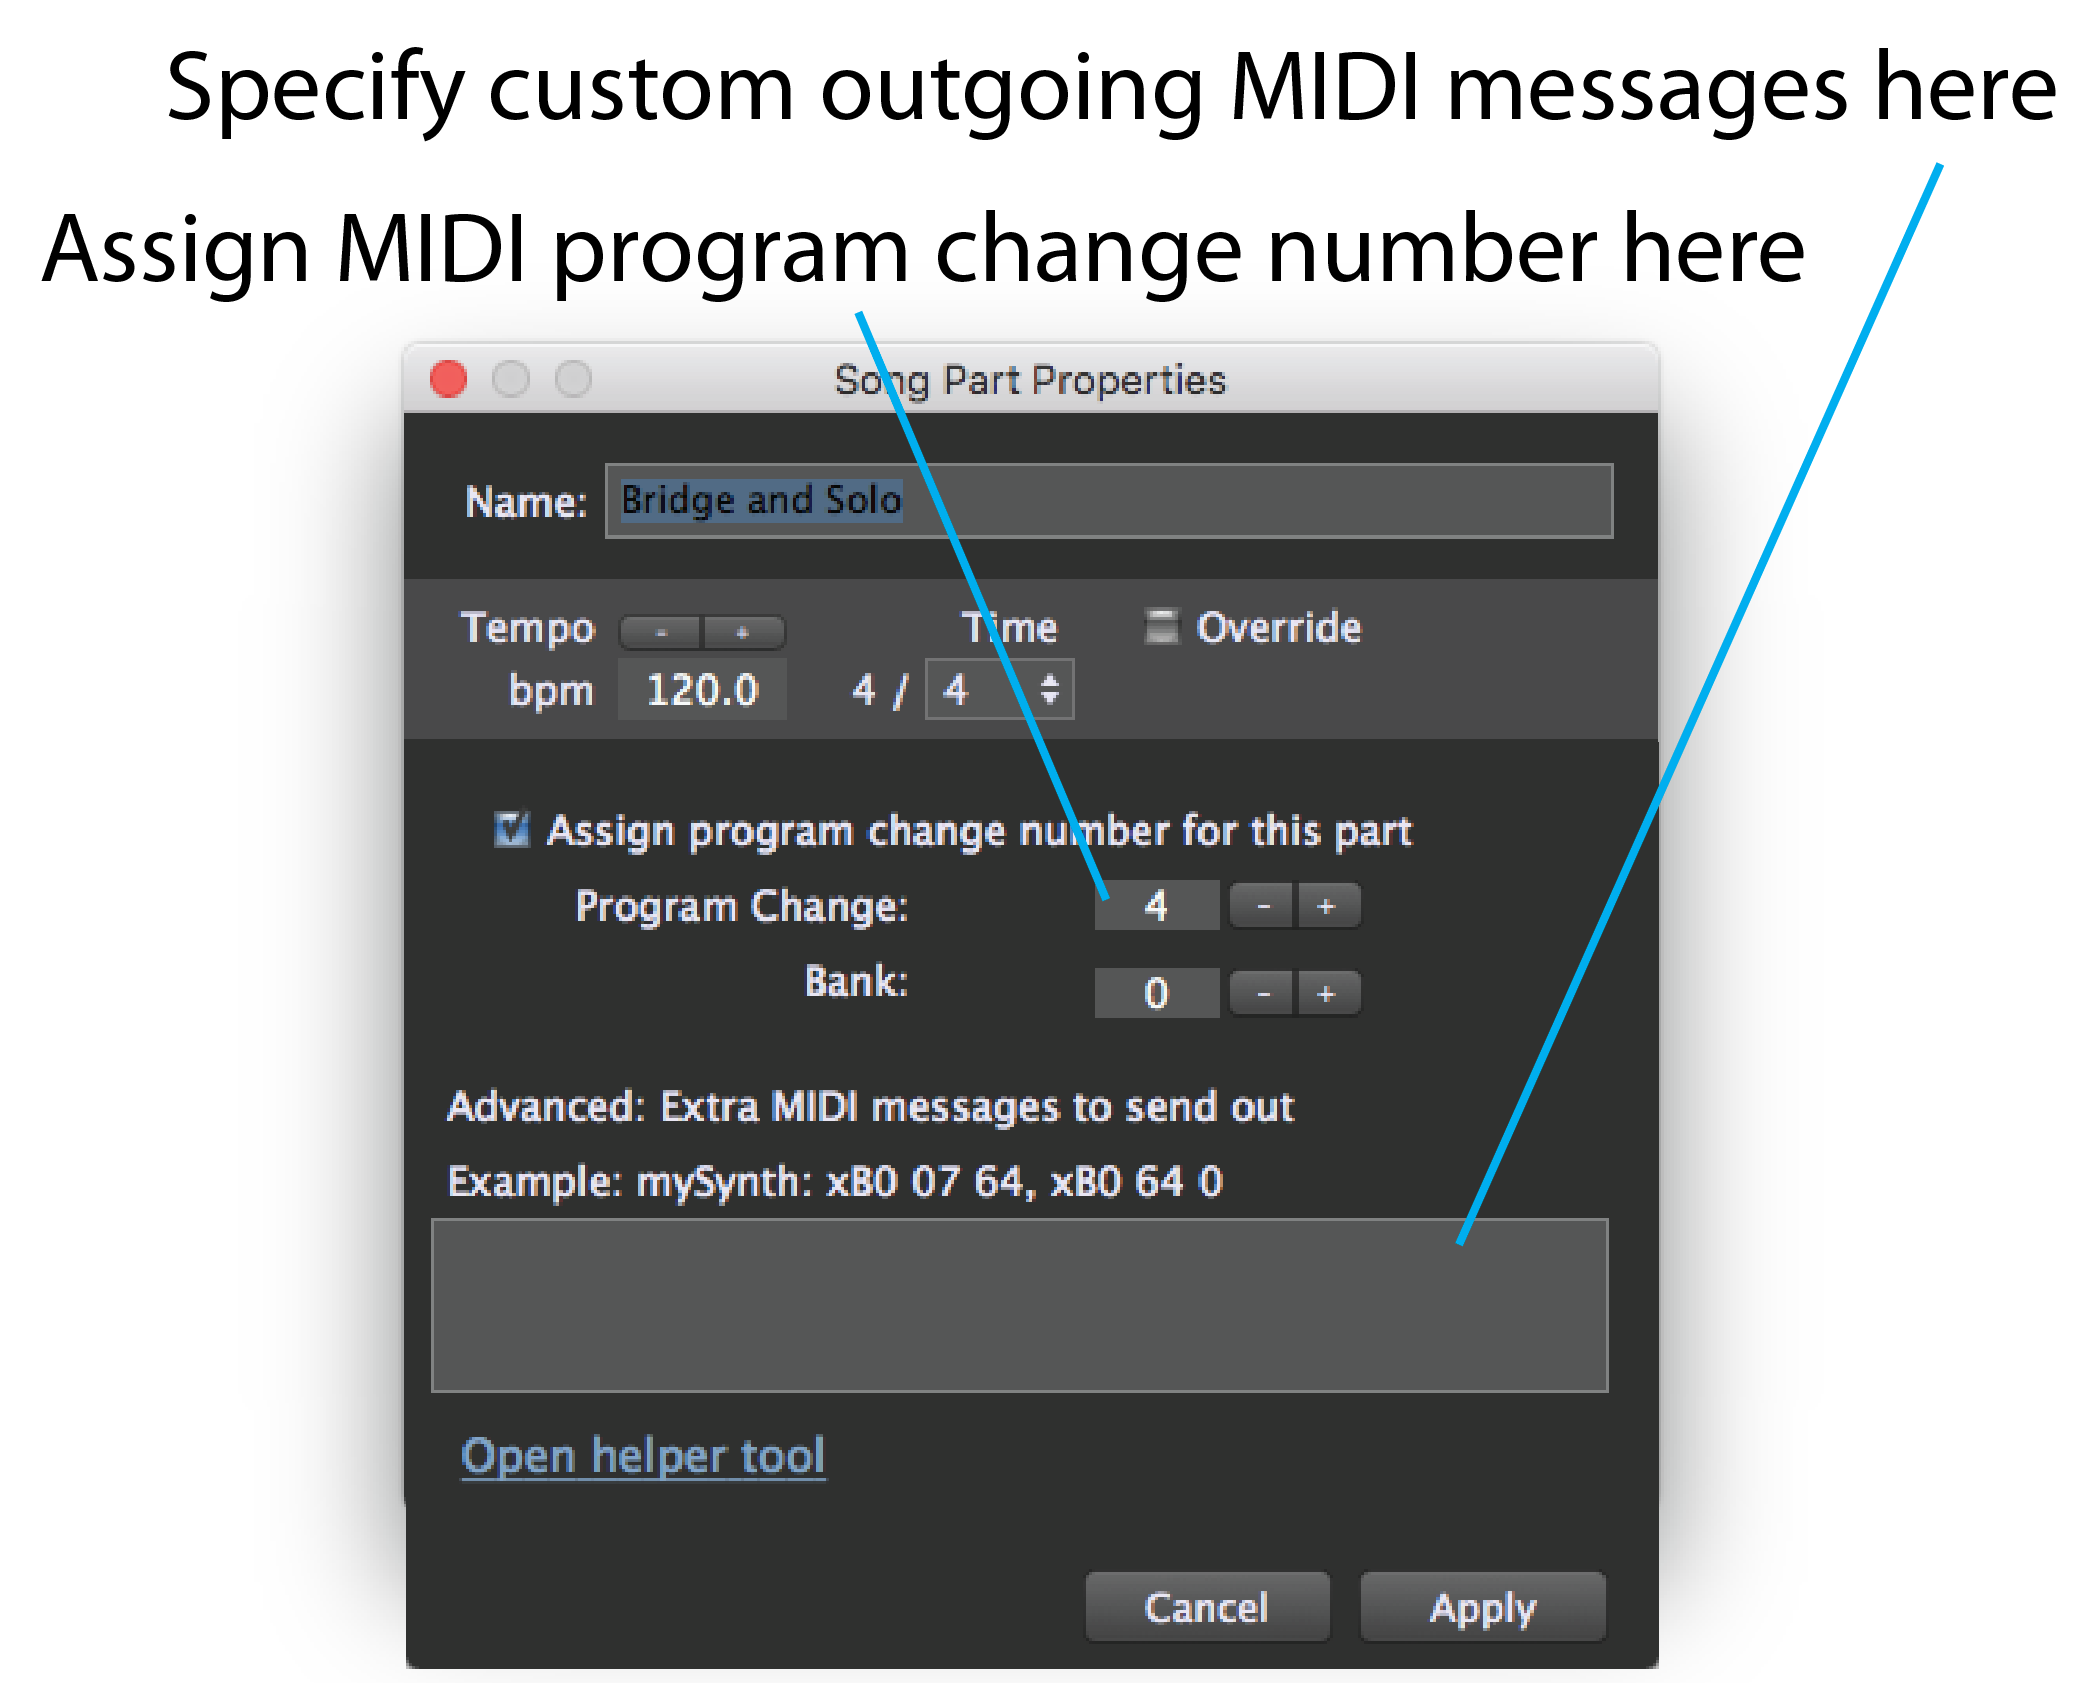
12.Assign a MIDI program change number to the part. Song parts can be called by a MIDI program change message assigned to it in the dialog. Click the Assign program change number for this part box and enter a program change number and, optionally, a bank number, using the +/- keys or simply typing in the value.
13. Make more songs and song parts. Repeat steps 2 and 3 to make some more songs and steps 4 through 6 to create more song parts.
14. Create a setlist. Choose the Add new setlist command in the Setlists contextual menu, or from the menu to create a new setlist. Enter a name in the Setlist Name dialog that appears.
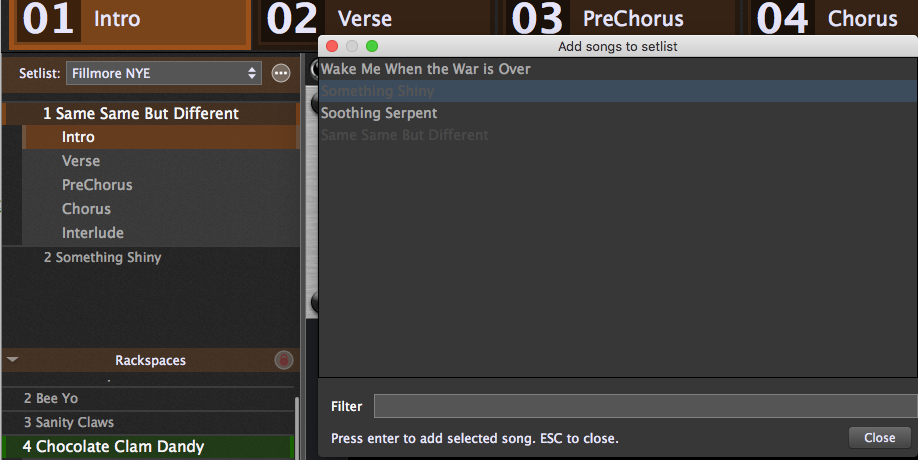
15. Add songs to the setlist. Open the Add songs to setlist window by pressing Cmd-Shift-F (Ctrl-Shift-F on Win), by choosing the command in the contextual menu or the command in the menu. To add a song from the Add songs to setlist window to the setlist, select it in the song list window and press the Enter key. When you are finished adding songs, press the Escape key to close the song list window.
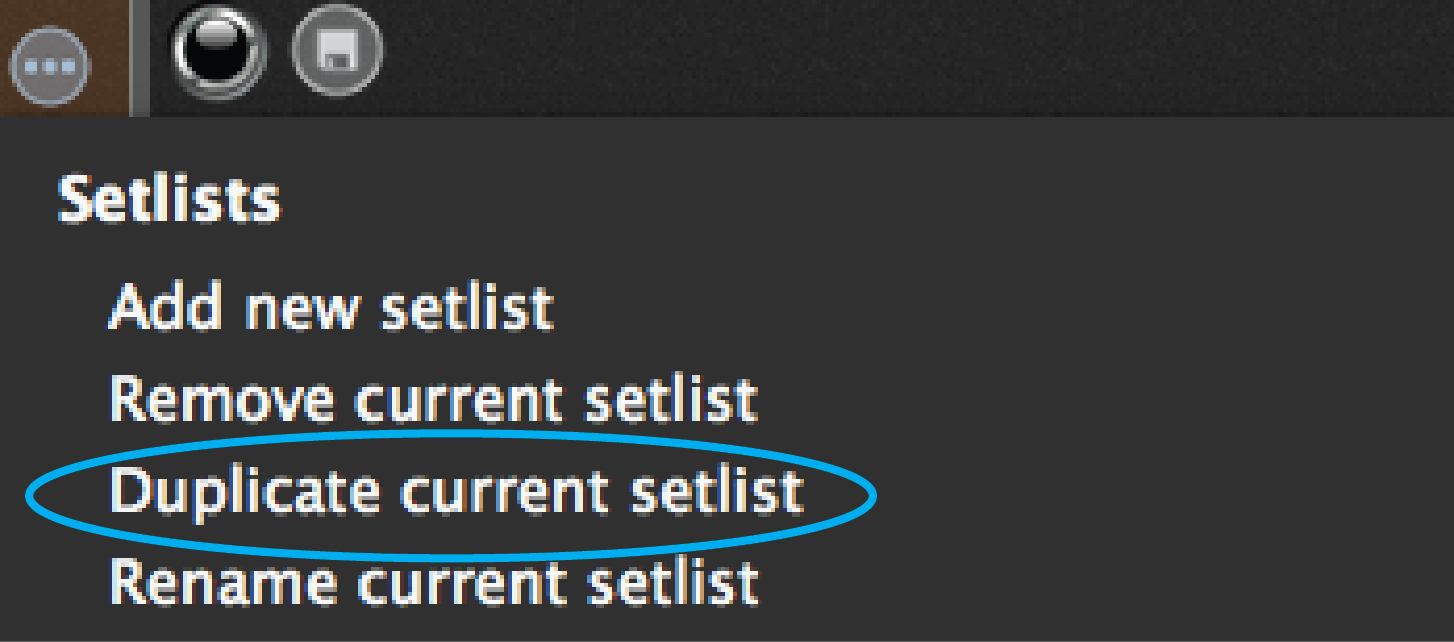
16. Choose the Duplicate setlist command from the Setlist contextual menu. Tomorrow’s setlist will be just a little different than this. The quickest thing is to duplicate this setlist and then modify it. Enter a new name in the dialog that appears.
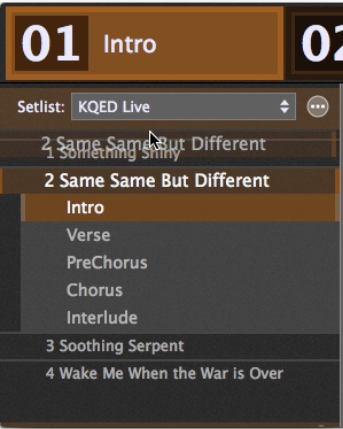
17. Modify the setlist. Add a few more songs. Rearrange the order of the songs by dragging them in the list.
18. Adjust the song part program changes for consistency. The program change assignment for a song part is specific to the setlist; the same song can have a different program change assignment in each setlist. This lets you have consistency even when the setlist changes from gig to gig. For example, say you set program change 1 to call the first song part of the first song in a setlist. The next gig might open with a different song, but rather than having to remember the correct program number for the first part of that song, you simply assign it to program change 1 in the second night’s setlist. If you do that on every setlist, then you can start every show by calling program change 1, knowing it always will call up the first part of the first song no matter what song opens the set.
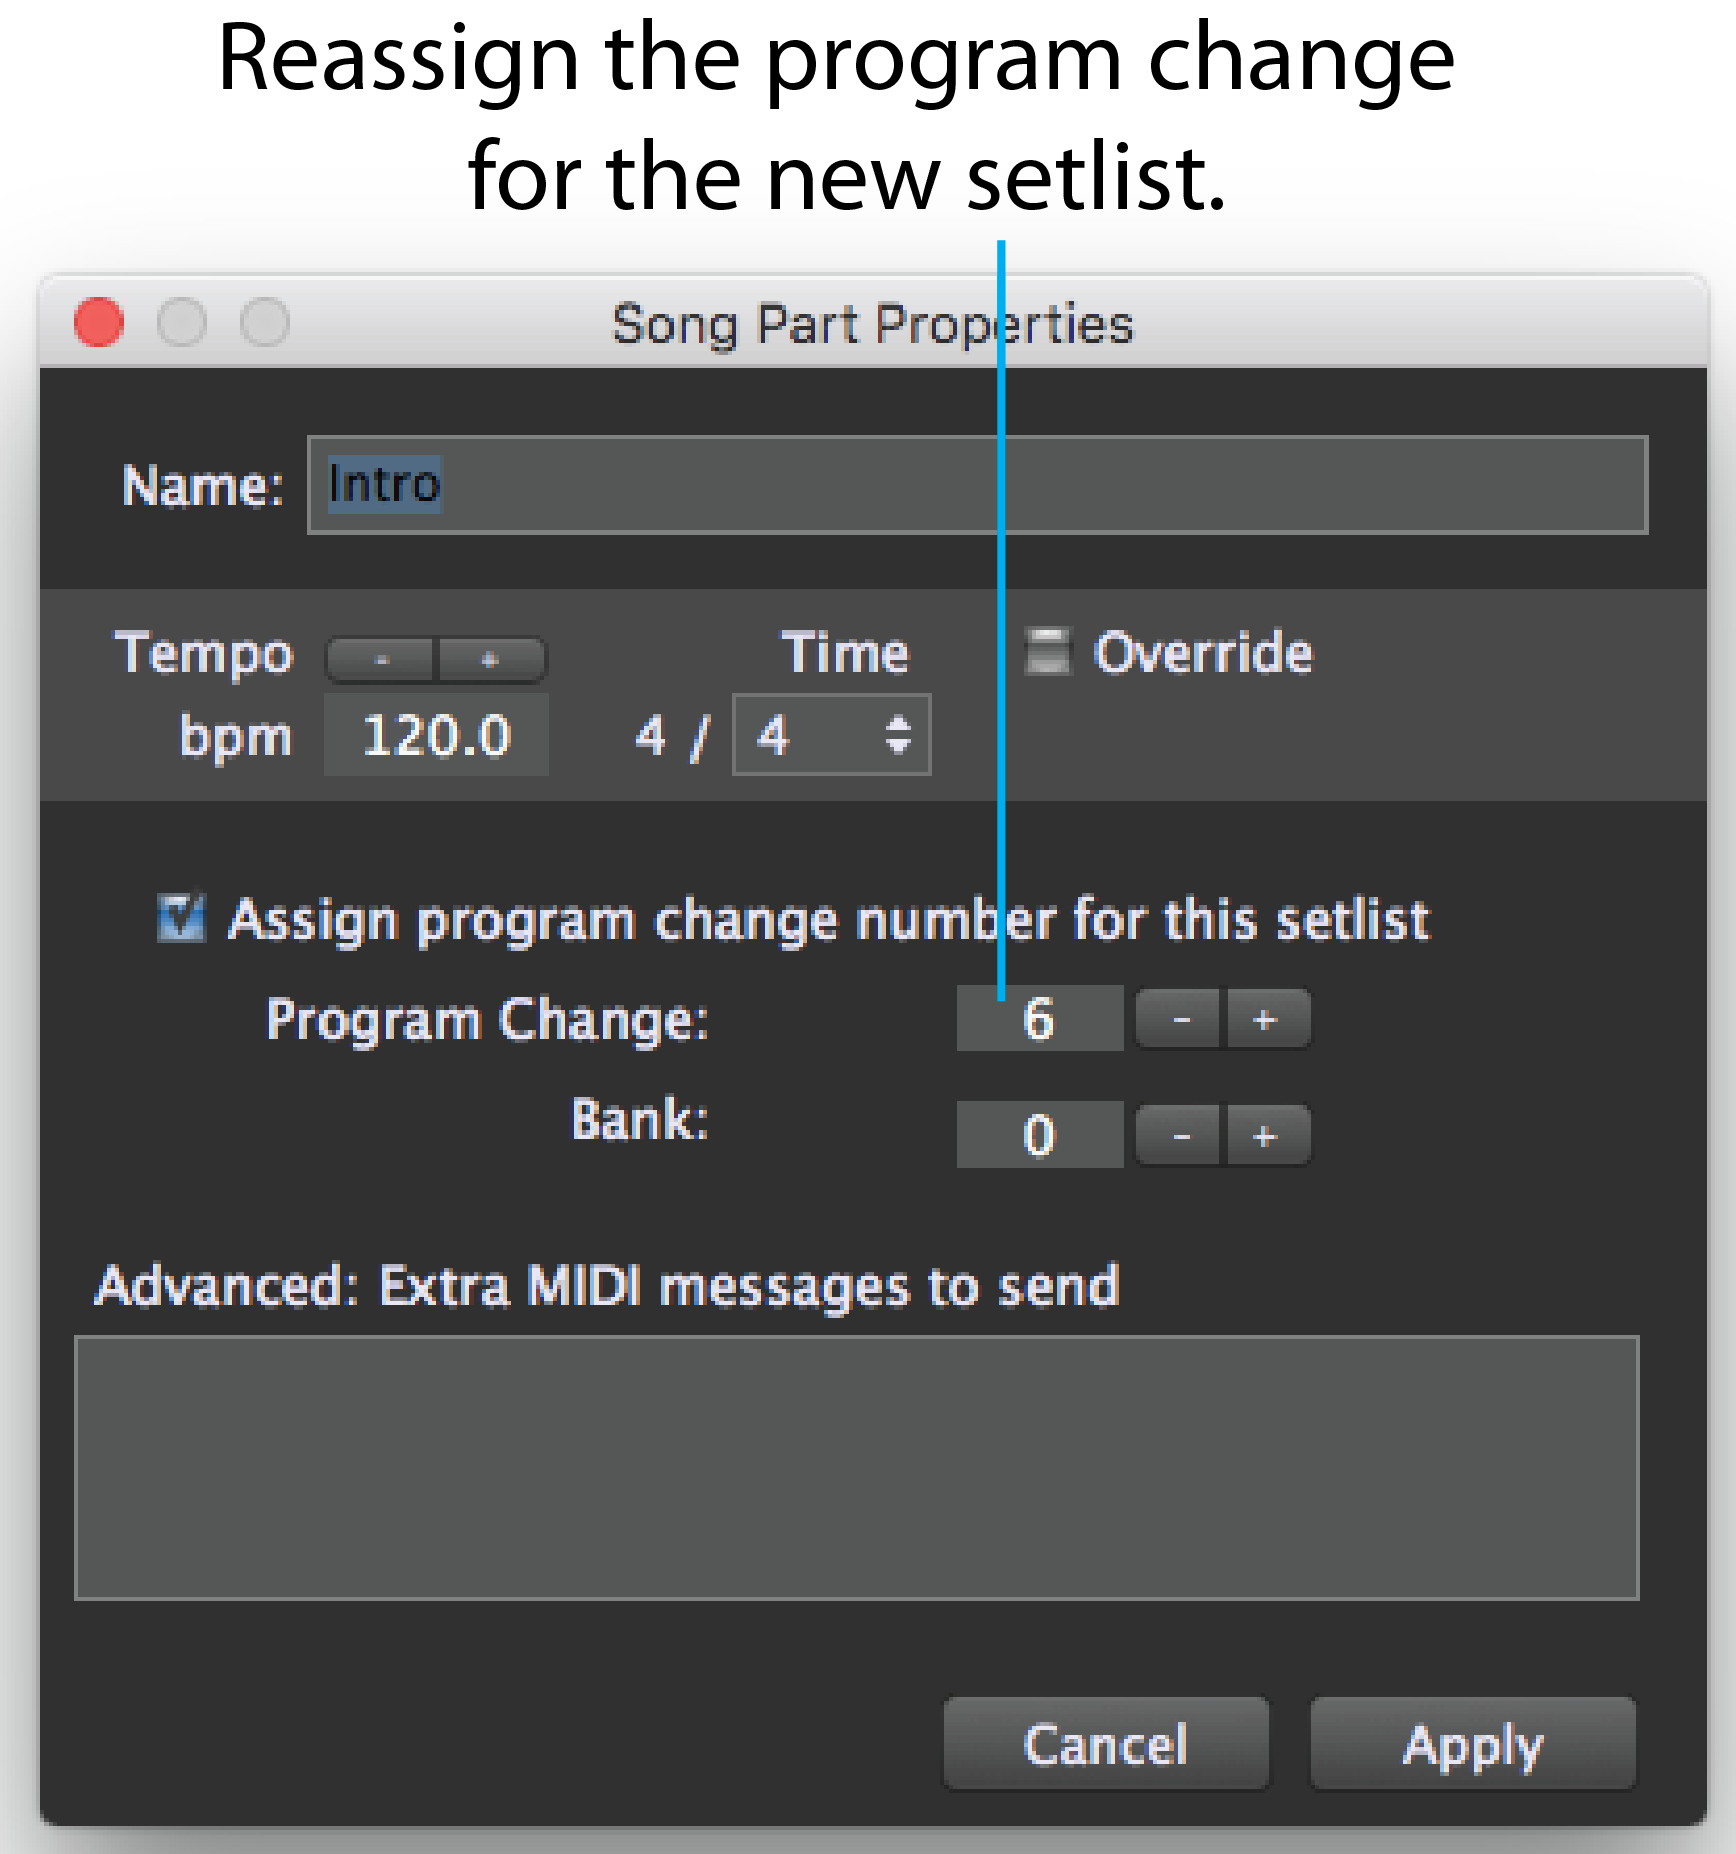
Now let’s use your new setlist.
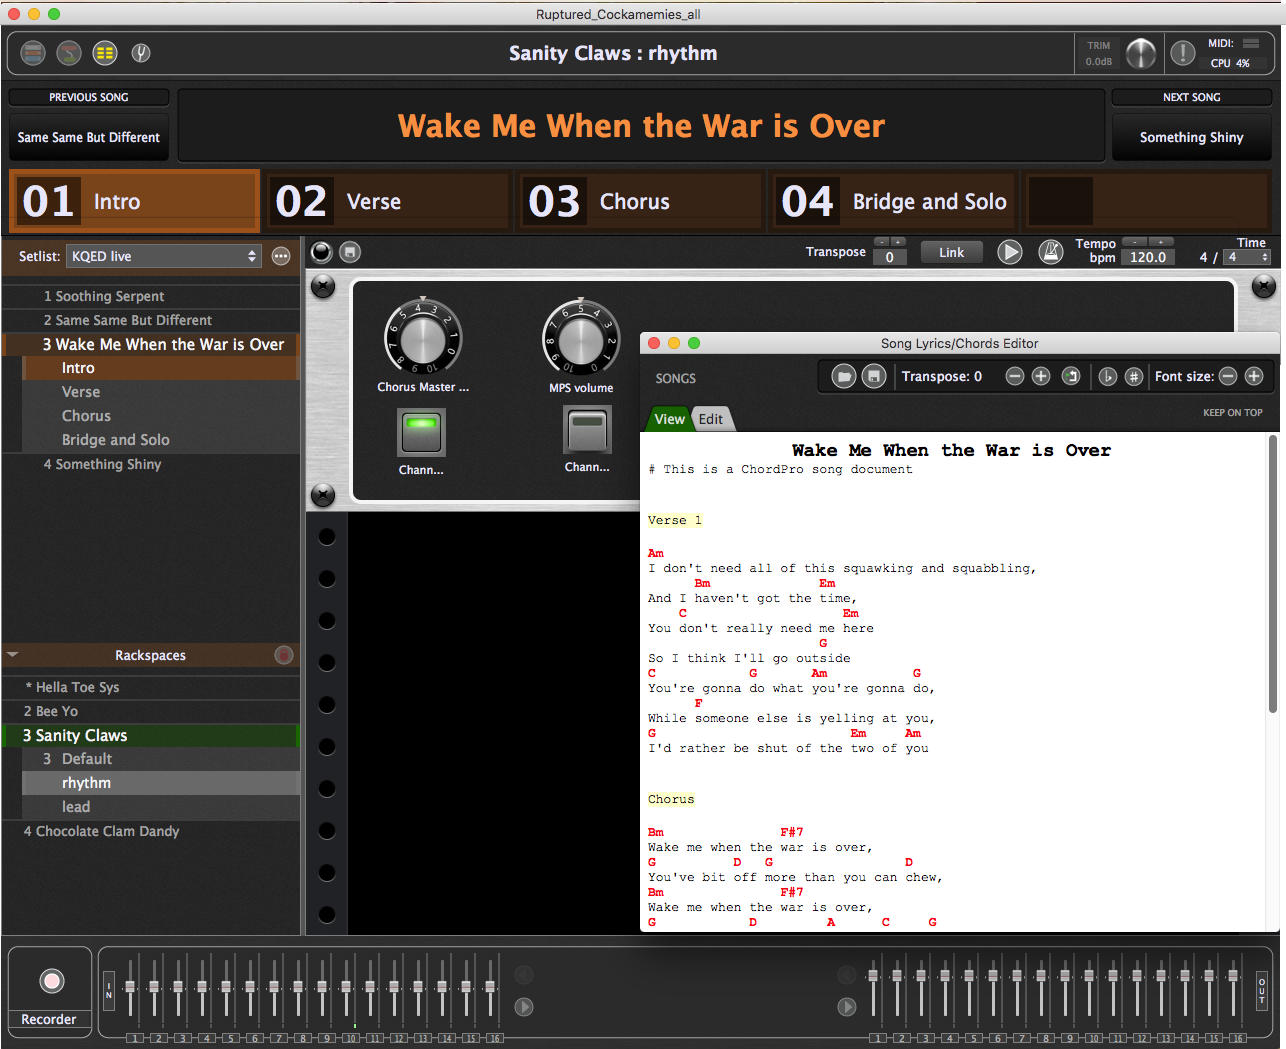
19.Press Cmd-E (Ctrl-E) to open the Song Lyrics/Chords editor.
20. Select a song with a ChordPro file attached. The chords and lyrics will appear as Gig Performer switches to the first part in the song.
21.Click the Previous Song button to move up one song in the setlist. Click a song part tile in the song bar to change to a different part.
22. Customize setlist operation in the Options>Setlist/Song Settings dialog. Set the row configuration to match the layout of your MIDI foot or pad controller.