In Gig Performer, you can control multiple plugin parameters simultaneously:
- using Widget Link groups,
- by assigning the same MIDI control to multiple widgets,
- using GPScript to control any number of parameters with a single widget.
In this chapter, we'll focus on a simple script allowing you to control multiple parameters with a single widget in Gig Performer Pro.
Start Gig Performer and create a new empty gig. First, click on the Wiring view and create a simple layout. In this example, besides built-in plugins, we are using two third-party plugins - Nick Crow 8505 and OrilRiver:
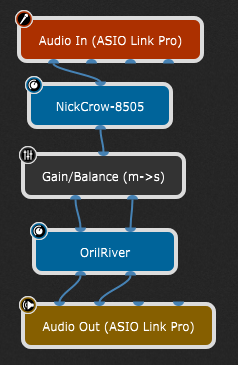
Refer to this blog article for more information on how to get these plugins, insert them and connect them.
Let's say you want to control two parameters with a single widget: one parameter from the NickCrow plugin and the second parameter from the OrilRiver plugin. To use a plugin in scripting, you need to define a GPScript handle for it. Right-click on the NickCrow plugin to open its contextual menu, then expand OSC/GPScript Handle and select Set Handle... :
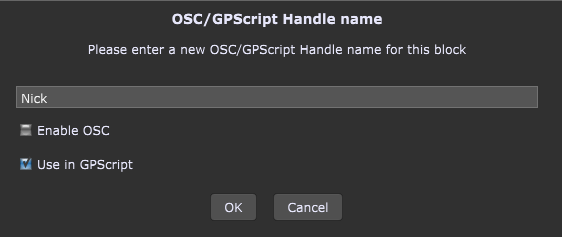
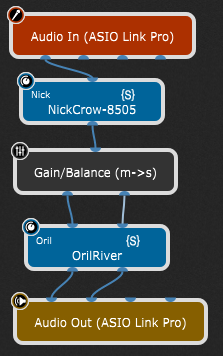
Type in a GPScript handle name (i.e. Nick) and check the Use in GPScript check box. Repeat the same steps for the OrilRiver plugin, set a handle name (i.e. Oril), and check the Use in GPScript check box. Now your layout looks like this:
The next step is to insert a widget and assign it a GPScript name so you can use it in scripting. Open the Panels View in Edit mode and insert the Plastic Blue Knob onto the panel (refer to this chapter for more information):
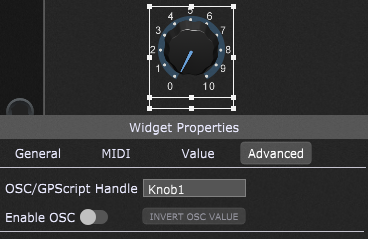
In the Widget Properties Inspector, click on the Advanced tab and enter a GPScript name for this widget (i.e. Knob1).
The last information you need is a parameter number that you want to control with this widget. Click on the Wiring View and double-click on the Nick Crow plugin to open its plugin editor:
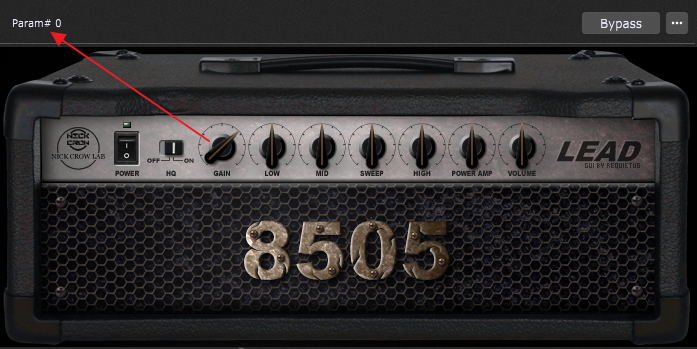
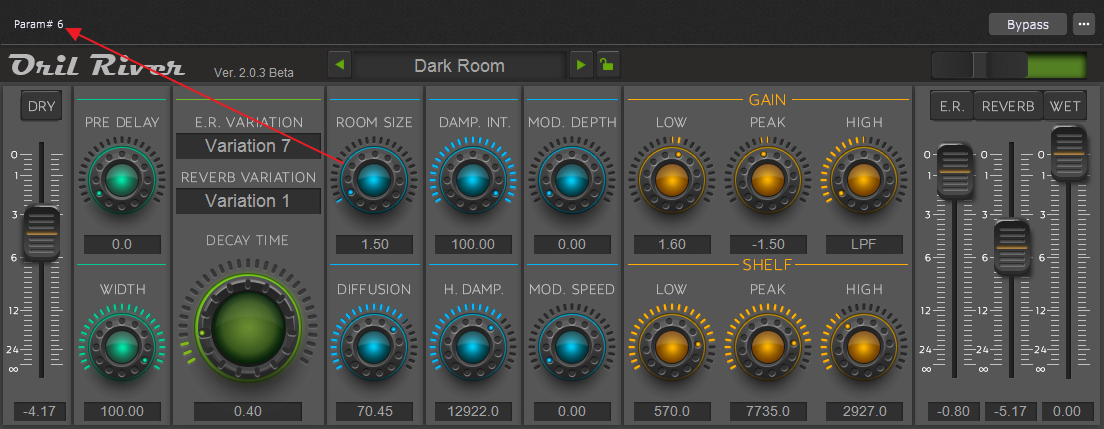
Move the desired control (i.e. the Gain knob) and you'll immediately see its parameter number (indicated with the red arrow). Repeat the same steps for the OrilRiver plugin and note the parameter number of, for example, the Room Size knob (indicated with the red arrow):
Click on the Window menu, select the Show Current Rackspace Script Editor menu item and insert this code:
Var
Knob1 : Widget
Nick, Oril : PluginBlock;
On WidgetValueChanged(newValue : double) from Knob1
SetParameter(Nick, 0, newValue)
SetParameter(Oril, 6, newValue)
End
Now click on the Compile button:
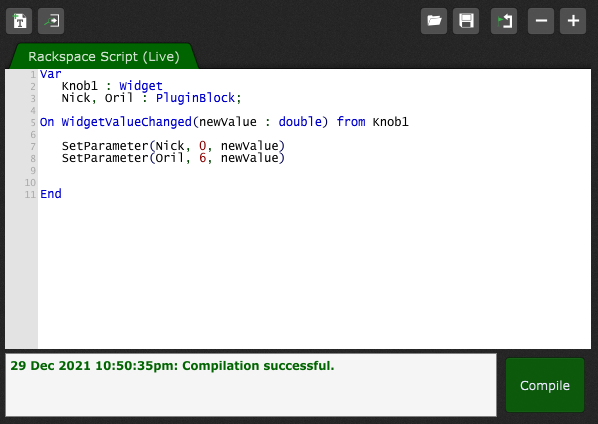
If your script contains no errors, you'll receive a note that the compilation is successful.
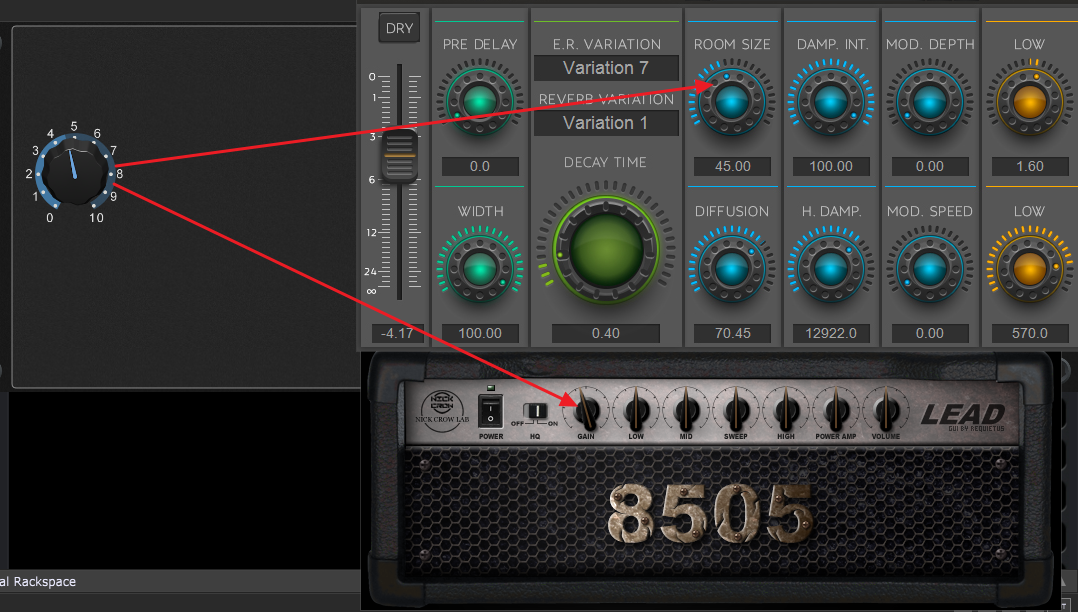
Open the Panels view and move the widget; you'll notice how the chosen parameters change accordingly:
Let's take a look at the code.
In the Var section, you simply declare your variables based on the GPScript names you had previously given to them and specify their type (i.e. Knob1 : Widget or Nick, Oril : PluginBlock). If you want to control more parameters from different plugins, simply give those plugins the corresponding GPScript names and declare them in the Var section.
GPScript language is event-driven. The next section "On WidgetValueChanged(newValue : double) from Knob1" tells the compiler what event to monitor and on which widget. The newValue parameter is updated with the new value every time you move the knob (i.e. the widget value changes). Any function in GPScript that run when a certain event occurs is called a callback (another example is On Activate which runs when a rackspace activates).
The section of code inside the callback simply tells the compiler what to do when the event is detected; in this example, we want to set the parameter in the plugin with the name "nick" and on the parameter number "0", with the value "newValue" (the current value of the knob widget).
This basic demonstration of GPScript provides you with virtually unlimited flexibility to create sophisticated setups for your live performance.
If you are interested in learning more, join our Community to see how users incorporate GPScript into their setups.