To create a new song, if you do not already have a suitable rackspace to use, first create a layout in the Wiring view (refer to this chapter for more information on how to insert and connect your plugins); in this blog article you can see the example layout, or use one from the built-in templates.
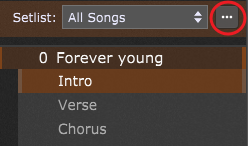
Afterward, switch to the Setlist view and press Ctrl+Shift+N (or Cmd+Shift+N on Mac) or choose the Create New Song... menu item from the Setlists contextual menu. The Song Properties dialog appears; enter a name in the dialog that appears (i.e. Forever young) and click on the OK button. Notice that three song parts are automatically created for your song - Intro, Verse, and Chorus:

You can easily create new songs/song parts, rename or remove the existing ones, and perform other operations by clicking on the "More..." button (indicated with the red circle) or by right clicking on a song/song part; learn more about supported operations in the Manage setlists contextual menu chapter. Also, rearrange song parts by simply dragging them to positions you prefer.
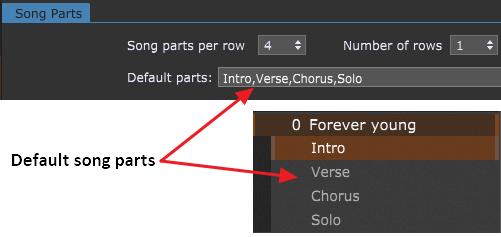
Note: you can set the default parts created with a new song by choosing Setlist/Song Settings from the Options menu:

In the screenshot above, the Solo song part has been added (make sure to separate song parts with the comma or the semicolon).
The new song is also added to the All Songs list.
Ways to switch to a song part:
- Click on a tile in the part bar at the top of the Setlist/Song view.
- Click on the part name in the Setlist browser.
- Select a song part with a MIDI program change message assigned in the Song Part Properties dialog.
- Use the up/down arrow keys on your computer keyboard to select the song part above/below the current one respectively.
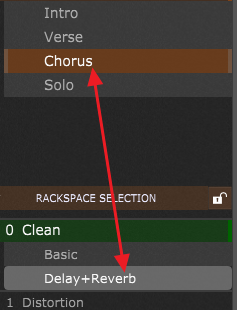
Click on the variation you want attached to the song part to select it:

Note: click here to find out more about how song parts and variations are related.
When you select a song, the first song part will be active. Note that rackspace variations have a different behavior (if explicit PC numbers are not used in variations the last selected variation will be called when using the PC for that rackspace).
Gig Performer supports the ChordPro lead sheet file format with both an editor/viewer to enable creating, editing, and viewing ChordPro documents, and the ability to attach a ChordPro document to a song, so that selecting the song opens the ChordPro document to put the chords and lyrics right in front of you. Refer to the ChordPro chapter for more information. Make sure to also check this blog article How to use ChordPro files in Gig Performer for detailed guidelines.
Make more songs and song parts: create new songs, song parts and assign ChordPro files to your songs by following guidelines above.
Note: although a song can have as many parts as you need, you can only assign MIDI events to the first 24 parts. Click here to learn more.
In the next chapter you will learn how to create a setlist from your songs.