How to use ChordPro files in Gig Performer

How to use ChordPro files in Gig Performer

In this article: learn more about ChordPro files, how to find them or create your own, and how to use them in Gig Performer.

What is ChordPro?

.
ChordPro
is a file format that allows you to represent lyrics and chords using text markup that can then be displayed in a form suitable for performing musicians.
Although initially intended for guitarists, it can be used for all kinds of musical purposes.

Unlike other audio plugin hosts, Gig Performer supports the ChordPro lead sheet file format for storing and presenting lyrics and chords for a song (see this comparison chart to see how Gig Performer compares to other audio plugin hosts).

ChordPro files can be created, edited, and imported into Gig Performer. In this article, you’ll find out how to link a ChordPro file to a song, so that the lead sheet opens automatically when the song is selected.

Find out more about the ChordPro format here.

How to find ChordPro files?

.
There are many chord-oriented web sites for musicians that support ChordPro files; an example of such a web site (that also Chordpro.org recommends) is Chordie.com – a searchable web site with a vast collection of ChordPro notated songs:

Chordie web site, ChordPro, Gig Performer

When you find the desired song, simply select the ChordPro view:

Chordie website View ChordPro format, Gig Performer

Click on the View button (1), and select Chordpro (2). You can tell that a file or the display of a song is in the ChordPro format by observing directives and chord representation (3). Read more about ChordPro directives here. 

Select all the text, copy the selection, and then either:

a) paste it directly into the Song Lyrics/Chords Editor in Gig Performer and save directly from there (refer to the Import ChordPro files to Gig Performer section in this article).

b) or open your favorite text editor, e.g. Notepad (Windows) or TextEdit (Mac), and paste the selection into the editor window (if you want to import this file later):

ChordPro File, Notepad edit
Afterward, save the file.

Note: any text editor can be used to create and maintain ChordPro files. These files may have arbitrary types (extensions), and common filename extensions for ChordPro files are .cho, .crd, .chopro, .chord and .pro. Gig Performer will also list and import the most common .txt file extension, so you don’t have to change the extension of your ChordPro files that you save with your editor. 

If you can’t find a song on Chordie, simply google for it and include the “chordpro” keyword in your search.

You can also copy any song with chords and format it into the ChordPro format using simple ChordPro directives. Refer to your existing ChordPro files to match the formatting properly.

Create a song in Gig Performer

.
First, create rackspaces for your songs and song parts. In the next section, ChordPro files will be connected to your songs.

Let’s get started! Launch Gig Performer and then switch to the Back view to create a rackspace for your song:

Simple Clean Guitar Rackspace for ChordPro

 Then switch to Setlist/Song view and create a new song:

Setlists, Create a New Song

Click on the More… button and select Create new song.

Setlists, Define Song Name

Enter the name of your song and click on the OK button. 

Your new song is created; three song parts – Intro, Verse, and Chorus – are automatically added to your song by default:

Setlists, Create New Song Parts

You can add more songparts such as a prechorus and a solo for your song:

Setlists, Song Part Name

You can rearrange your song parts by dragging them to different positions:

Setlists, Song with song parts

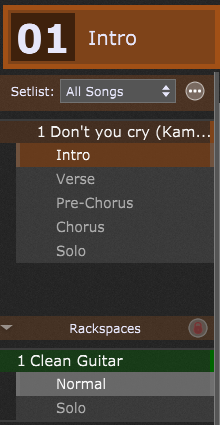
Note that you can assign different variations to each of your song parts (Normal, Solo, etc.).

Import ChordPro files to Gig Performer

.
All set: you have downloaded or created your own ChordPro file and created a song in Gig Performer. Now it’s time to check out Gig Performer’s support for ChordPro files.

Note: you need to place all your ChordPro files in the Gig Performer Song Lyrics-Chords folder. This folder is located in your Documents folder by default (Windows users: C:\Users\UserName\Documents, Mac users: /Users/Username/Documents). The location of the Gig Performer Song Lyrics-Chords folder can be changed under the Options -> Setlist/Song Settings -> Lyrics/Chords (ChordPro).

If the selected file is not within the specified chords folder, you’ll get an error message such as this one:

File not in the root lyrics folder

Click on the Window menu and select the Song Lyrics/Chords… menu item: 

Song Lyrics Chords Editor, Chordpro

Click on the Songs button to display All Songs and then click on your song; click on the Open button to load your ChordPro file:

Open ChordPro File in Gig Performer

Your file should now be loaded. You can either view it:

Chord Editor in Gig Performer, View Chordpro files

… or click on the Edit tab to modify it:

Chord Editor in Gig Performer, Edit Chordpro files

Note: Gig Performer will automatically remember and auto load this ChordPro file when you switch to this song again.

If you double click this song in the Setlist view to open the Song Properties window, you can see that this ChordPro file is linked to the song:

Song Properties, ChordPro is linked to a song, Gig Performer

Gig Performer provides many features when it comes to using ChordPro files, such as transposition, making all chords flat or sharp, etc. Make sure you review these settings in the User Manual for Gig Performer 3.

Note: In Gig Performer 4, the Song Lyrics/Chords Editor supports automatic scrolling to song parts. Learn more in Gig Performer 4 User Guide

You can also use PDF files with Gig Performer; make sure to check out this blog article: Converting PDF files for use with Gig Performer ChordPro.

Make sure that you also visit our Community and share your feedback. 

If you like this article, please share it.

.
Own the Stage® and enjoy Gig Performer®!

Nemanja Pudar


Scaling Curves


Scaling curves allow you to control the shape of the output of a widget or convert an incoming note velocity to a new velocity. Various predefined curves are available and they can be tweaked as necessary. You can also just draw your own curve as well to achieve the effect you require.


MIDI File Player Plugin


You can load up to 128 MIDI song files in a single plugin instance. Switch from one song to another, mute tracks and/or change their channel numbers. Tempo can be controlled by individual songs or you can use the global tempo and tap tempo to control the BPM interactively.


Favorites and Presets


Create a sound by placing and interconnecting your desired plugins, such as a synth, some effects and perhaps a mixer. Select them all and then save the selection as a named favorite. The favorite will subsequently show up in all plugin insert menus, making it easy for you to recreate that configuration whenever you need it again. This feature is also very powerful for creating your needed sounds on your studio computer and then transferring them to your touring laptop.


Probabilistic Sound Designer


Parameters you select in an open plugin are captured into the Probabilistic Sound Designer dialog window. When you click Randomize, you're only adjusting those selected parameters. Each entry in the PSD dialog has a curve but unlike widgets where the curve controls scaling, in the PSD the curves are used to define the probability of particular values being selected. Make sure the filter cutoff never gets too slow so as to block all sound. Perhaps adjust the max range of the VCA attack parameter so that the sound doesn't have too much delay. Constrain the octave ranges of the oscillators, perhaps ensuring that 1/3rd of the time we select 8' and 2/3rds of the time we select 4'. The possibilities are endless.


More Widgets


Numerous new widgets are included in Gig Performer - a new sustain pedal, plastic knobs, drum pads and more colored sliders. Shapes can be colored with different borders and fill colors and morphed from rectangular to circular. Your creativity is now the limit to creating fabulous front panels in Gig Performer.


MIDI Message Helper


Select MIDI devices by name. Choose the MIDI message type and adjust the appropriate parameters for the specific type


Layout management


Gig Performer supports arbitrary resizing. Layout your widgets the way you want - resize the main window and the widgets will grow or shrink as necessary to maintain the same interrelationships. No matter what size screen you have, your front panels will still be neat and usable.


Undo Support


If you move your widgets around and/or resize them, or even delete them by mistake, the Undo facility will correct your mistake. Minor moves to a widget by mistake will no longer spoil your design


Plugin Channel Count


Some plugins support a large number of outputs and they depend on the traditional channel strip to control how many ports should be available.   When you only need a stereo pair, it is convenient not to have a large horizontal block. In Gig Performer, the number of available ports  is controlled by the channel count override, which can be applied to individual plugins and will be remembered when the gigfile is reloaded or if the plugin is saved as a favorite.


Input muting and output fading


Rather than a single audio length tail, Gig Performer 4 gives you the ability to control input muting and output fading separately. Input muting controls how much time it takes for audio input to be silenced when you leave the rackspace. Output fading controls how much time will be taken for audio to fade out when you leave the rackspace.


Faster Plugin Finder


Instead of searching through menus of perhaps hundreds of plugins (you know who you are!), the Quick Plugin Finder makes it easy to find the plugin you need by simply typing partial strings. For example, as shown here, to find the Modartt Pianoteq 7 plugins, it's enough to type pia mod 7 (in any order, by the way)  to restrict the list of available plugins to those matching your query. The Quick Plugin Finder also knows about manufacturers, presets and favorites.


Touch Friendly Input


Any entry field can be changed by either dragging your mouse (or finger) up or down, or by using the large popup touchpad where you can just tap on the squares to enter a value. The large popup keypad also does validation so you can't enter an invalid value. You can also just tap the BPM field to pop up a larger view where you can quickly change tempo, tranpose, trigger Tap Tempo and enable Ableton Link, the last allowing you to synchronize Gig Performer with any other application that also supports Ableton Link.


New Tuner Display


The tuner view makes it easy for guitarists to quickly check and adjust their tuning. You can toggle into the tuner view from any other view and toggle right back as soon as you're done. All output will be silenced automatically while you're in tuning mode. You can adjust the concert reference pitch from its default of 440 Hz to suit your own needs. The tuner view fills the entire screen so you can easily see it from a distance.