Thank you for your interest in Gig Performer Essentials.
Please enter your name and email address in the field below. Links for both Windows and macOS downloads will be sent to you.
By providing your email address, you will be subscribed to our newsletter from which you will be able to unsubscribe at any time. Make sure you use a valid e-mail address and if you don't receive our e-mail, please check your spam folder.
Dialog window
Gig Performer® 14-Day Free Trial
Thank you for your interest in Gig Performer.
Please enter your name and email address in the field below. Links for both Windows and macOS downloads will be sent to you.
By providing your email address, you will be subscribed to our newsletter from which you will be able to unsubscribe at any time. Make sure you use a valid e-mail address and if you don't receive our e-mail, please check your spam folder.
In this article you will learn how to stream multiple backing tracks using Kontakt.
Gig Performer has a very powerful Streaming Audio File Player (SAFP) that is designed to give you immediate access to thousands of MP3, WAV, FLAC, AIF and other audio files without using any significant amount of RAM. It also supports a Timeline with markers and actions to allow you to perform all kinds of automation. However, if you need to play a song with each instrument on a separate track (so as to adjust or mute certain tracks), then the SAFP may not your best choice. Of course, you can use multiple SAFP plugins in a rackspace and sync them together.
However, several samplers, including Kontakt from Native Instruments does have a way to do this, although it is not immediately obvious how to go about it. In this tutorial, I will explain the process using, as an example, the individual instruments of a small orchestra that I have been putting together for use in an upcoming theatrical performance of Pink Floyd’s The Wall.
While we will (of course) use our own live performance host, Gig Performer, the techniques described here should be applicable to any plugin host.
What is Kontakt?
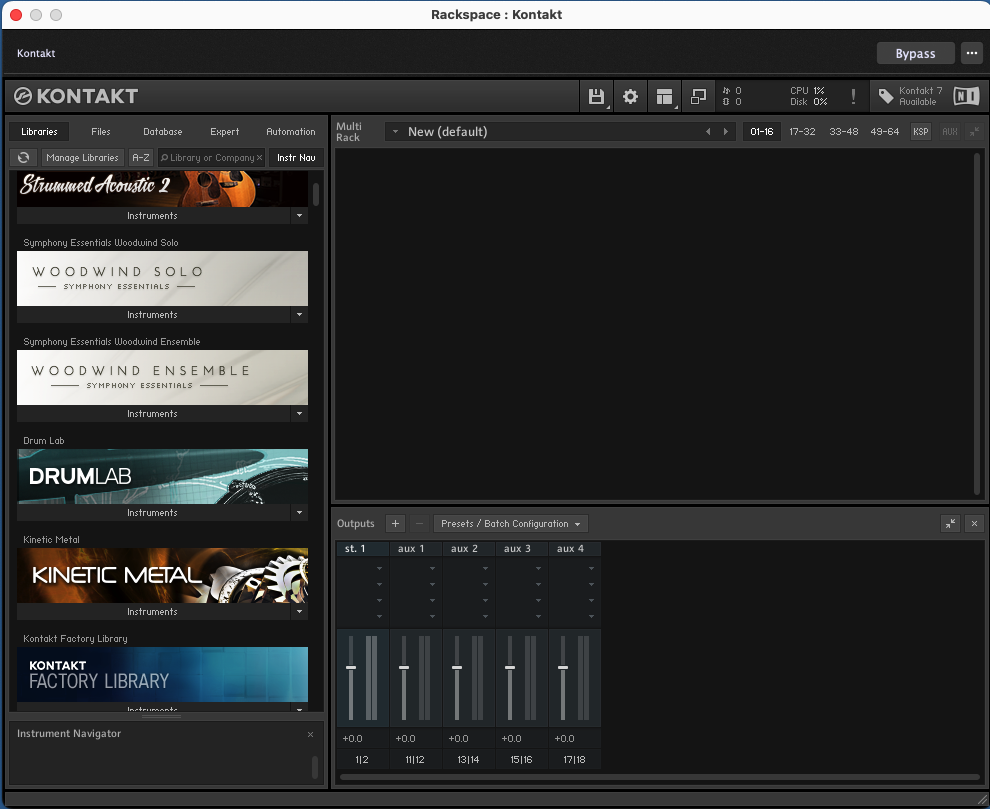
Kontakt is a plugin designed to play back samples (audio wave files), typically pitched sounds (though of course percussive sounds and sound effects are fine too) mapped to individual keys that can be played from a MIDI keyboard or by pressing buttons in Gig Performer. If you insert Kontakt into a Gig Performer rackspace and open its editor, you will generally see something like this:
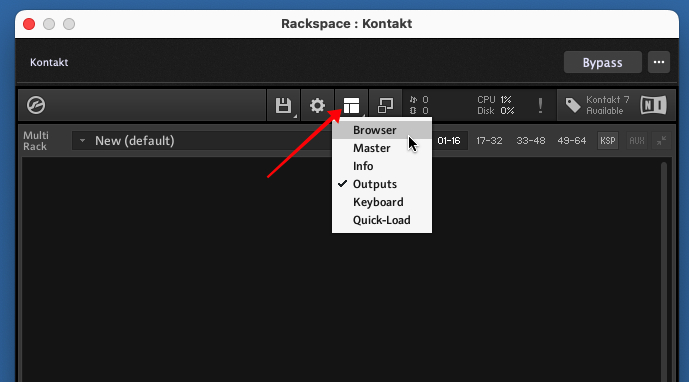
The area on the left is a browser that gives you access to numerous libraries (some come with Kontakt, others can be added) of sounds. Since we’re going to use our own sounds, we can ignore the browser. In fact, we can hide it by clicking on the little window pane icon and deselecting “Browser”:
Preparing your tracks
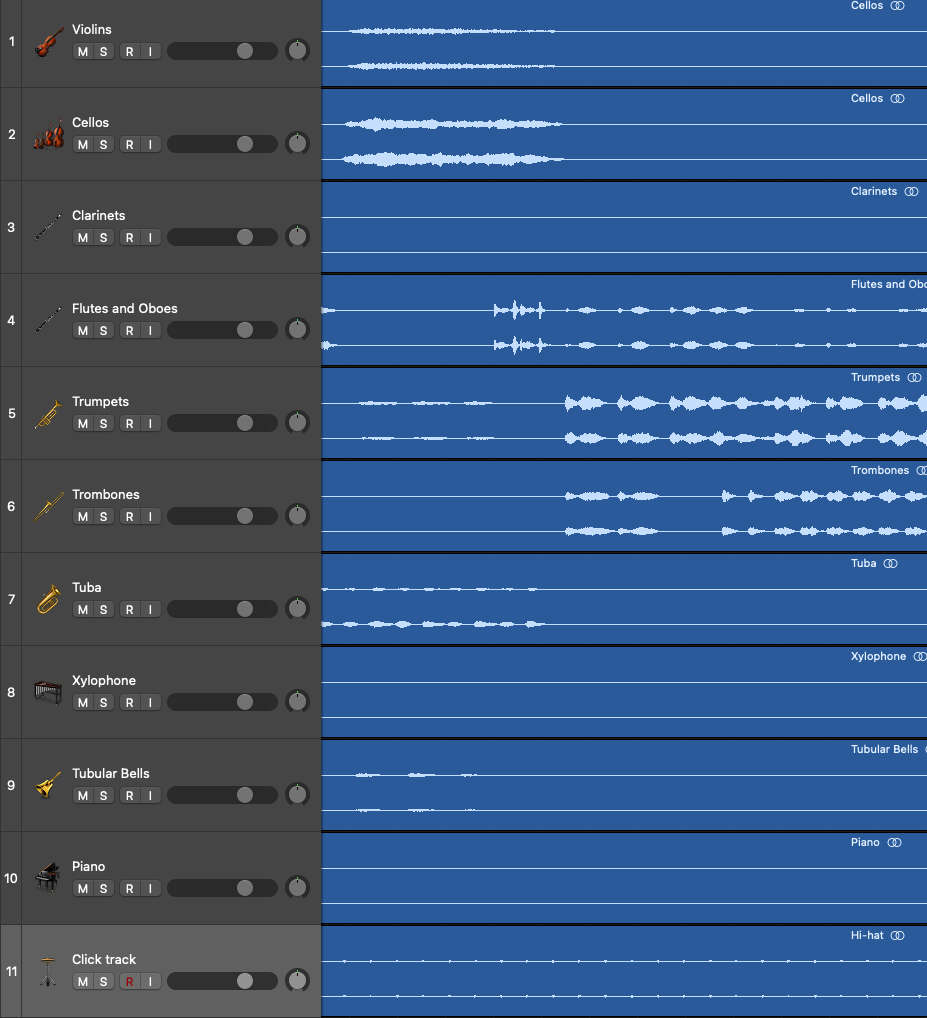
I’m going to assume that you have already created your backing tracks using a DAW such as Logic. Here’s a small section from The Trial with all the various instruments.
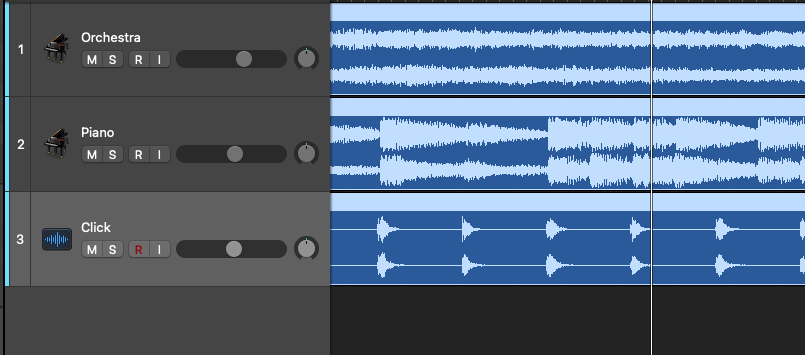
For the purpose of this tutorial, I’ve bounced all the orchestral parts to a single track and so we will just have three backing tracks consisting of the orchestra, the piano and the click track.
Let’s listen to this brief segment.
You can hear the orchestra, piano and the click track. In practice, if I’m available to play the piano part, then we will want the piano backing to be turned off but I’ll want to hear the click track in my in-ear monitor. If a pianist is not available, then we will play the orchestra and the piano parts but not the click track unless the singer wants the click track.
Bringing the tracks into Kontakt
There are in fact two different ways to bring multiple tracks into Kontakt
Groups
Separate instruments (Kontakt speak)
We are going to use separate instruments, mostly because it’s easier that way.
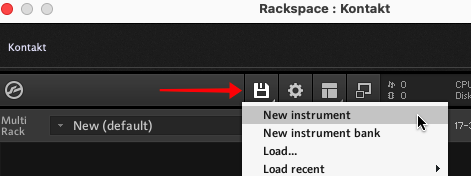
Step 1. Click on the floppy disk icon (yeah, I know) and click on New Instrument
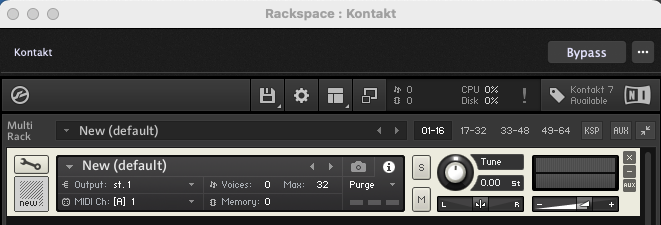
A new instrument will be inserted.
You can type over that “New (default)” title with a more useful name – so we’ll call the first one Orchestra
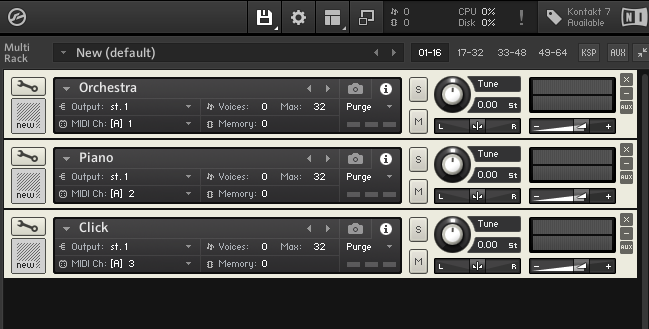
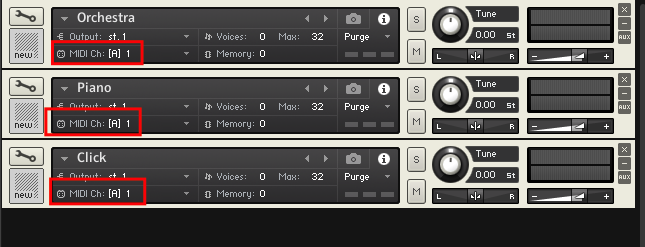
Repeating step 1, go ahead and create two more instruments and give them appropriate titles
Before we go any further, let’s deal with MIDI channels. By default, when you insert a new Kontakt instrument, Kontakt will automatically increase the MIDI channel so that each instrument is on a separate channel.
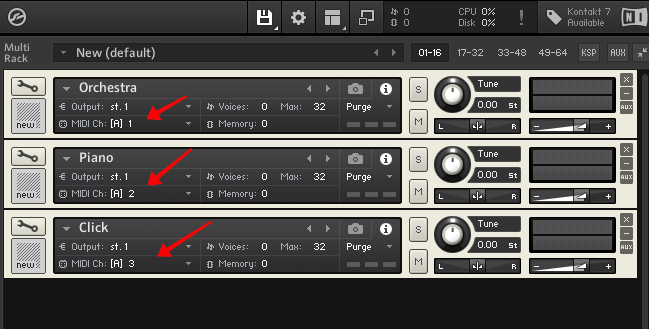
However, we need all three instruments to respond to the same MIDI channel so we will set the second and third instruments to also use channel 1. You can do this simply by clicking on the MIDI channel field of each instrument and selecting MIDI channel 1.
Step 2. Inserting the audio files into each instrument
Let’s do the orchestra first.
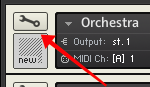
Click on the wrench icon on the top left of the first instrument.
This will open up the instrument so that you can add samples (audio files) and perform other operations such as looping, inserting effects and so on, none of which are relevant for this tutorial.
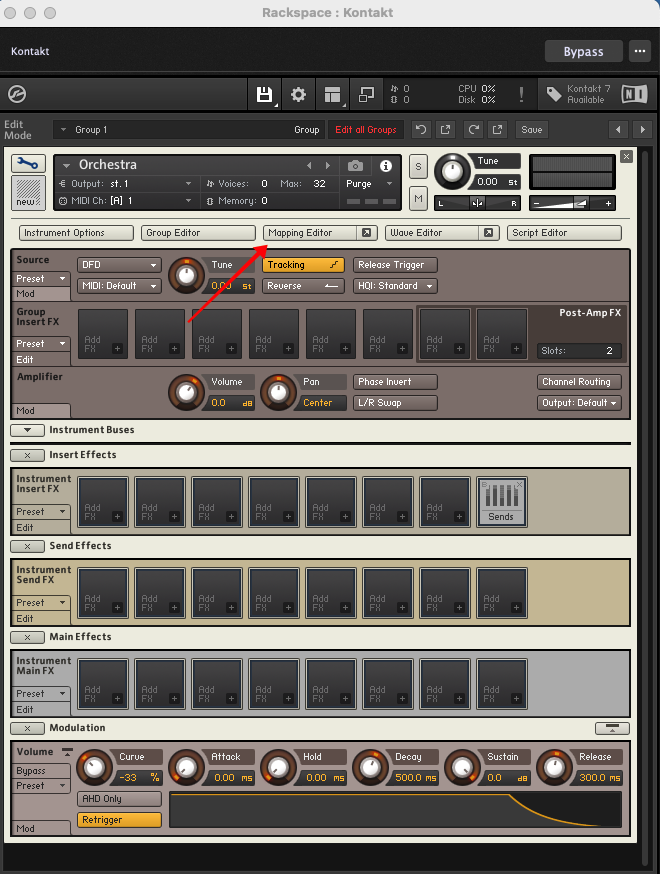
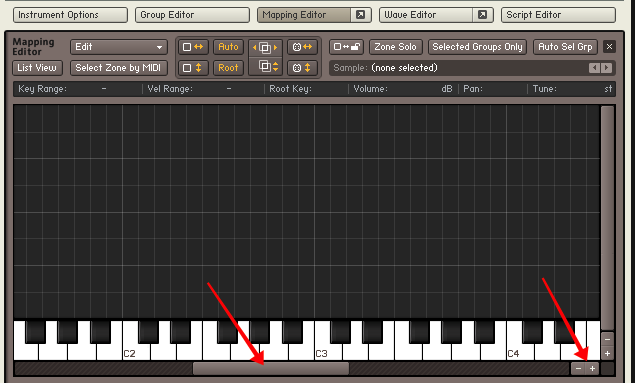
Right now we are only interested in the Mapping Editor so click on that to open a new view into which we can drag samples.
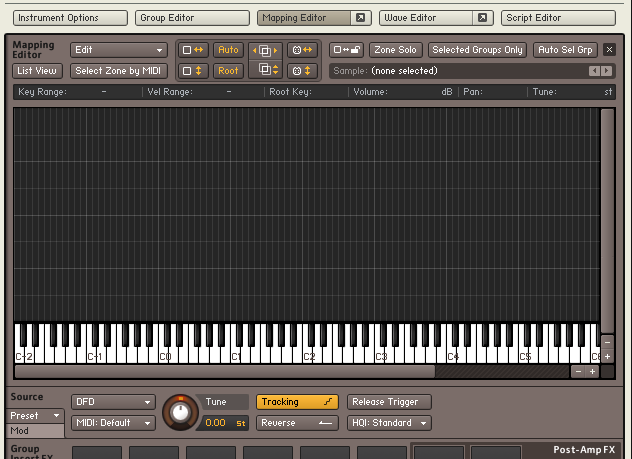
At the bottom you can see a keyboard with the octaves marked (C1, C2, C3, etc). Click on the PLUS sign on the right a couple of times to zoom in and move the horizontal scrollbar so that C3 is clearly visible. We are going to map each sample (orchestra, piano, click) to C3 on each instrument.
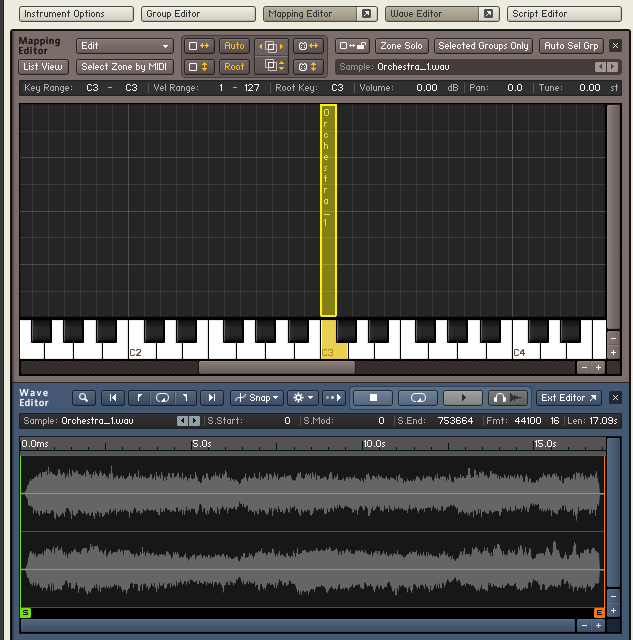
Now drag the orchestra sample into the window and place it on the C3 key.
If you click on the Wave Editor button (to the immediate right of the Mapping Editor button, you can see the sample waveform
If you’re doing this with Gig Performer, it’s easy to confirm that this works by routing the output of the first two Kontakt channels into your audio interface, preferably through a mixer block to make sure it’s not too loud.
Just click and hold down the mouse on the C3 key in the Kontakt editor to hear the audio.
Step 3. Adding the other instruments
Now here is where the fun starts! Click that wrench button again to close the instrument editor so that you can see all three instruments again as shown earlier in this article.
Then click on the wrench button for the second instrument (Piano) and repeat the steps that you followed for the first instrument, but this time dragging in the audio file that you want to play in sync. Make sure you place the new sample on the same key, for example on C3 as we did for the first instrument.
Close the second instrument and then do the same thing for the third instrument. In fact, you can do this as many times as you need for individual tracks.
Step 4. Testing from your MIDI controller
If you haven’t already, add a MIDI In block to the wiring view and connect it to Kontakt
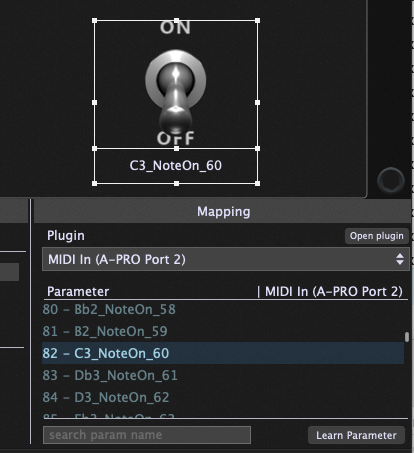
Now, if you hold down middle C, you should hear all three instruments playing together. Releasing the key should stop the sound. As a brief aside, you don’t have to use a key on your MIDI keyboard to trigger these. You could also put a button or toggle widget on the rackspace panel and map it to the C3 note parameter of the MIDI In block and then click on that toggle (or map to some button) to start and stop the sound. Here is what that mapping looks like.
Step 5. Separating the sounds to different outputs
You may have noticed that all the instruments in the Kontakt plugin are sending audio out through the first stereo pair of the plugin block. But for many purposes, we may need the different instruments to be routed to different audio channels. For example, you might want add different effects to the different instruments. Or more importantly, one of your instruments might contain a click track, possibly even with vocal prompts. You do not want that instrument to go to front of house – rather you just want it to go to members of the band.
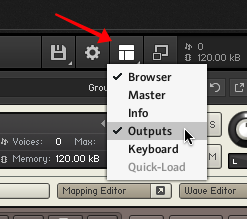
To accomplish this, we need to arrange for Kontakt to send the output of each instrument to separate pairs of audio output channels. Fortunately, there is a very easy way to do this. Let’s take a look at the Outputs section of Kontakt. (NB, if you don’t see an Outputs section, click on the Window Pane icon and make that Outputs is checked)
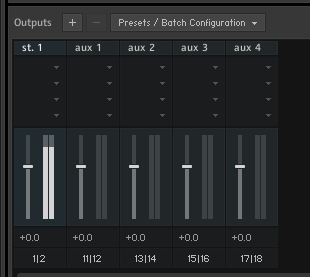
Once the Output section is visible you should typically see a stereo output channel and a few aux channels. In the screenshot here, all the instruments are playing but the output from each of them is coming out through the first stereo pair.
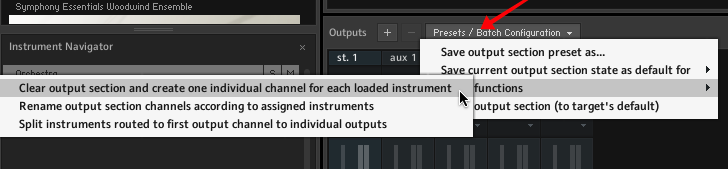
Click on the Presets/Batch Configuration button and from “Batch functions” select “Clear output section and create on individual channel for each loaded instrument”
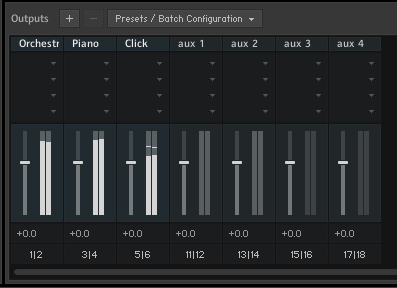
After you do this, there should now be multiple channels, one for each of the instruments, with the aux channels to their right.
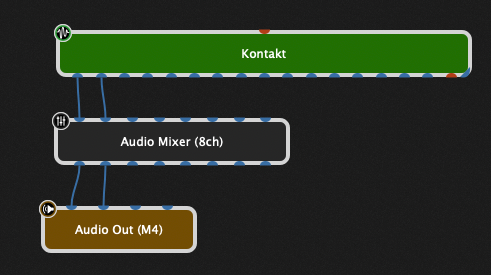
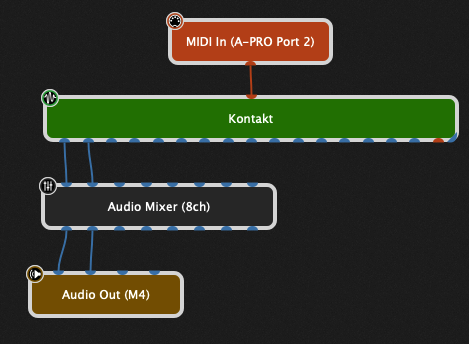
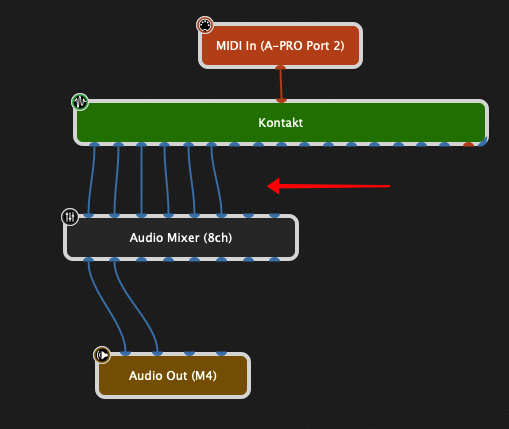
Each channel has the name of the instrument in its header. Finally, modify your routing in the Gig Performer wiring view so that each stereo pair of channels from Kontakt goes to separate input channels in a Gig Performer audio mixer block. You can then adjust the volumes, route different channels to different outputs in your audio interface and so forth.
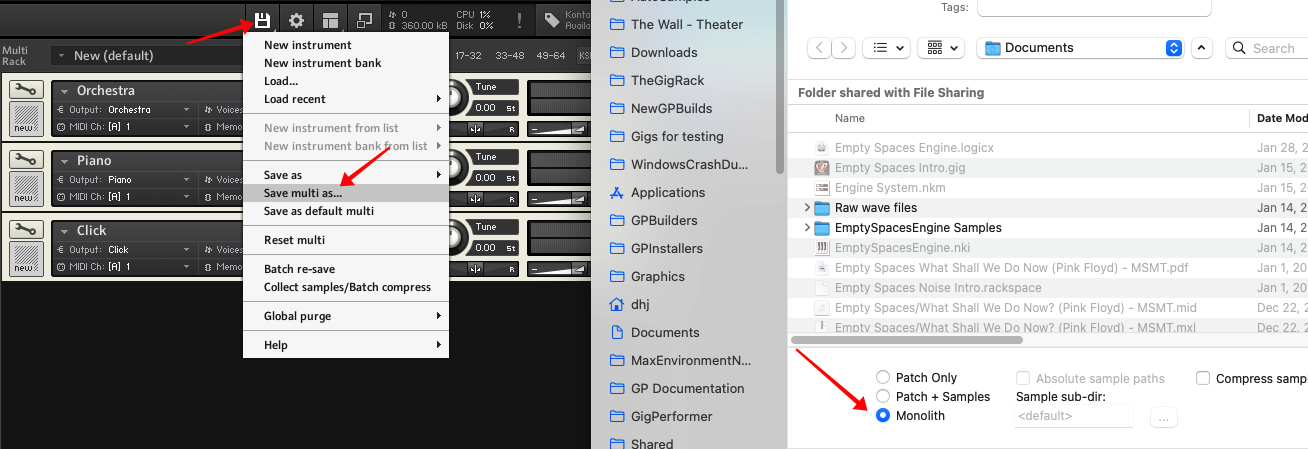
If you have followed the steps above, you should now be able to construct a set of backing tracks in a Kontakt plugin and use them wherever you want. By the way, you might want to consider saving all those instruments along with their samples. They are saved into a single monolithic multi-instrument container, making it much easier to move entire sets of tracks around.
We hope this tutorial will be of use to many of you as you prepare your gig files for performance.
We use cookies to ensure that we give you the best experience on our website. If you continue to use this site we will assume that you are happy with it.