Thank you for your interest in Gig Performer Essentials.
Please enter your name and email address in the field below. Links for both Windows and macOS downloads will be sent to you.
By providing your email address, you will be subscribed to our newsletter from which you will be able to unsubscribe at any time. Make sure you use a valid e-mail address and if you don't receive our e-mail, please check your spam folder.
Most players have run into this problem. Over time, we create lots of sounds for different songs. Further, we spend time meticulously tweaking a plugin to get it just right and then save a plugin preset. Then, a few months later, you need that sound, but wait….what plugin did we use for it?
Or maybe you have created five different variations of a string sound, using different plugins for some of them. A bit later, you know you need that “Soft Symphonic” sound, but with which plugin did you create it?
But wait – it gets worse. There’s that other sound where you layered three different plugins and ran them through various effects. Some may conceptually use “Inserts” and others conceptually use “Sends” and the volumes and balances have been set up just right. How do I get it back and, oh year, I’m in a hurry.
Gig Performer has two features to help you with these needs:
1. GP User Presets 2. Favorites
Let’s first take a look at GP User Presets. .
The unified GP User Preset management
. Most plugins have their own preset management. They tend to work differently, certainly if the plugins are from different developers. However, Gig Performer offers its own solutions for managing presets and adds some powerful workflow shortcuts.
Saving a GP User Preset
If you open the editor for any plugin, there is always a header area with two buttons on the right edge.
. Click the rightmost button (displayed with three dots). It brings up a new menu and the second item lets you save the current sound of the plugin as a GP User Preset. As we will see in a moment, it actually does a little more than that.
. Suppose you have just created a nice new pad sound for your romantic songs. Let’s call it “Soft Romance Pad”:
. In the example above, I happen to be using a plugin called the Legend which emulates a Minimoog but with some extra features such as polyphony and some built-in effects. When you save the preset, several things will happen:
First of all, the preset will be saved in a subfolder called Legend, i.e. the name of the plugin. The parent folder will be named after the manufacturer of the plugin and that folder lives inside the Presets subfolder of your Gig Performer documents folder.
. You should always respect this hierarchy and never try to save a preset to a different folder. You can, however, absolutely create new sub-folders if you want to further classify your presets. We’ll see a benefit to that as well below.
How to insert a saved preset
Secondly, that preset will show up automatically in the main popup menu that appears when you right-click inside the Wiring view. You use this menu to choose a plugin you want to use. It appears in a section called User – GP User Presets
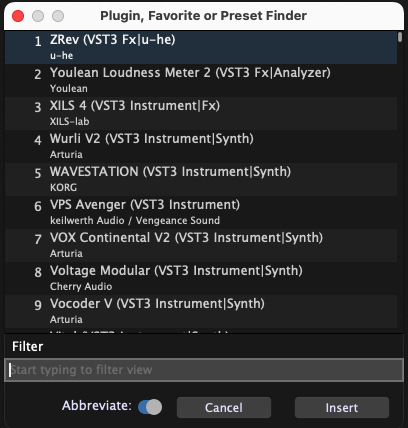
. Of course, with this popup menu, you still need to know which developer and plugin to select to find the preset. However, when you bring up the Quick Plugin Finder, (press CMD-P), things get more interesting. Here’s what that dialog looks like when you first open it.
. As you can see, it displays a list of all your plugins. But now, start typing the word, “romance” into the filter area at the bottom
. As you can see, the list has been reduced to one item, your saved preset. It also conveniently shows you the name of the plugin and the developer. If you now insert that preset, Gig Performer knows that an instance of the Legend is needed. So, it will automatically create and insert an instance of the Legend into your wiring view and set it to the Soft Romance Pad sound, ready for you to use.
By the way, as an aside, you may prefer to use a different application to search your file system for presets. For example, you may use Spotlight on macOS or Copernic on Windows. In this case, you can just drag the found file from the Finder (Mac) or Explorer (Windows) into Gig Performer’s Wiring view. Again, the appropriate plugin will be created and set to the desired sound.
By judicious naming of your presets, perhaps even including keywords in them, you can quickly find the sound you need. You don’t have to remember which plugin you used to create the sound.
Incidentally, GP User Presets aren’t just for sounds and effects. Suppose you have configured a MIDI In block with certain channels remapped or blocked, or perhaps some MIDI event blocking, transpose or splits. You can save that as a GP User Preset to quickly reuse it again in the future. .
Favorites
. The Favorites mechanism extends the concepts of user presets to apply to collections of interconnected plugins. Suppose you have created a really nice piano with an added phaser, some EQ so the sound fits into a band context and perhaps a reverb effect implemented similar to using Send.
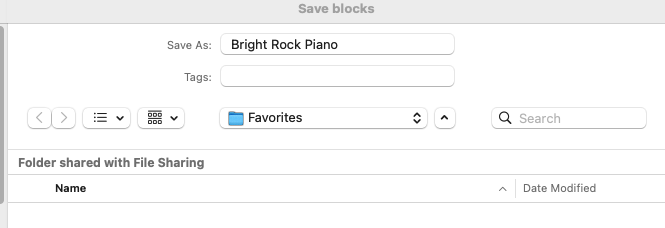
. Select the blocks, right-click and click on Save as Favorite…
. I am going to save it with the name, Bright Rock Piano
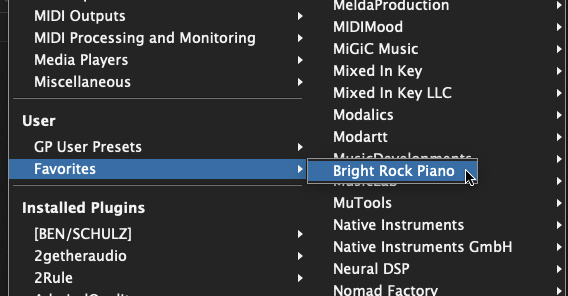
. After you have saved it, that favorite will now show up in the popup menu…
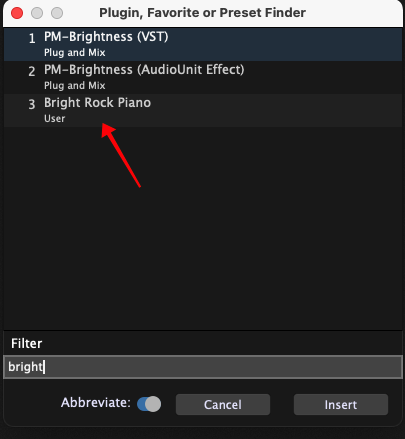
. …and in the Quick Plugin, Favorite or Preset Finder.
. As with GP User Presets, you can just insert a favorite into the Wiring view. As a result, all the plugins will be inserted, connected together and with the right sound, ready to use.
We use cookies to ensure that we give you the best experience on our website. If you continue to use this site we will assume that you are happy with it.