n this article, we will show you how to leverage other DAWs’ proprietary plugins from Gig Performer.
.
Introduction
.
Many DAWs come with their own collection of proprietary plugins. As an end user, I generally never use proprietary plugins because doing so locks one into a particular eco-system. It also makes it difficult to collaborate with other musicians who have a different DAW.
Nevertheless, with most DAWs, it can be done and generally just requires a little bit of preparation. Conceptually, we are going to view the DAW as if it was a physical external multi-timbral hardware synth. We will send MIDI messages into it from Gig Performer and we will receive the audio generated by the DAW back into Gig Performer.
Turns out there are quite a few ways to do this, depending on your needs and your platform.
.
Using other DAWs’ proprietary plugins in Gig Performer
.
.
GP Relayer
.
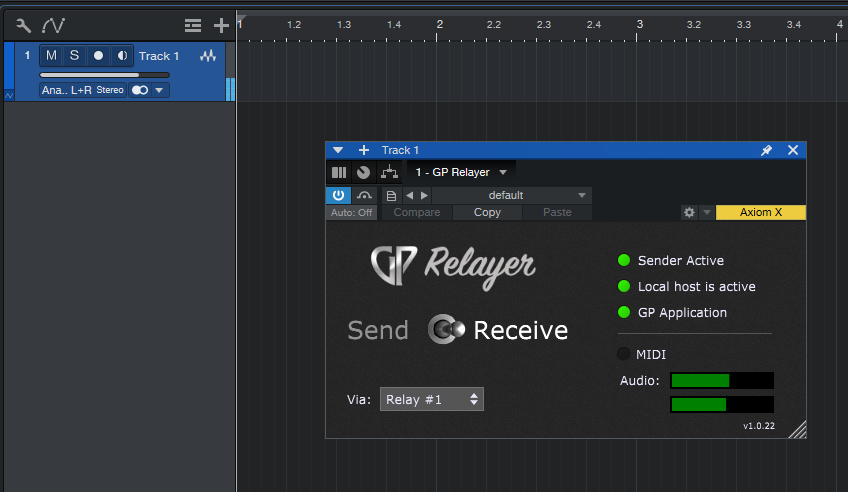
GP Relayer, is an exciting new plugin introduced in Gig Performer 5. It provides the easiest way to share audio and MIDI between Gig Performer and your favorite DAW. Simply place one or more of these plugins in your DAW one or more in Gig Performer, and you’re ready to seamlessly move audio and MIDI data back and forth.
You can directly record high-quality, low-latency audio from Gig Performer. Additionally, you can use other DAWs’ proprietary plugins and MIDI effects within Gig Performer.
Read this dedicated blog article to learn more and check out our tutorials for various DAWs.
If you happen to use an older version of Gig Performer, you can try the method mentioned below.
Virtual Audio Drivers
I will demonstrate how to leverage DAWs’ proprietary plugins using Apple’s Logic Pro and virtual audio drivers. I will explain the purpose behind each aspect of the setup. If you are using a different DAW, you will be able to find the equivalent mechanisms to achieve the same goals.
Mac users will need to download the free Blackhole virtual audio driver. If you are trying to do this on a DAW that runs on Windows, then you will need download and install both a virtual audio driver and a virtual MIDI driver (macOS already includes a virtual MIDI driver, known as IAC).
Incidentally, if you have an audio interface that has some spare I/O channels, you don’t need to use a virtual audio driver. Instead you could just route the output of your DAW into the input of Gig Performer using some patch cables or by creating a submix, if your audio interface has its own firmware mixer.
Note, if, rather than controlling Logic plugins from Gig Performer in a live situation, you are more interested in recording Gig Performer into your DAW, please see this blog article, which essentially describes the same process, only in reverse.
In the tutorial below, I assume you know how to perform basic Logic Pro X operations so I’m not going to include explanations on how to create channel strips, tracks or insert plugins, etc.
Setup (MIDI)
Open your Audio MIDI Setup application and press CMD-2 to show the MIDI Studio window.

Double-click on the IAC Driver icon to open up the IAC Driver Properties dialog

If there are no ports listed, press the + sign (1) to add a new port.
Check the Device is online (2)
Setup (Audio)
Download and install the Blackhole virtual audio driver
Press CMD-1 to show Audio Devices
You should see the Blackhole virtual audio interface as one of the entries

Configure Logic Pro
Configure MIDI
Deselect all MIDI input ports except the IAC port. This is a really important step. The reason we do this is because we do not want Logic to receive any inputs directly from your keyboards or other controllers. We only want Logic to receive MIDI events that are sent from Gig Performer. After starting Logic Pro, open the Preferences window, click on MIDI and then on Inputs, then unselect all inputs except the IAC Driver IAC Bus 1 and then close the Preferences window. (NB, if you see more than one IAC driver listed, make sure you select the white one rather than any of the grayed out entries).

Open the preferences window again and click Recording and then click on Recording Project Settings…

This will open a new dialog where you should check Auto demix by channel if multitrack recording. The purpose of this is to make sure that each MIDI channel targets a separate track in Logic. Otherwise, all instruments in Logic will play at the same time.

Configure audio
We are going arrange for all channel strips to send their audio out through the Blackhole interface.
Open the preferences window again, select Audio, then Devices and then select Blackhole 16ch as the output device. Also (mostly to avoid confusion), select None for the input device. Set the buffer size to 128. Click Apply changes and then close the Preferences window.

Note: you could have selected the aggregate device that we created earlier. However, if you do that, when you are selecting output ports for audio in Logic for each channel, you will need to make sure you use the correct offset since your physical interface outputs will be first.
Create some channel strips/tracks
For this example, I created two Software Instrument tracks, and inserted plugins into each of them. Now, here are the critical steps. The default MIDI Channel for every track is set to All. You need to change this and select single channels for each track, So set the first track to MIDI Channel 1 and the second track to MIDI Channel 2. This means that incoming MIDI events on channel 1 will go only to the first track and incoming MIDI events on channel 2 will go only to the second track.
Finally, make sure you record-enable both tracks (or alternatively, enable input monitoring).
At this point, Logic is now configured to respond to incoming MIDI events coming from the IAC MIDI port and sending audio into the Blackhole audio interface
")
Phew! We’re done configuring Logic Pro – now, on to Gig Performer
Configure audio devices
Open Gig Performer options and click on Audio I/O

Select your physical audio interface as your output audio device (mine is a Scarlett 18i20 USB) and select the BlackHole 16ch as the input audio device. Click Apply Settings and close the options window.
The audio generated from the soft synths in Logic will be available to Gig Performer though this port.
Setup a basic rackspace with MIDI routing to test everything
When you create a new rackspace, there will be a default MIDI In port called MIDI In (OMNI). You cannot use this port. This is because the MIDI In (OMNI) port receives input from all your ports, including the IAC port. So when we send MIDI events out to Logic Pro using an IAC port in Gig Performer (we’ll see how to do this in a minute), we do not want those events to come back into Gig Performer.
So right-click on the MIDI In (OMNI) port, select Change MIDI Input Device and then select your keyboard. In the example here, my keyboard is a Roland A-88 using Port 1.

When you’re done, you can right-click on the block again, this time select Caption… and rename the block to something more relevant. I called mine Roland A-88

Create a MIDI Out block
Now we want to route incoming MIDI events from the keyboard to the soft synth on Track 1 in Logic. Remember that that track will respond to events arriving on MIDI channel 1.
Press CMD-P to open the quick plugin finder and type “midi out” into the Filter field
You will see a list of all available MIDI Out devices, including the IAC Driver. Select that one and click the Insert button

You should now see a new MIDI Out block below the MIDI input block. Any MIDI events sent into that block will travel over the virtual IAC port, directly into Logic.
Click the orange port and drag a connection to the new MIDI output block

Now, if you play some notes on your keyboard, you should see the meters in Logic flashing as you play. However, you still won’t be able to hear anything.
Audio connection
(Make sure your amplifier volume is low the first time you do this – just in case!)
Remember that any audio generated by Logic is sent into the first two channels of the Blackhole virtual audio device. From Gig Performer’s perspective, such audio will arrive at the Blackhole Audio In block in Gig Performer. Since we just want to listen to that audio, just connect the first two audio channels together.

Now, when you play your keyboard, you should see Logic meters flashing and you should be able to hear the audio from Logic.
At this point, you should be hearing whatever software instrument you inserted into the first track in Logic.
So how do you listen to the second track?
Double-click on the MIDI Out block in Gig Performer to open its plugin editor. Change the MIDI Channel to 2 and make sure that Map all incoming MIDI to this channel is checked (by default it should be)

Now play notes again and you should hear whatever plugin you inserted into the second track in Logic.
That’s it!
OK – if you’ve made it this far, you should have a working configuration. You can now leverage all of Gig Performer’s capabilities to suit your needs.
Examples:
1) Layer both plugins together. Simply duplicate the MIDI Out block and set the MIDI Channel on one of them to 1 and to 2 on the other.

2) Splits – Play one plugin on the lower half of your keyboard and the other plugin on the upper half of your keyboard.
First, just duplicate the MIDI In plugin (associated with your keyboard)

Then, double-click on each MIDI In block (one at a time) and adjust the keyboard range that you want to use. Optionally adjust the Transpose

3) Insert a reverb effect for the audio coming in from Logic

We’re done.
Hopefully, the information above will help you to start using DAWs’ proprietary plugins from Gig Performer in a live situation.
Enjoy Gig Performer.
