In this guest article written by Alexander (@tripleB) you will learn how to use OnSong with Gig Performer.
Intro
.
As we have seen in another blog, it’s easy to add a SetList / Songbook app to Gig Performer. This article describes the usage of OnSong on an iPad along with Gig Performer running on a MacBook Pro.
Originally, I used OnSong standalone with my Kurzweil Forte SE to have some cheat sheets, song texts etc. and of course to navigate through my needed patches in a setlist order. So, I can prepare my setlists based on existing songs offline and don’t need to touch any of the HW / Gig Performer stuff during a show.
With the transition to Gig Performer (with a short stop at MainStage) my current rig looks like this (currently at home):
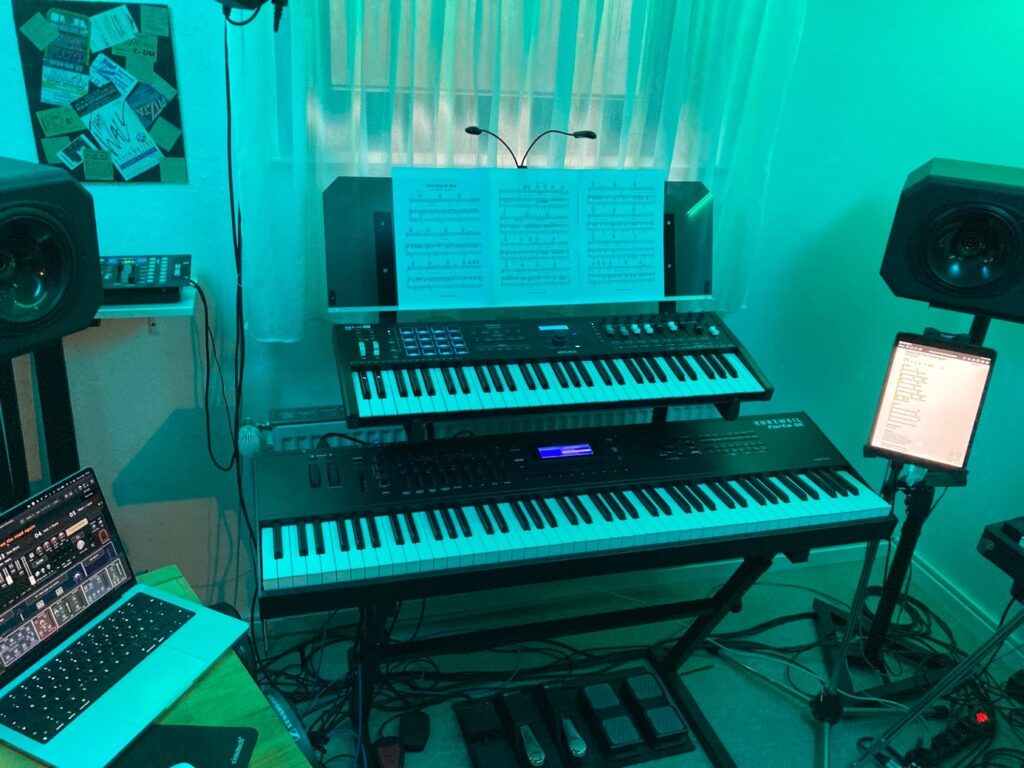
I’m using a Kurzweil Forte SE, an Arturia KeyLab 61 MkII and a Focusrite Scarlett 8i6 audio interface, an iPad running OnSong and of course Gig Performer 4 on a MacBook Pro 14″.
Everything except the iPad is connected via USB. The audio outputs of the Kurzweil are running into the Focusrite and routed through Gig Performer to build a two-channel audio mix for FOH / Main Band mix.
On my KeyLab MkII I have some (more) dedicated buttons to control Gig Performer, OnSong and also some Script based actions, e.g., to bring Gig Performer, my PreSonus Mixer App to front of the screen etc. (but that’s a different story…):
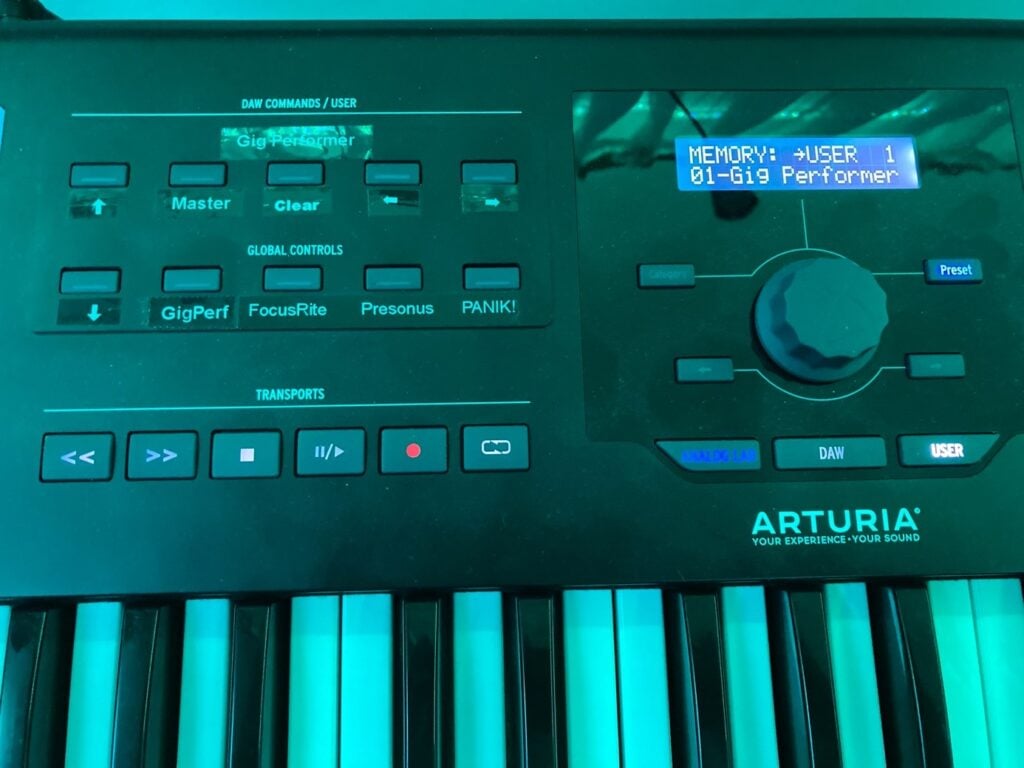
For this article the left and right arrow keys on the top right of the DAW Commands / User section are relevant to change OnSong to the previous/next song.
In the following sections we will see two main concepts for:
a) calling a corresponding Song from OnSong in Gig Performer,
b) changing to the previous/next Song in OnSong by using buttons on a MIDI controller.
Here is my typical Gig Performer main view:
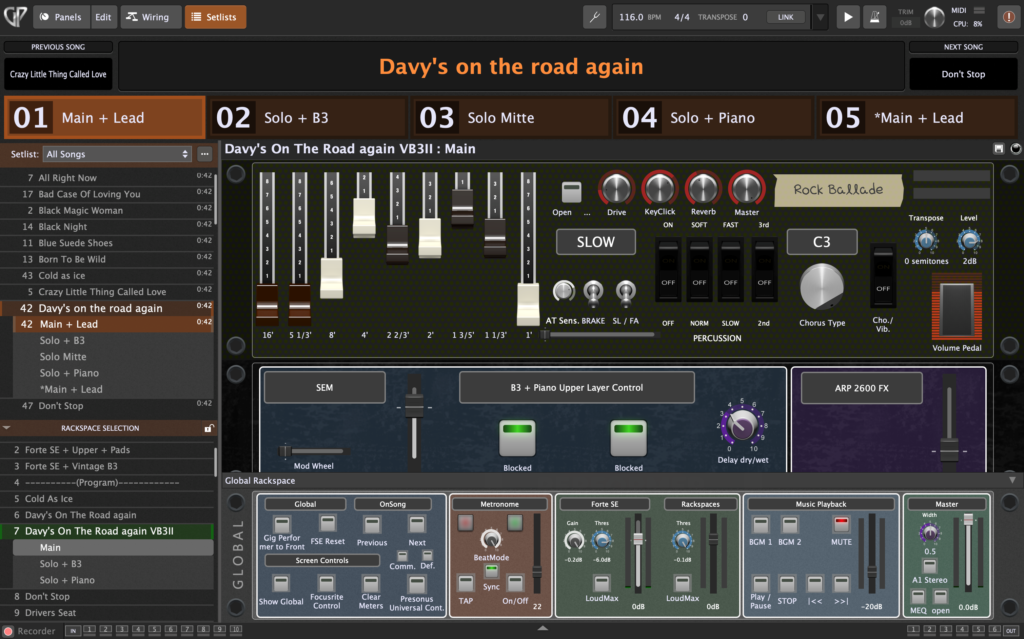
We will have a closer look to the Global rackspace and the setlist later on.
Preparing OnSong
.
As far as I know, OnSong changed the license model and package contents somewhere in the past. It’s necessary to have the MIDI option purchased (in-app purchase) and enabled:

Setting up Bluetooth
.
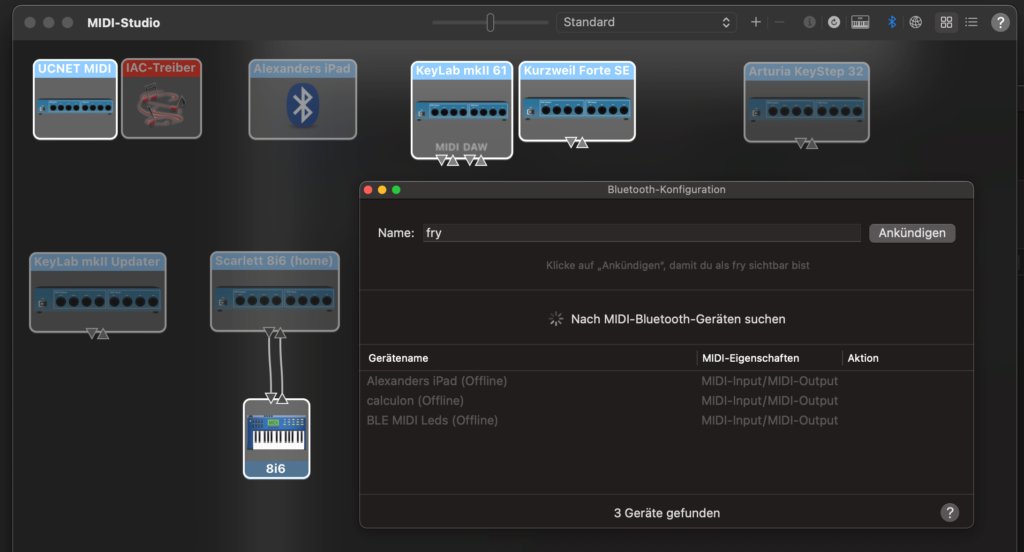
First thing we need to do is to setup a Bluetooth MIDI connection between the iPad and the MacBook Pro.
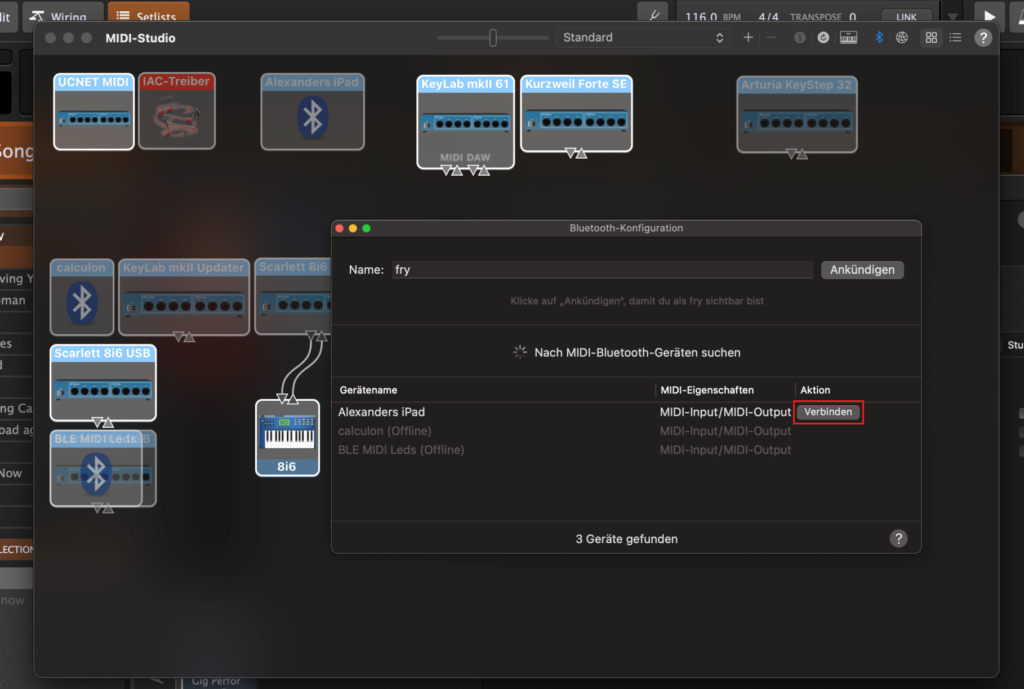
Open the Audio MIDI Studio on your MBP, open the MIDI Studio view and click on the Bluetooth symbol on the top right. Your MBP now scans for Bluetooth MIDI devices:
Now open OnSong and go to Settings -> MIDI Settings and click the Bluetooth icon:
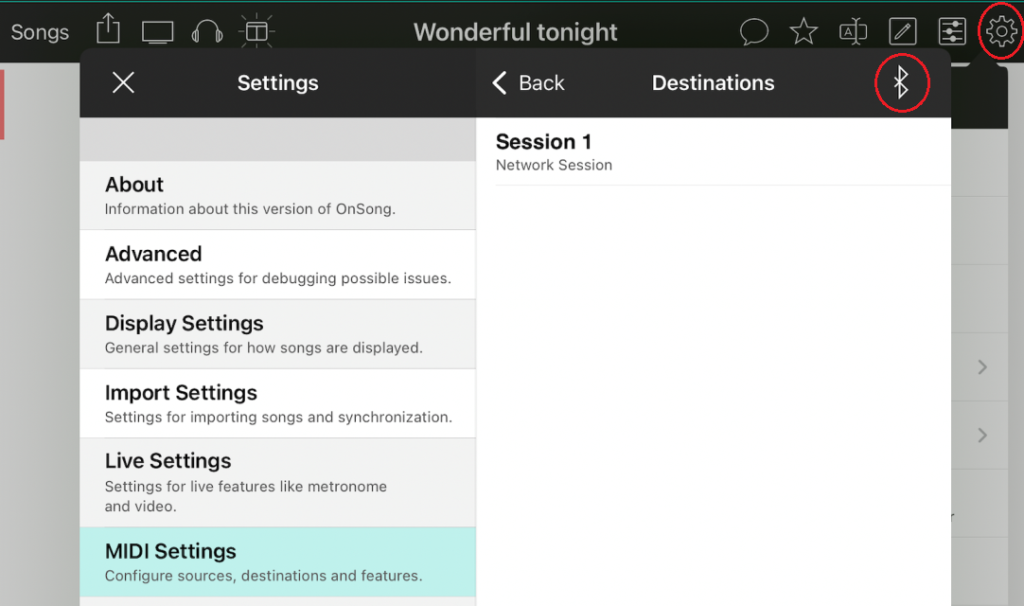
Then enable Advertise MIDI service.
Now connect (German: “Verbinden”) to the iPad on your MacBookPro:
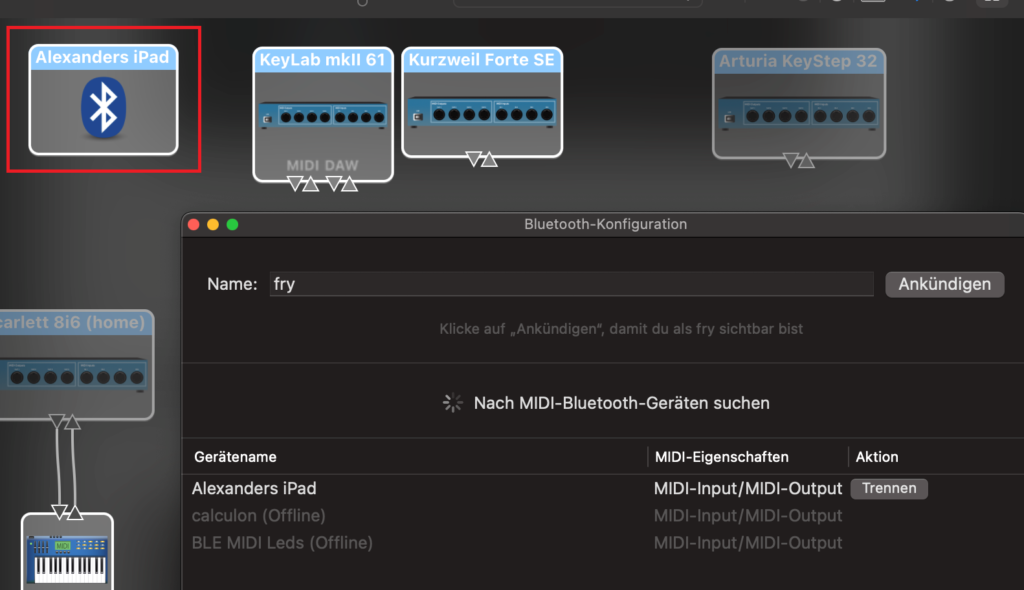
And you’re done:
Prepare OnSong – Song Program Changes for Gig Performer
.
This is a little bit tricky: for every Song in OnSong you need a 1:1 match in Gig Performer. So, all your songs need to provide MSB/LSB and PC for OnSong.
Therefore, you need to edit your songs and add a MIDI: control to the header of your song.
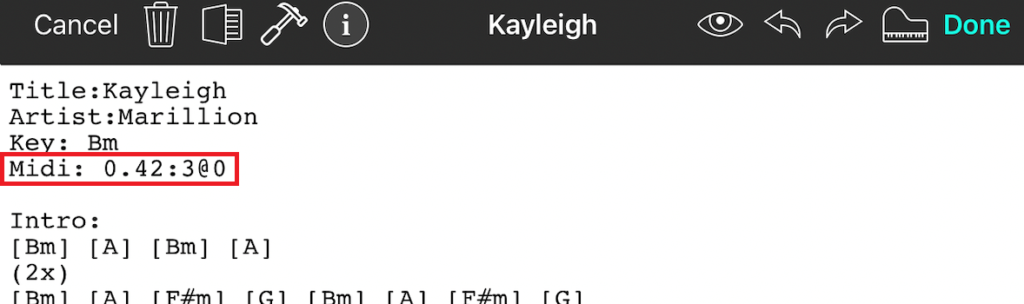
Note the red rectangle; Midi: 0.42:3@0 translates to:
– MSB = 0
– LSB = 42
– PC = 3
– @0 = MIDI Channel 1.
Please refer to the OnSong documentation for more details.
OnSong will send these MIDI messages over Bluetooth to your Mac when a Song is selected. You can select a song either by picking directly from the Songbook or by swiping to the previous/next song.
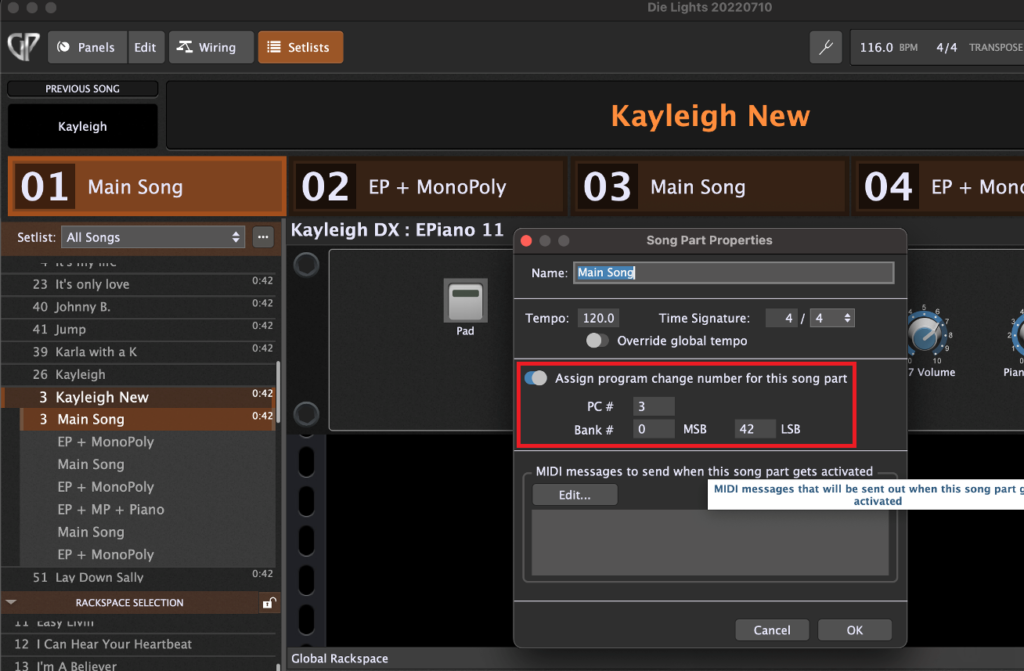
As outlined above, every song needs a 1:1 assignment on both Gig Performer and OnSong. Therefore, we have to provide a match. From our example above we need to assign a program change number for the first Song Part in Gig Performer (refer to the Song Part Properties dialog):
We also need to configure some Global MIDI and Setlist Options in Gig Performer.
Gig Performer Setup
.
We need Gig Performer to only respond to Program Change messages coming from the iPad:
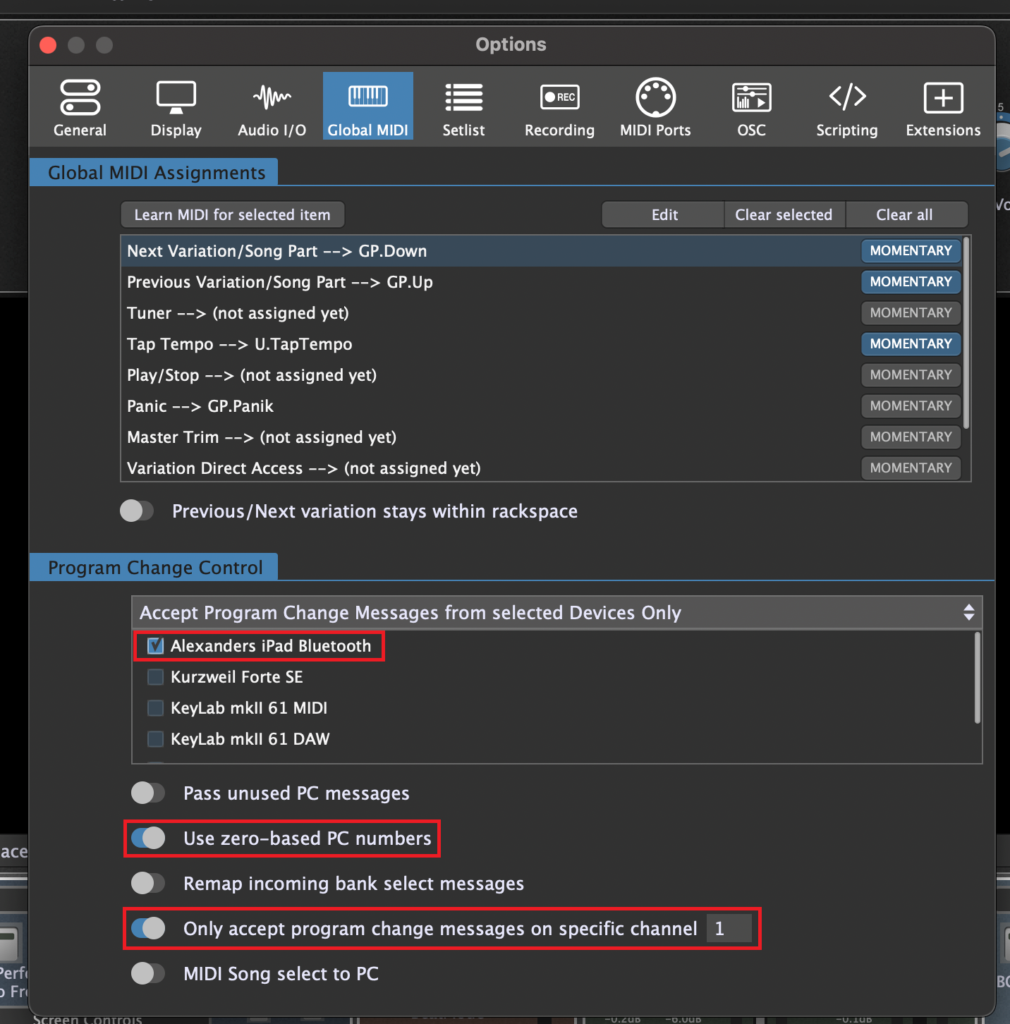
I also use zero-based PC numbers and accept PC messages on the channel 1.
In Setlist Options, I turned on the following toggle button:
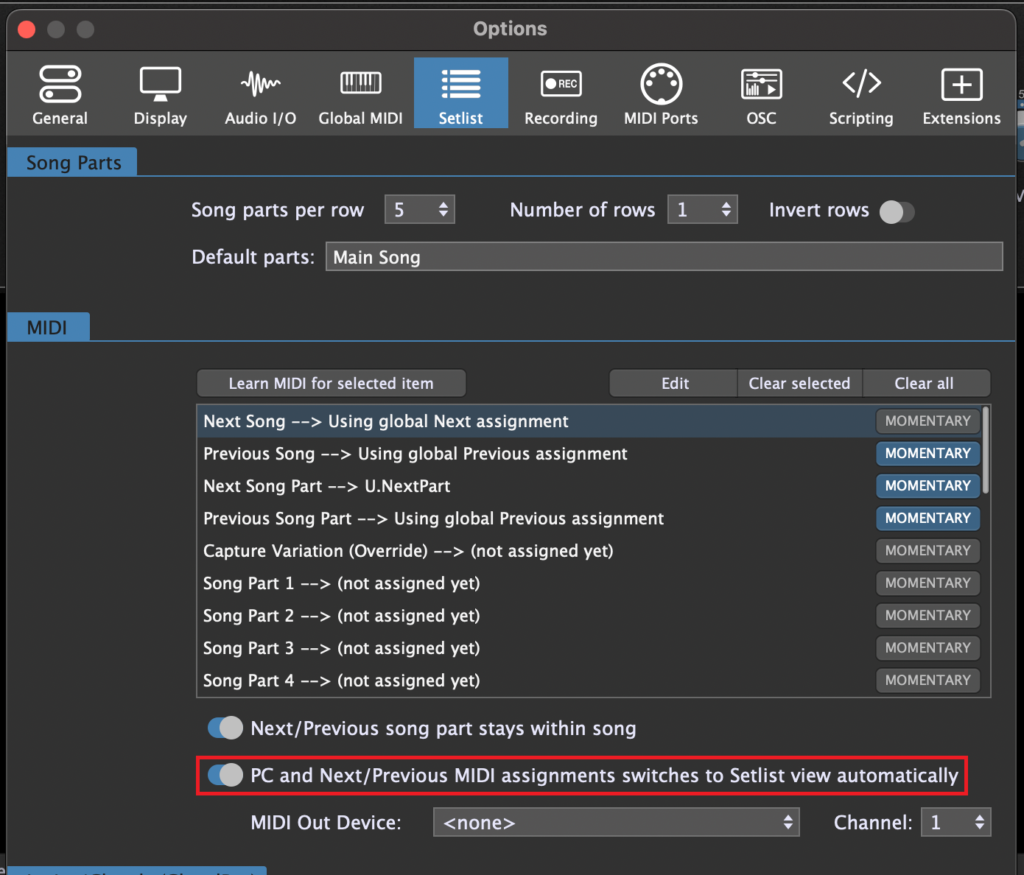
This option will switch to the Setlist view automatically on incoming OnSong messages.
From now on you should be able to select a Song in OnSong and call the corresponding Song on your Setlist in Gig Performer.
Switching Songs in OnSong by MIDI
.
Now let’s proceed to the other way around: changing Songs in OnSong by MIDI. To enable Previous and Next Song selection by MIDI in OnSong click on the remote symbol:
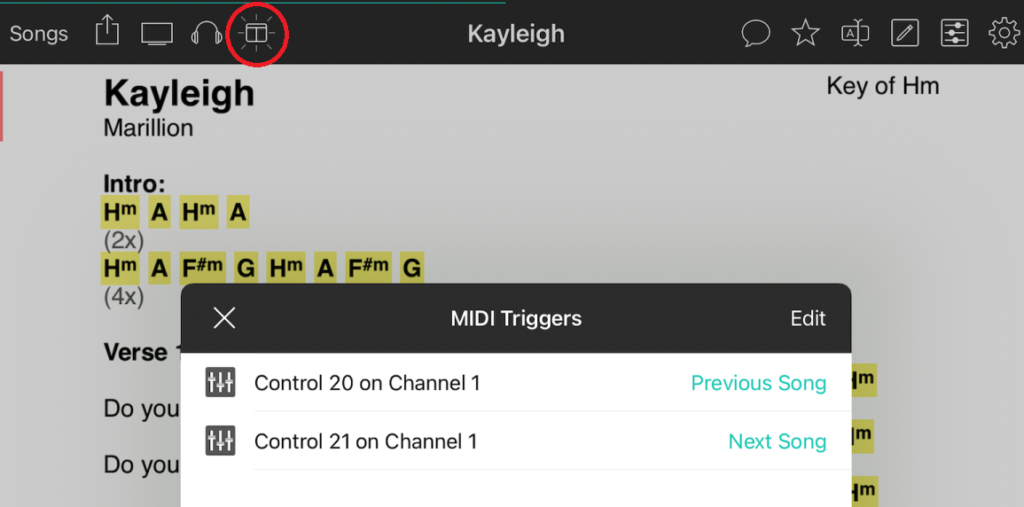
Then add triggers for Previous/Next Song actions. I selected Control Change messages CC 20 and CC 21 on channel 1 for the following setup in Gig Performer.
Prepare Gig Performer and provide buttons
.
In the Global Rackspace you have to setup two momentary button widgets:
– General: enable momentary touch,
– MIDI: assign the widget to the MIDI Out of the iPad (drop a MIDI Out for the iPad in the wiring view before assigning) and assign the formerly in OnSong defined MIDI controllers (CC 20 and CC 21).
Now learn the corresponding MIDI from your controller and you are done.
In my case my Arturia sends CC 55 and CC 56 which are mapped by the Rig Manager.
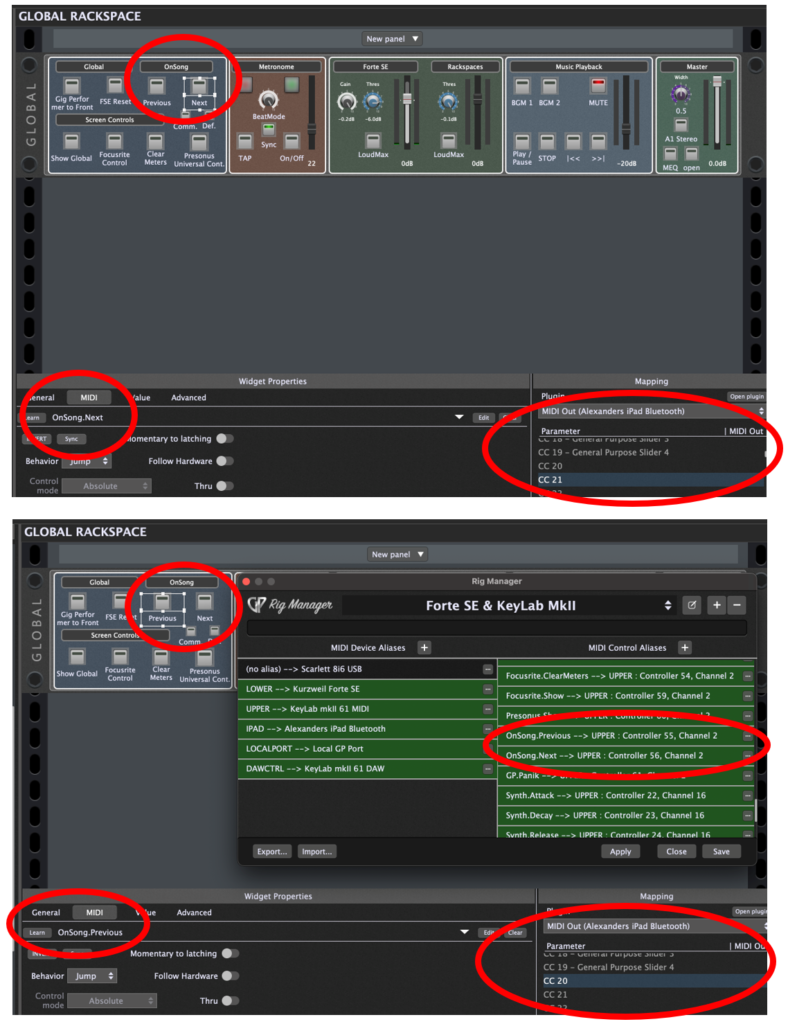
You can now control with two buttons from your MIDI controller OnSong’s Previous/Next songs.
OnSong will then ‘respond’ with the MIDI MSB/LSB/PC of this Song to ‘sync’ with Gig Performer.
Final thoughts
.
With this setup it’s only a one way sync! Gig Performer will follow OnSong. Picking a Song in Gig Performer and syncing OnSong would result in a MIDI loop.
If you have questions or want to share your feedback with us, please visit this Community thread.
.
Share this article it to support Gig Performer and spread the word! 
Own The Stage® with Gig Performer®
.
Related topics:
– How to use BandHelper with Gig Performer
– All Gig Performer resources at one place
