In this article, you will learn about handles in Gig Performer and how to use them.
.
What is a handle
.
In the Gig Performer universe, a handle is a name that you can assign to a plugin or a widget to use them in Timeline or Song Part actions, Gig Performer extensions, Gig Performer’s proprietary programming language GPScript and OSC. Historically, handles were used exclusively for advanced use cases with both GPScript and OSC. Starting with Gig Performer 4.0 and the public availability of the GP-SDK, , allowing 3rd party extensions to be developed, developers created extensions that interacted with plugins and widgets through their handles.
With the release of Gig Performer 4.7 and the more recent version 5, Gig Performer introduced very simple yet sophisticated action automation through Timeline and Song Part actions. By specifying a plugin’s handle, you can easily alter its parameter values on the fly as time passed or when you switch from one part of a song to another. Similarly, by specifying a widget’s handle, you can easily alter its value. For this use case, no knowledge of scripting is necessary.
.
How to create a handle
.
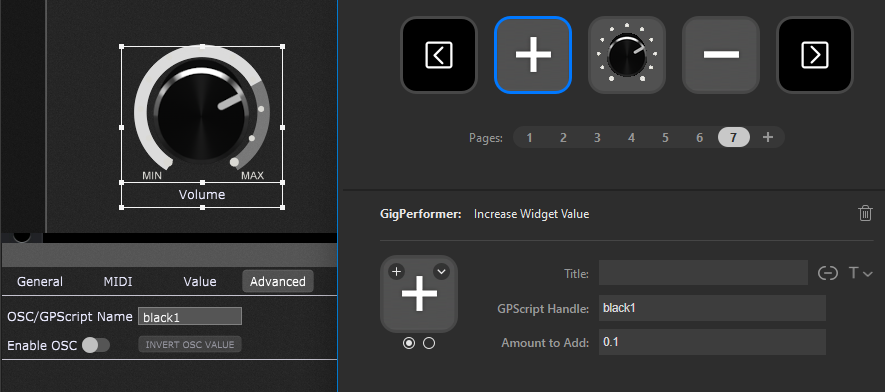
To create a handle for a widget, select the desired widget in the Widget Properties window and then click the Advanced tab:
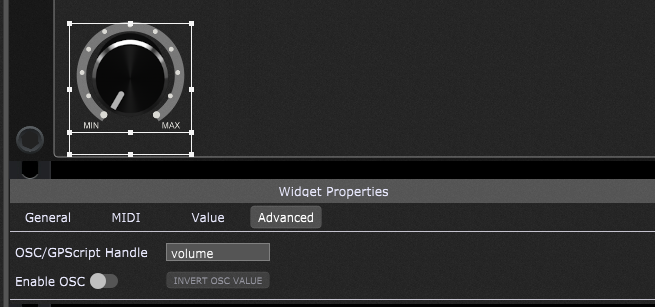
In the OSC/GPScript Handle, type in the name of the handle. Note that the space character is not allowed. If you need to use two words for the handle name, you can use the underscore character (“_”).
To create a handle for a plugin, right-click on a desired plugin to open the Plugin Contextual menu:
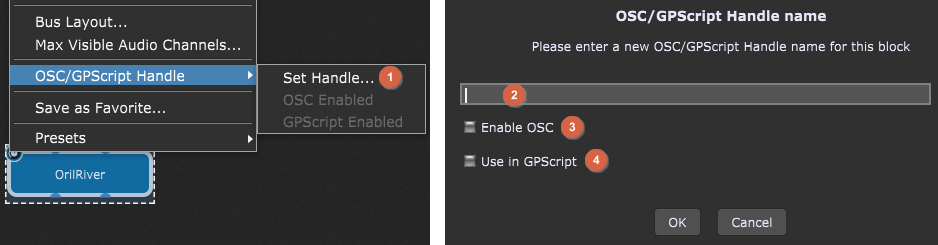
Click on the Set Handle… menu item (1). When a new dialog appears, type in a name of the handle (2).
Optionally, you can activate Enable OSC (3) and/or Use in GPScript (4) if you want to use this handle for these advanced features. Click here to learn about OSC and here to learn about GPScript.
Note that the space character is not allowed. If you need to use two words for the handle name, you can use the underscore character (“_”).
.
How to use a handle
.
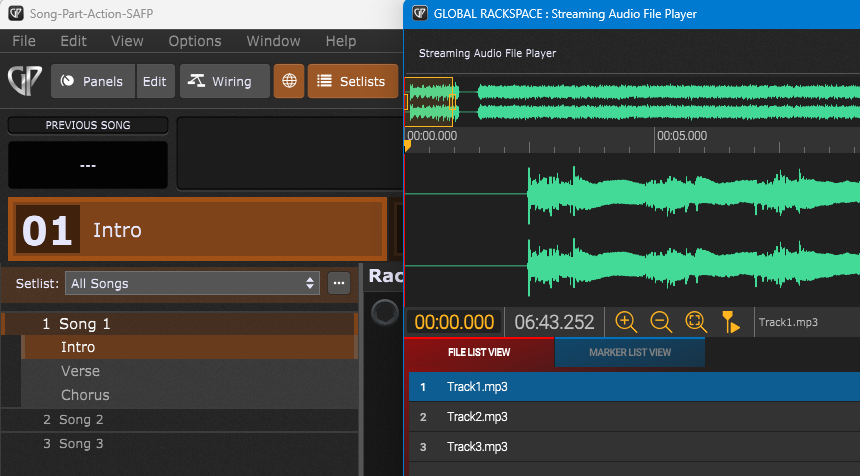
Suppose you created three songs in Gig Performer and you want to activate the corresponding backing track for each song. One solution is to add a Streaming Audio File Player to each rackspace and load the desired backing track (one track per rackspace). Another solution is to place all your tracks in a single Streaming Audio File Player plugin that is located in the Global rackspace. Let’s break down this solution.
First, create three songs (Song 1, Song 2, and Song 3). NB: to learn how to create a song, click here. Afterward, add a Streaming Audio File Player to the Global rackspace and add three tracks (Track1, Track2, Track3).
To use this Streaming Audio File Player in any automation using actions, you need to define a handle for it, e.g. “MySAFP”.
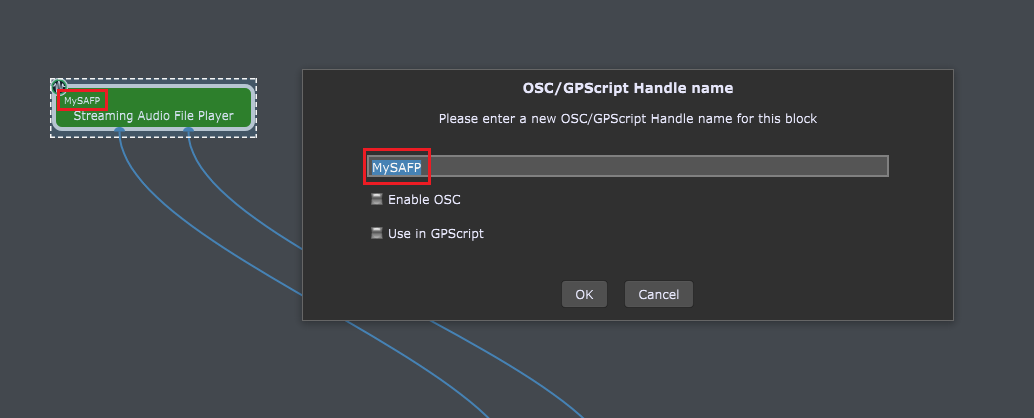
We don’t need to enable GPScript or OSC for this scenario.
NB: the plugin’s handle is also displayed at the upper-left corner of its block.
We’ll now set up Song Part Actions, so that when you click on the Intro part of every song, the corresponding audio track will be automatically selected in the Streaming Audio File Player.
First double-click on the Intro part of the Song 1:
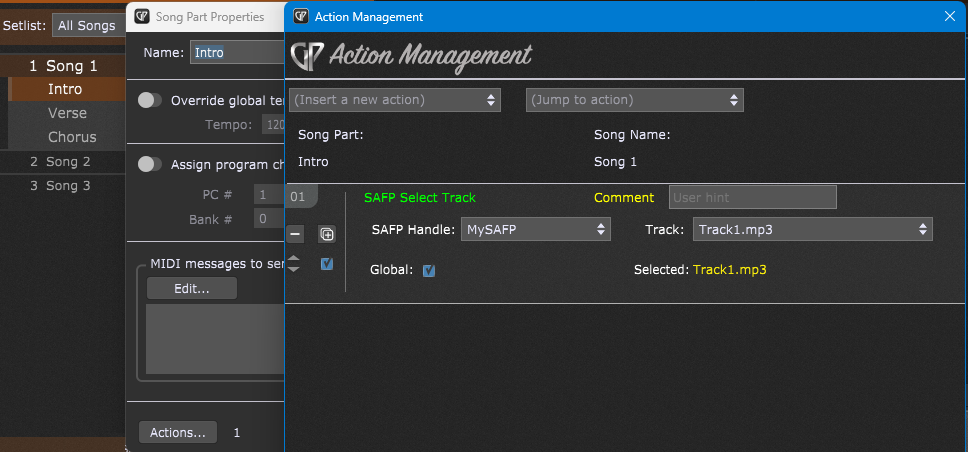
In the Song Part Properties dialog, click the Actions… button. Next, in the Action Management window, insert the SAFP Select Track action and configure it as in the screenshot above.
Similarly, configure the Intro song parts for the Song 2 and the Song 3:
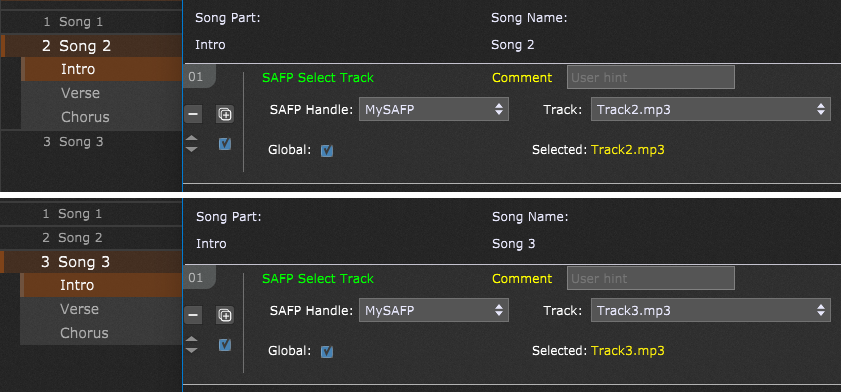
That’s it. Now when you click on a song, the corresponding track will be selected.
.
Handles in other use cases
.
Gig Performer extensions, such as the Stream Deck extension, rely on handles to alter plugin parameters and widget values.
Check out this blog article to learn how to configure your Stream Deck device to work with Gig Performer.
To see an example of how to use handles in:
.
If you have any questions or you want to share your feedback, please visit this Community thread.
.
Share this article to support Gig Performer and spread the word!
Own The Stage® with Gig Performer®
Nemanja Pudar
.
Related topics:
– All Gig Performer tutorials
– Why Gig Performer? Because!
– Gig Performer as an ultimate enhancer
