In this article you will learn how to offload audio plugin processing to remote computers on your network using AudioGridder.
What is AudioGridder and how does it work
.
AudioGridder is a free (donations are accepted) network bridge application for audio and MIDI, that allows you to offload the DSP processing of VST, VST3 and AudioUnit (Mac only) audio plugins to computers on a network running macOS or Windows.
AudioGridder consists of:
a) The AudioGridder server component, that hosts effect and instrument plugins and makes them available across the network,
b) The AudioGridder plugin, a client component that accesses audio plugins that are hosted on the AudioGridder server. MIDI and audio data from Gig Performer will be streamed over the network, processed on the server and streamed back to the client.
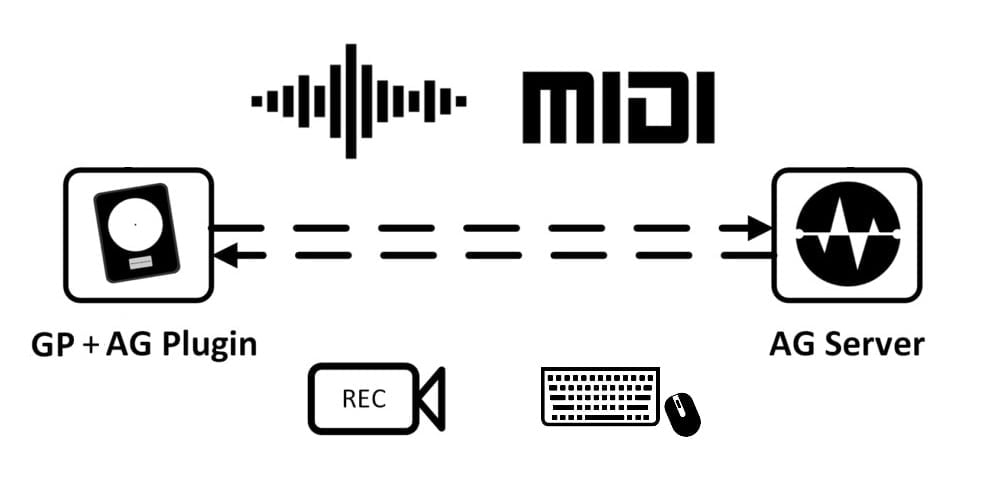
The AudioGridder server is capturing the user interface of its hosted plugins (or just plugin parameters, available via their host automation functionality) and streaming it to the client. Mouse and keyboard events are also synchronized between client and server so all changes to the plugin parameters are reflected both on the server and on a client.
To learn more, the AudioGridder website provides useful documentation about How does it work, the Server and the Plugin.
The benefit of this concept is that the DSP code of the loaded remote plugins executes on another computer in the network, taking advantage of its processing power.
Alternatively, you can use AudioGridder locally (i.e. on the same computer), where you can take advantage of your CPU cores, as AudioGridder servers run on separate CPU cores.
How to install AudioGridder and prepare computers for seamless communication
.
Since Gig Performer is a cross-platform audio plugin host for live performance, we decided to build a testing environment that consists of a Mac computer running macOS Monterey and a Windows 11 PC, with both computers on the same local network.
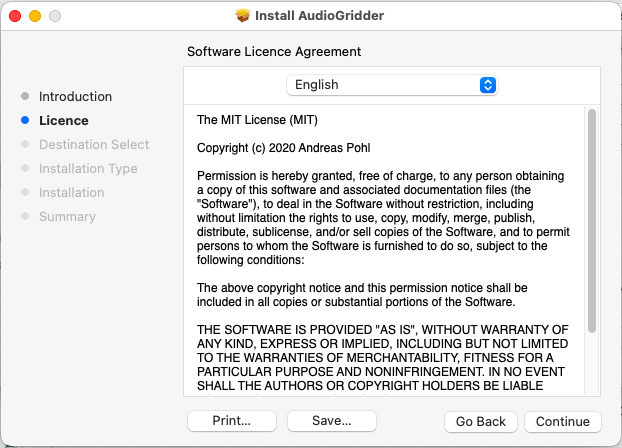
First, go to the AudioGridder’s Download page (the latest beta: 1.2.0-beta12). Download the installer on both computers.
When you run the installer, both the “Server installer” and “Plugin installer” will install.
In this article, we will test the following scenarios:
– Mac is the server and PC is the client,
– PC is the server and Mac is the client,
– PC is both server and a client,
– Mac is both server and a client.
Install the desired setup file using the standard installation procedures:
After you install the AudioGridder server on a Mac, you need to enable permissions for both Screen Recording and Accessibility (AudioGridder needs the Accessibility permission to remote control plugins):
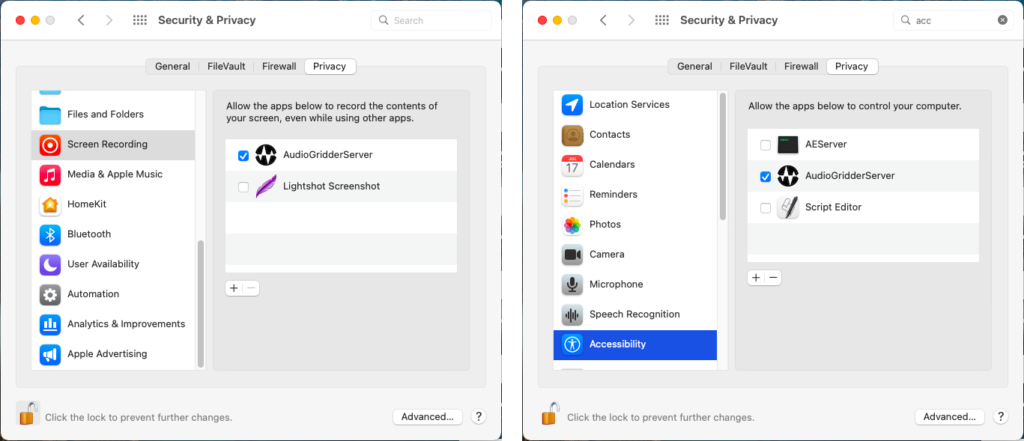
Open System Preferences -> Security & Privacy and on the Privacy tab check AudioGridderServer as on the screenshots above.
On the Windows 11 computer, you need to allow the AudioGridderServer application through the Windows Firewall, otherwise another computer cannot establish the communication with the server:

Open the Windows Firewall, click on the Allow another app… button and locate the AudioGridderServer executable in Program Files, as shown on the screenshot above.
Important note: ensure your computers are connected using wired ethernet cables. Although Wi-Fi connection is also possible, in our tests wireless turned to be too slow for this kind of application. You’ll get far too much latency, along with CPU spikes and dropouts etc.
How to configure the AudioGridder server
.
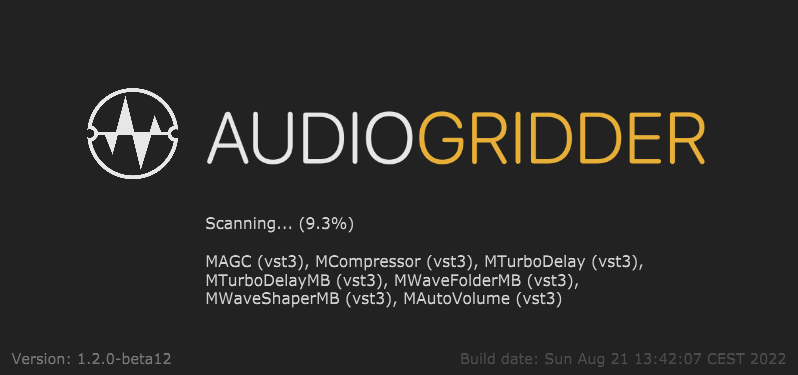
When you install the AudioGridder server and run it, it will first scan your plugins in the default VST folders:
The AudioGridder’s Available Plugins window is very similar to Gig Performer’s Plugin Manager:
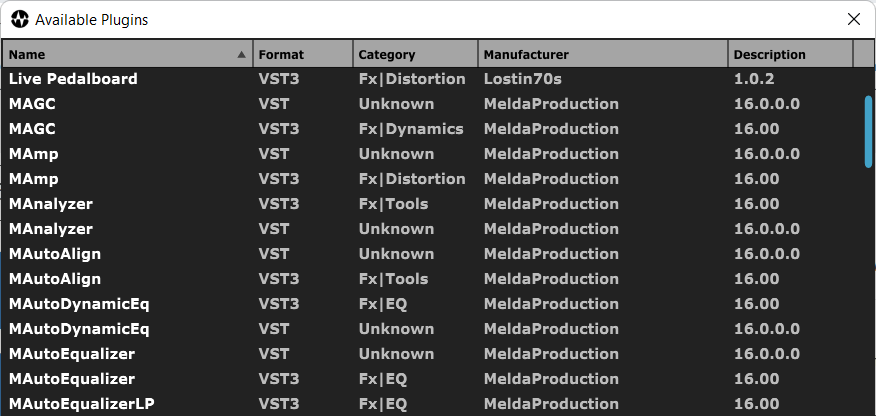
In this window you can Activate or Deactivate plugins that you want the server to host or not host respectively using the right mouse click. If you don’t see the desired plugins in this list, click the AudioGridder server icon in the notification area and then click Settings:
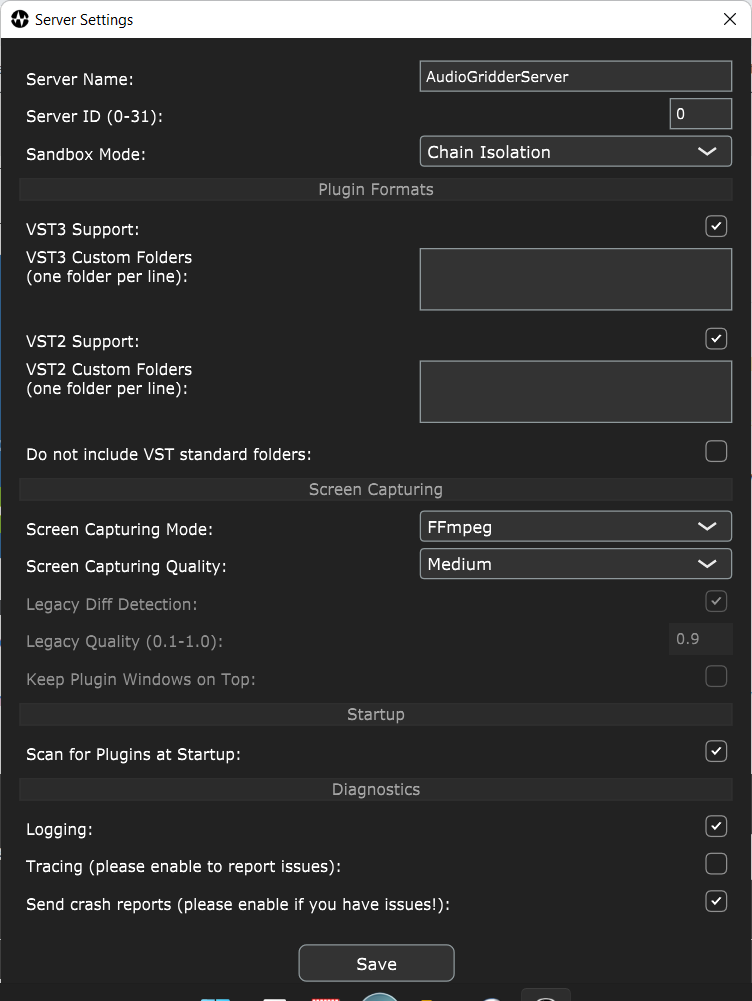
Give your server a meaningful name (e.g. I named it AudioGridderServer on the PC and AudioGridderMacOS on the Mac) and add VST3 and VST2 custom folders.
If you want to run multiple servers on a single computer, you will have to assign a different server ID to each instance. Leave the value at 0 if you run only one server. Click on the Save button to save your configuration.
How to use the AudioGridder plugin in Gig Performer
.
Insert the AudioGridder plugin into the Wiring view, as you would any other plugin. In the plugin editor, click on the server button:
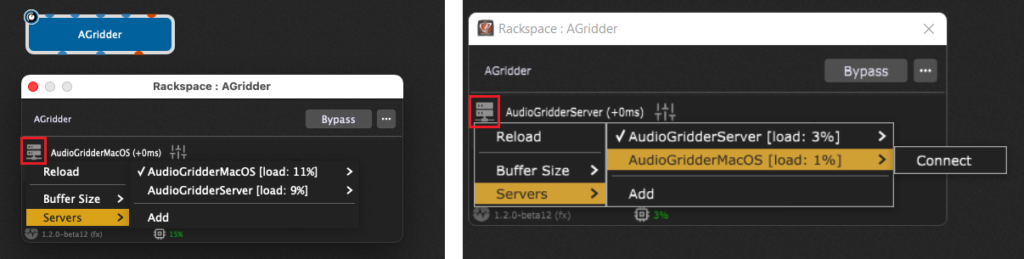
If you configured everything properly using the guidelines in this article, the AudioGridder plugin will automatically search and discover all available servers in your local network. To connect to a server, simply click on the desired server and then click on the Connect menu item.
Afterward, you can select the desired Buffer Size:
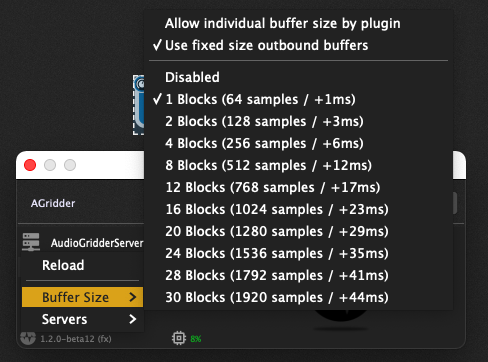
The actual values in this list depend on the buffer size setting in Gig Performer’s Audio Options. Of course, higher buffer size means more latency, as indicated in the screenshot above.
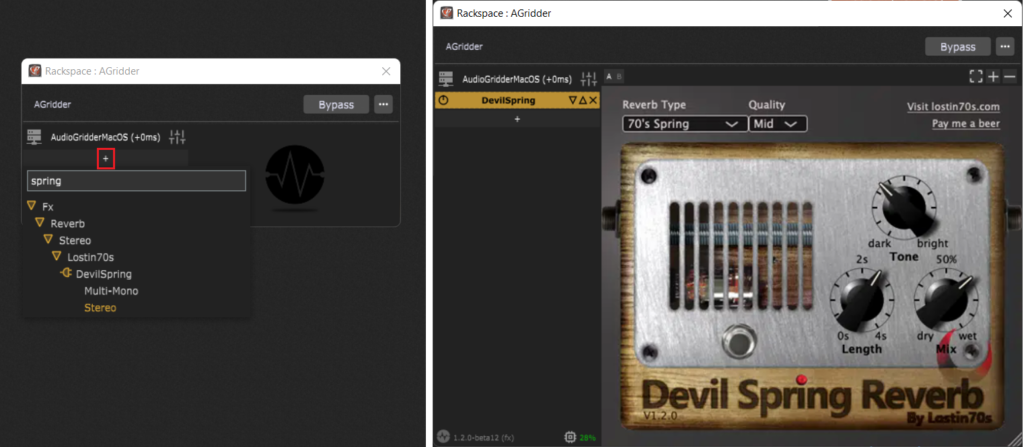
Finally, click on the plus symbol (indicated with the red rectangle) to add the desired plugin that is available on the AudioGridder server. You can type in text to filter the results, e.g. “spring”. Double-click on “Stereo” and you’ll see that the bundled DevilSpring plugin is loaded and that its plugin interface is streamed from the server:
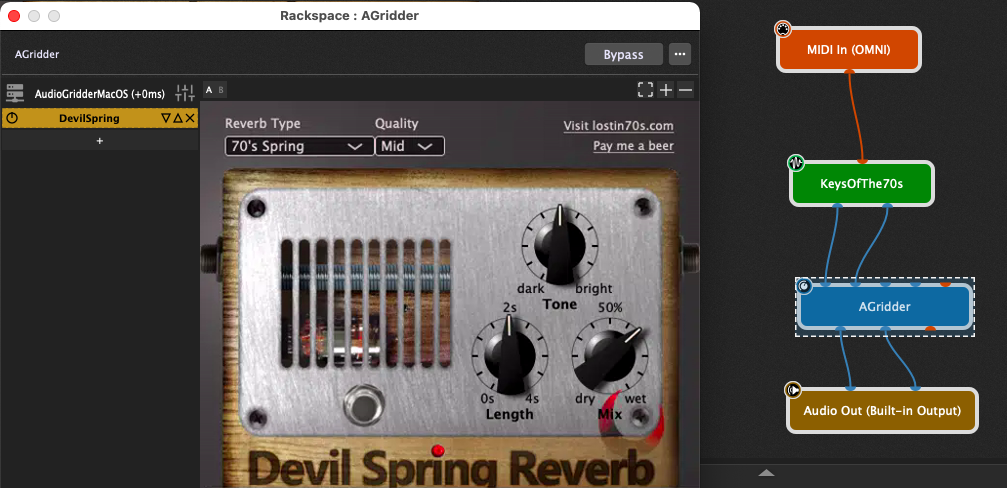
Create a simple plugin chain in Gig Performer and wire the AudioGridder plugin. You’ll notice that the reverb is applied to your sound:
Alternatively, if you don’t need to stream the plugin’s editor (the whole GUI), you can just retrieve the plugin’s parameters (which will result in the better performance):
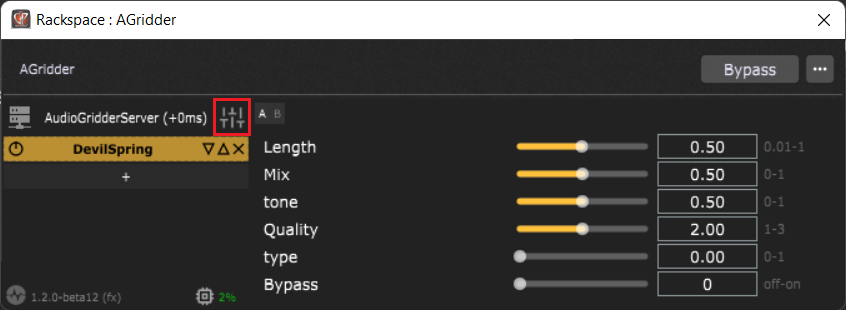
Click on the Settings icon (indicated with the red rectangle) and then select Generic Editor. Afterward, move the sliders to modify the parameter values.
To share your feedback and to see more tips about AudioGridder, please visit this Community thread.
.
Share this article it to support Gig Performer and spread the word! 
Own The Stage® with Gig Performer®
Nemanja Pudar
.
Related topics:
– Clever ways to optimize your plugin usage (Blog)
