In this article you will learn what are extensions in Gig Performer and how to use them.
What are extensions and the SDK?
.
Extensions are basically libraries (.dll files on Windows and .dylib files on macOS) independently developed that Gig Performer can load to provide additional functionality. For example, additional support for a hardware device, some new GUI functionality or even additional GPScript functions. For the first, an extension would make your hardware device usable directly from within Gig Performer as if it was already built-in.
Gig Performer 4 exposes an API (application programming interface) that allows third-party developers to create libraries that can be used to interface with Gig Performer. The primary purpose of the API is to enable the creation of libraries to manage control surfaces and other hardware that one might want to use with Gig Performer. It is also possible to create 3rd party GUI tools, as well.
Extensions are developed using Gig Performer’s SDK (software development kit). It is freely available under the GPL-3.0 license you can download it from GitHub. Visit that link to learn more about SDK and fundamentals.
Important: Deskew Technologies LLC does not officially support third-party extensions and cannot be responsible for any impact they may have on Gig Performer itself. Please test your extensions thoroughly before using them in a live performance. Should you have issues with an extension, please contact the developer of that extension.
Are there any published extensions to try out?
.
In this article we’ll present a Stream Deck extension and three extensions from a Gig Performer power user @rank13. You can easily check their functionality as there is a solid documentation for each extension. (usage info, GIFs, etc.)
We’ll briefly present them and provide the download links.
[1] Stream Deck extension
Elgato’s Stream Deck is a very popular multi-button control surface.
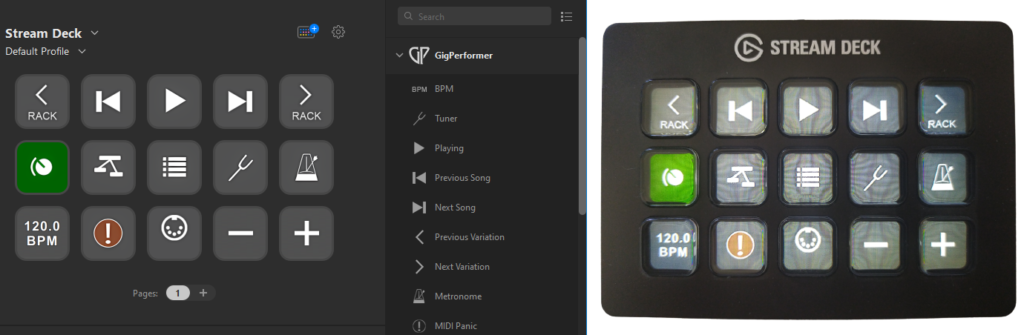
Learn more how to set up the Stream Deck extension and use it in this dedicated blog article.
[2] Gig Performer Selector
The Gig Performer Selector extension provides you with an additional resizable window for selecting rackspaces/variations or songs/parts:
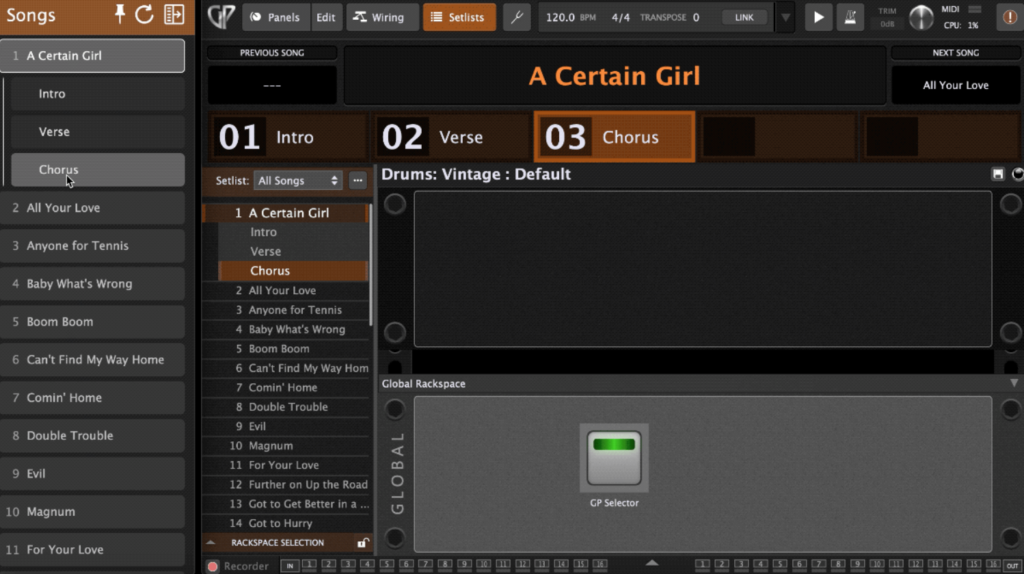
It has two display modes: a compact list of rackspaces/songs, or an expanded window with a large display of the current and previous/next rackspace or song. You can also control the visibility of the window using widgets (thereby allowing it to be triggered from an external MIDI controller). You can see Gig Performer Selector in action in this Community thread.
Download: GitHub
[3] Heads-Up Display
The Heads-Up Display (HUD) extension adds GPScript functions to show a heads-up display (HUD) window, as shown in the screenshot below:
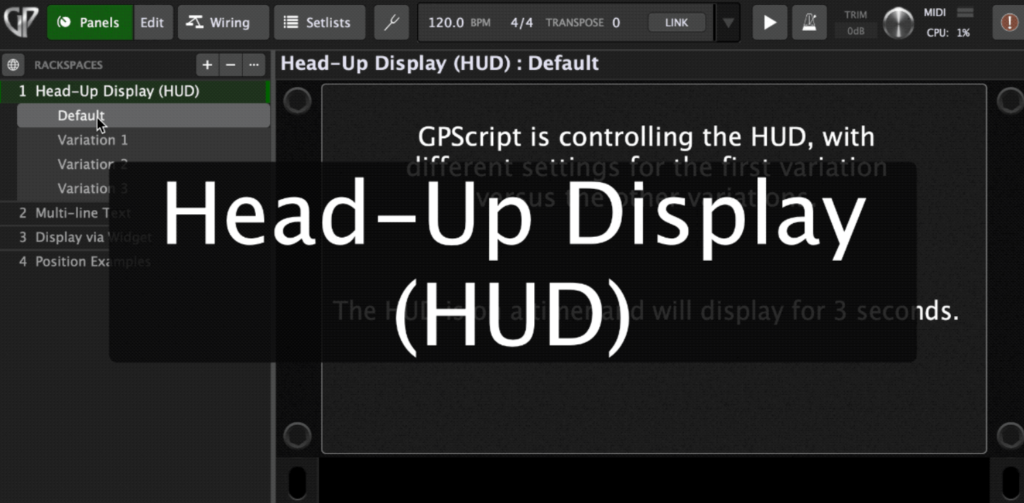
A basic knowledge of Gig Performer’s scripting language (GPScript) is required to use this extension.
Download: GitHub
[4] Radio Buttons
Important note: this extension was very useful for Gig Performer 4.5. Gig Performer 4.7 and later include the built-in support for radio buttons.
The Radio Button extension implements radio button widgets. Radio buttons are mutually exclusive, meaning you can only activate one widget at a time from a defined group of widgets.
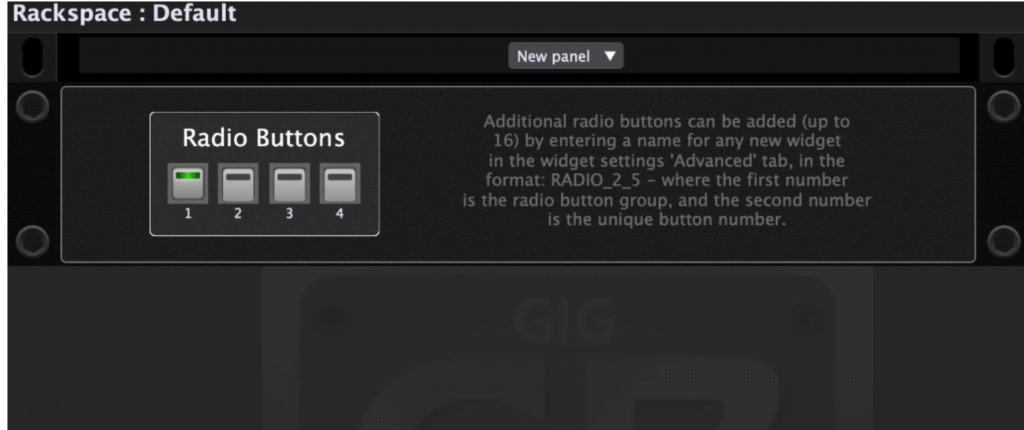
The extension adds 4 panel templates for 2, 4, 8 or 16 radio buttons. These can be accessed from the New panel menu while in Edit mode of the Panels view in Gig Performer.
Download: GitHub
Examples for developers
If you are interested in developing a Gig Performer extension, here are some small examples that will help you along the way:
- Example extension, written in C – LINK
- Example extension, written in C++ – LINK
- Example extension, written in C++ using JUCE framework and CMake – LINK
- Example extension, written in C++ using JUCE and Projucer – LINK
.
How to install an extension in Gig Performer?
.
We already stated that an extension is a file – .dll file on Windows or .dylib file on macOS.
First, download an extension for your operating system. Afterward, simply move it to the Extensions folder:
On macOS: /Users/Shared/Gig Performer/Extensions
On Windows: C:\Users\Public\Documents\Gig Performer\Extensions
Next, restart Gig Performer. A prompt will appear asking to confirm whether to install the extension. Check out this user manual page for more information. Gig Performer extensions can easily be disabled or enabled again through the Options window.
If you suspect that an extension is preventing Gig Performer to start normally, you can temporarily disable extensions in the Temporary Startup Options dialog. Check this blog to learn more.
Contribute!
Every developer is welcome to contribute and build an extension for Gig Performer. If you are an end-user and (say) have a keyboard with a display, you can contact your keyboard’s manufacturer to create an extension for Gig Performer so Gig Performer can communicate directly with your keyboard, and show various parameters, such as Song name, Rackspace name or Tempo on the display (or assign buttons and knobs with functions in Gig Performer).
The relevant new community category is GP Extensions with two sub-categories: Using GP Extensions and Developing GP Extensions. If you have any questions or want to share your feedback, please visit this Community thread (I’ll also create there an index of extensions, available for Gig Performer).
.
Share this article it to support Gig Performer and spread the word! 
Own The Stage® with Gig Performer®
Nemanja Pudar
.
Related topics:
– Extensions (User Manual)
