In this article we will share with you our best practices for a rock-solid software-based setup.
.
Background
.
Gig Performer is an audio plugin host for live performance that is designed to provide you with the most stable and glitch-free music making experience. It is the best companion for all your music efforts and the ultimate enhancer of your setup. However, Gig Performer itself is only a part of your whole setup.
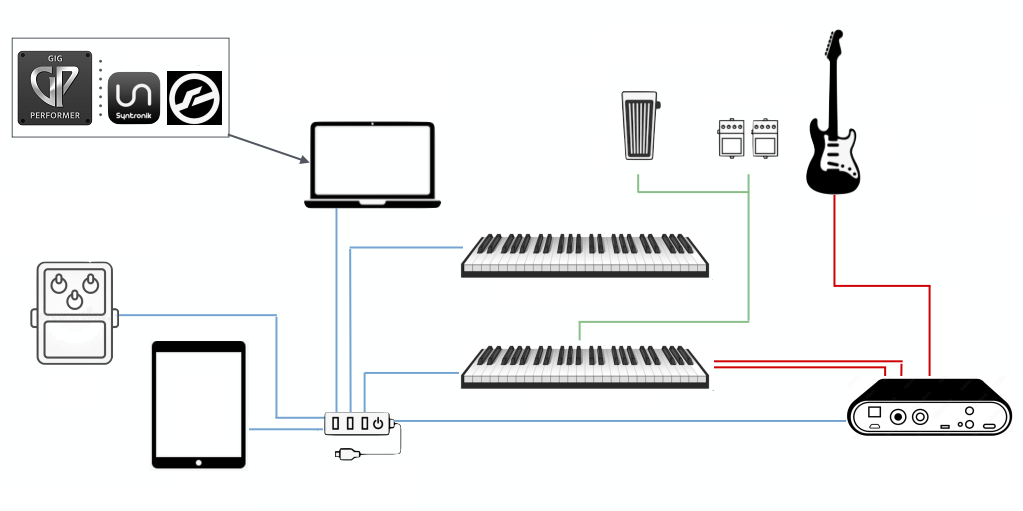
Gig Performer is just a fragment of your rock-solid setup
There are many variables in your overall setup that make the final equation most efficient and rock-solid during your performance. We’ve compiled many tips based on the the inexhaustible wisdom of our amazing community.
.
1. Plan and research
.
This is the first phase we want to highlight and it is the most general. In this phase you’ll need to identify your needs, the technologies you want to use, and your budget. This information will help you choose the right platform for your needs – a PC or a Mac. You should think of your computer just as a tool to fulfil your needs most efficiently.

Consider everything to be just a tool
We have a large number on users of both platforms and also users that migrate from PC to Mac and vice-versa. Some users use another platform as their backup platform. We have a dedicated blog article that describes some considerations and differences between these two platforms. You can check it out here: Cross-platform usage and moving from one platform to another.
Note, however, that there are also hidden costs that are best described in the article A Note about Total Cost of Ownership.
Once you choose the platform that is most suitable for your needs, it is important to research the computer specifications carefully.
For example, suppose you have stumbled upon a configuration that has an Intel Core i5 8225U processor inside. Note that it has the U suffix, meaning that it is optimized for low-power consumption at the expense of high performance which is not the best solution for real-time audio. (check the suffixes here)
It can also happen that the whole processor series is corrupt. See an example here.
Another example is when Mac computers with Apple Silicon chips first appeared. Many users chose the Intel Platform over the first M1 chips, because many of their plugins were not available natively for this new ARM processor architecture. Needless to say, the best is to always use plugins that are available natively for your processor.
Of course, the plan and research phase applies to all other components of your setup. For example, what MIDI controller should you choose? Is the type of the keybed appropriate to your personal preferences? What audio interface should you choose or what powered USB hub should you buy.
.
2. Optimize your computer
.
Once you have bought your computer, you can optimize some settings to make it more suitable for real-time audio.
For Windows, we have a comprehensive FREE e-book that is intended to help musicians optimize their Windows PCs to process audio as fast and as reliably as possible.

To get the most from Windows for digital audio processing, you need to adjust various Windows settings and features. By following this guide, you will learn how to minimize issues like crackles, dropouts, audio glitches, high latency and more.
We will explore many Windows settings so you can understand what is happening in the background. We’ll also provide instructions to adjust those settings. Our goal is for you to have an optimized computer that perfectly fits your needs as a live or session performing musician. We have compiled testimonials from different forums across the Internet by many readers of this e-book.
We also have a macOS guide, which you can find here.
Note: In the Related topics section below, you can find even more tips for Windows and macOS, based on feedback from our community forums.
.
3. Use your plugins cleverly
.
In this dedicated blog article, we have compiled many tips to help you to use your plugins most efficiently.
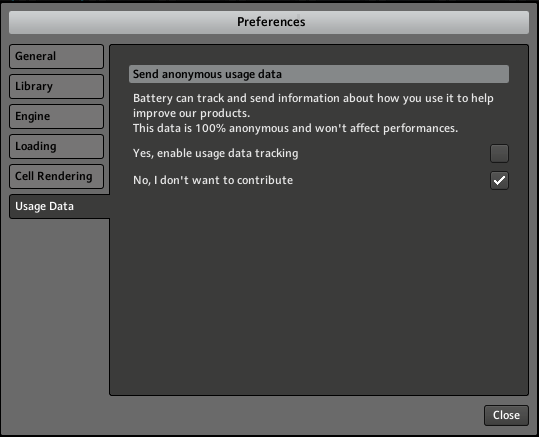
Disable usage data tracking
The main motto here is Less is more. If you don’t use certain features of a plugin, turn them off. Also make sure to disable any usage data tracking, as they can impact your computer resources. Click here to learn how.
To see plugin specific tips, ensure to review this thread. For example, if you use Kontakt, you may want to use the Purge feature to save RAM, use its streaming from disk feature, or remove unneeded articulations.
Another example is Amplitube. For instance, even if you are only using a single amp/cab routing, the double and triple amp/cabs are enabled by default in the background. You have to go into those routings and bypass the amps/cabs you won’t be using. Then you’ll see significantly less CPU usage. (click here to see the video)
If you have any other plugin optimization tips, make sure to share them with in the thread listed above.
.
4. Be careful with updates
.
We mention this tip all over the place and it always seems we don’t mention it frequently enough. If you want to have a rock-solid setup, you MUST turn off all automatic updates.
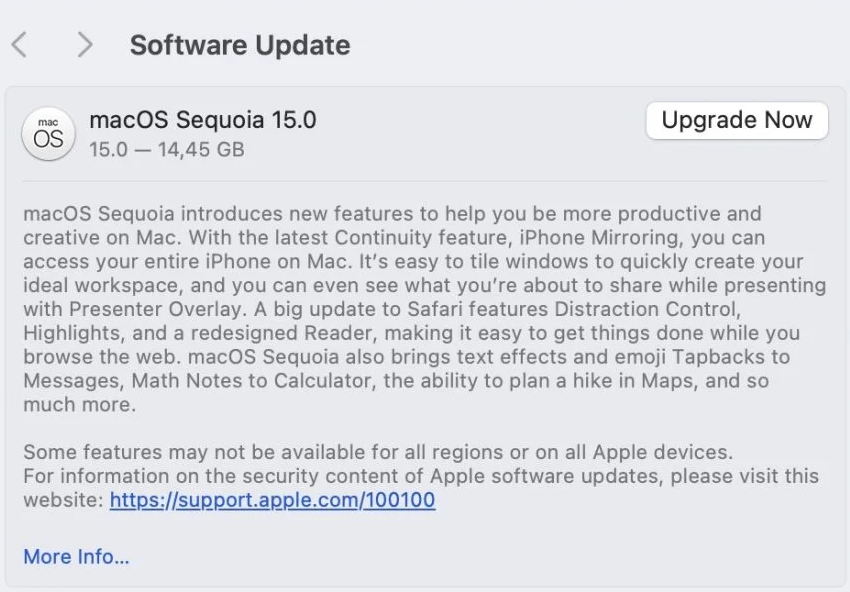
Don’t upgrade before you read the blog article below
Make sure to read this blog article to see examples and best practices.
.
5. Design tips
.
When you are designing your sounds, here are some tips that will help your setup to be rock solid.
.
Don’t mix plugins with different formats
.
We are recommending that as a best practice, when you use more than one copy of the same plugin in your gig file, always use the same version and format of that plugin when you add more copies (e.g. only VST3), regardless of whether the new copies will be in the same rackspace or in a different rackspace. Don’t mix plugin versions and formats of the same plugin. Read this article to learn more.
.
Separate sustain pedal from your MIDI controller
.
Your sustain pedal is typically plugged into one of your controllers. It can be very useful to manage your sustain pedal separately from your MIDI controller (using separate MIDI In blocks) so that you can control specific splits independently of which keyboard is playing the split. Follow the advice in this article to set this up.
.
Use host automation rather than MIDI to control plugin parameters
.
If you’re trying to control a plugin parameter directly from your physical hardware, you may be tempted to use the audio plugin’s MIDI mechanism, possibly because that’s all that was available to you before you started using Gig Performer.
However, you will generally want to avoid direct MIDI control of plugin parameters and you should always use the plugin’s host automation support. Check out this article to see the benefits.
.
Don’t use Program Change messages to change plugin presets
.
Generally, it’s not really a good idea to use Program Change events with plugins. Suppose your plugin support changing presets with program changes. In that case, you:
– don’t know how long it will take for a plugin to change its patch after receives a PC event.
– depending on the plugin’s implementation, you may get stuck notes if you were holding keys or the sustain pedal down when a program change is sent.
– badly implemented plugins can produce undesirable artifacts (i.e. clicks) or may even crash!
We recommend using program changes mainly to select rackspaces. This is the only way you’ll have zero latency when switching your sounds, not to mention that there are other benefits such as Patch Persist or the Predictive Loading feature.
.
Make it resilient: block MIDI events you don’t need and anticipate possible undesirable behavior
.
To create a robust setup, a good practice is adding certain ‘security mechanisms’.
For example, one of our community users reported that his Korg Kronos would (for some reason) occasionally and unpredictably send out CC messages, which then affected his plugins in undesirable ways. His solution was simple: in the MIDI In block, he would simply block all CC events. Problem solved.
Indeed, Gig Performer’s MIDI In block allows for many MIDI operations. Check out this blog article to learn more.
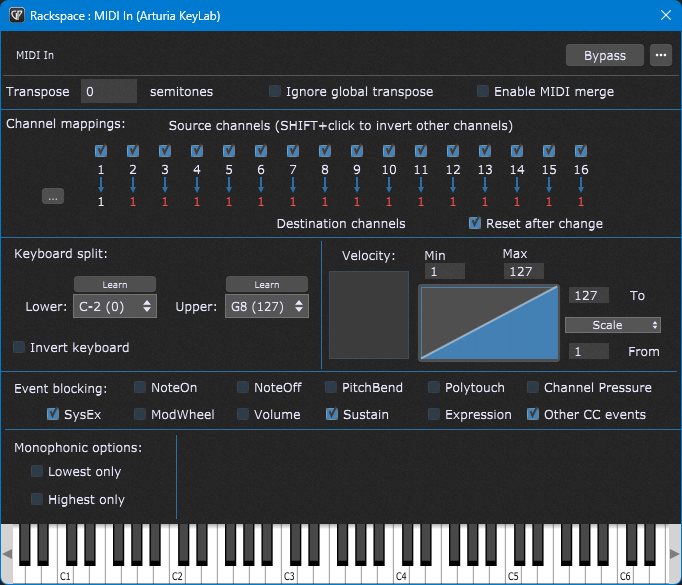
For example, you may know that many plugins respond to MIDI channel 1. So, suppose that you accidentally switch your controller to MIDI channel 2 (or you may use a backline controller that is programmed to use MIDI channel 2), you may not hear any sounds for plugins connected to that MIDI controller. In this case, remapping all the MIDI channels to the Channel 1 up front is a solid ‘fail safe’ mechanism. The plugin will respond normally regardless of the channel that your MIDI controller sends out. However, make sure that your controller is not sending out events simultaneously on multiple channels as this will cause duplicate notes to be produced.
Another user shared with us that he uses MIDI Filter blocks and simply filters out all the messages that he doesn’t plan to use, i.e. allows only Note events, sustain and some ‘safe’ controllers. Following this practice, this user has never had any issues with plugins leaking MIDI or problematic MIDI controllers.
NB: we share many Gig Performer tips every week in our Facebook group and this was the Tip # 41.
.
6. Use the Rig Manager
.
If you are currently not using the Rig Manager, the best possible practice is to start using it. It will add more resilience to your set-up and pay off in the long run. Among other functionality, the Rig Manager allows you to:
To find out more about the Rig Manager and how this feature works, please see this blog article, or review this YouTube video.
Touring musicians who don’t bring their own controllers and instead depend on the use of back-lined or rented keyboards sometimes run into various problems. Their setup doesn’t work properly even though it was working properly when they rehearsed with their own MIDI controllers.
For this occasion, we compiled the tips in this blog article: Dealing with back-lined or rented keyboards.
.
7. Other tips
.
Every keyboardist, guitarist, bassist, FoH engineer, etc. has their own way and tactics to make a stable setup for live performance. We have interviewed many high-profile music makers in our Backstage with Gig Performer show. Check out our YouTube channel.
Of course, if you want to share your tips with use, please check out our community forum. Here are some more tips from us.
.
Test your setup offline
.
It can happen that you design your gig files and rehearse while your computer is online. Ensure you check your setup offline. For example, you may discover that some of your plugins use significantly more CPU cycles offline (read this blog article). Or you may discover that your plugins might check for a license online, hence disallowing you to use that plugin until you are online again. (one example are Roland Cloud plugins)
.
Use decent or quality gear
.
You can’t go wrong if you invest in quality audio interfaces, USB hubs and cables.
.
Backup is your friend
.
Backup your gig files regularly. Needless to say, once you are happy with your setup, make sure to create a full system backup.
.
If you have any questions or want to share your feedback, please visit this Community thread.
Own the Stage® with Gig Performer®.
Nemanja Pudar
.
Related topics:
– macOS tips from the forums
– Windows tips from the forums
– Why use a computer with Gig Performer rather than hardware
– Don’t do that!
– Do that!


