Thank you for your interest in Gig Performer Essentials.
Please enter your name and email address in the field below. Links for both Windows and macOS downloads will be sent to you.
By providing your email address, you will be subscribed to our newsletter from which you will be able to unsubscribe at any time. Make sure you use a valid e-mail address and if you don't receive our e-mail, please check your spam folder.
If you have started your free trial of Gig Performer or you have just purchased it, this blog article is intended to provide you with various resources for getting started with Gig Performer as easily as possible.
Thank you for your interest in Gig Performer®, our premium audio plugin host for live performance and session musicians, created by musicians for musicians. Apart from creating an outstanding software application for live performance that lets you be the Artist, we recognize the value of supporting you along your journey to master Gig Performer and truly Own The Stage®.
.
User Guide
.
The very first resource with which to get started is the Getting Started section of our user guide. Here you can find basic setups for keyboardists, guitarists, vocalists, drummers, other musicians and FOH engineers. The user guide is always up-to-date. Make sure to check out the latest features and changes in Gig Performer updates and upgrades. .
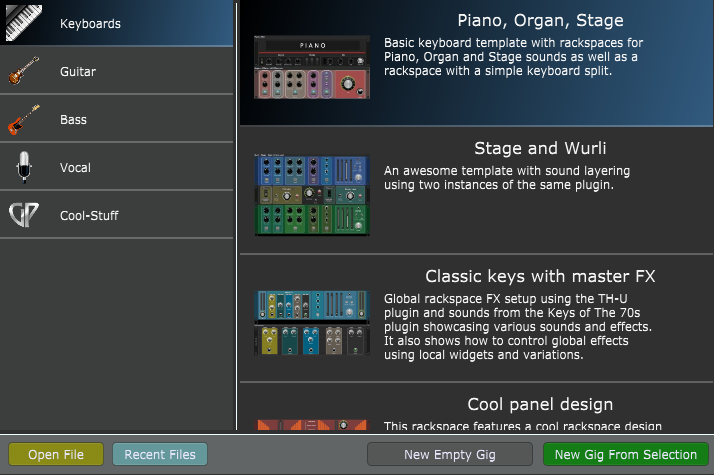
Built-in templates
.
We’ll also highlight the Built-in templates chapter that explains templates, fully functional gig files so you can immediately start tweaking sounds and experiment with your setup.
We recommend that you review this live stream to learn how you can optimize your workflow using bundled templates. If you are a guitarist, this YouTube video with Igor Paspalj, the Guitar World’s 2020 Electric Guitarist of The Year, shows how to use and improve guitar templates. .
Community forum
.
The heart of all Gig Performer user interaction is through the Community forums. This is the place where musicians can discuss their use cases, issues, explore new opportunities to use Gig Performer and many other topics. There is a great atmosphere in the Community and we’re proud to have such knowledgeable and kind members as part of our virtual family. Many Gig Performer users have explicitly commented on the value of the support our Community offers, such as in this thread:
“That did it! Brilliant! Thanks everyone for your support. This community is 100% of the reason why I bought Gig Performer and why I will stick with it until the end. Truly invaluable.”
.
All Gig Performer resources at once place
.
We’ve compiled a list of all Gig Performer resources and how-to threads (now over than 150 useful guides) in this thread.
How-to topics range from beginner to advanced and you can find relevant blog articles, YouTube videos, user manual pages, live streams, etc.
Here are the most important articles to get up to speed:
.
The section in the Community forums of which we’re very proud is the Gig and Rackspace files category. Here you can find a curated list of 100+ gig files, rackspaces and scriptlets. There is even the Getting Started gig file where we present you with the basic guidelines and various elements in Gig Performer:
Make sure to check out this live stream that discusses how to take full advantage of the rackspaces available on the community forums. .
Video tutorials
.
As for the Gig Performer YouTube channel, to help you get started, make sure to check out our Foundations and Build it with Gig Performer series:
.
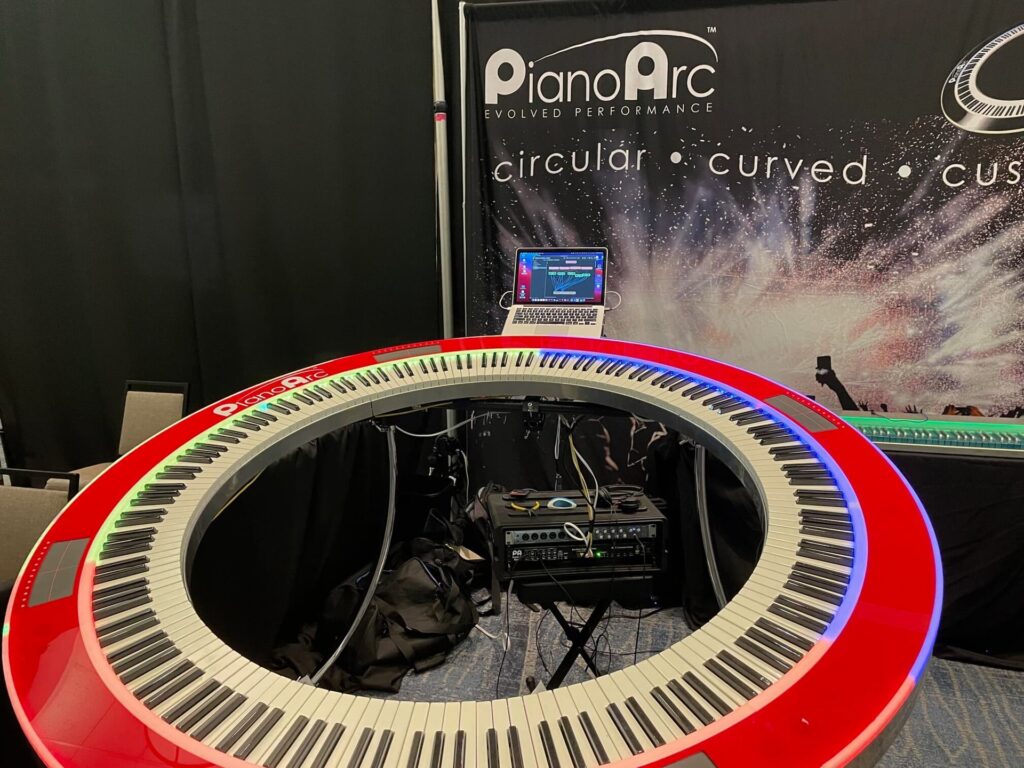
If you are wondering how other artists are using Gig Performer and with what gear, make sure to check our Gig Performer in Action page. You can see many names such as Blue Weaver (Bee Gees), Chris Broderick (In Flames, Megadeth), Igor Paspalj (Electric Guitarist of the World 2020), Robert Martin (Frank Zappa), Trey Gun (King Crimson), … … … even special projects such as PianoArc.
If you are wondering whether Gig Performer is the right choice for your use cases, don’t worry! Gig Performer provides you with the most flexible MIDI processing out there. It can handle the most advanced setups. You can find more more information in this blog.
One of our users independently tested Gig Performer’s latency and jitter. The results are remarkable – click here to learn more. That’s also why Gig Performer is used in other markets such as broadcasting and live streaming. Click on this interesting article to learn more.
Note: Gig Performer videos are recorded in English. However, you can find many YouTube videos of Gig Performer in other languages made by Gig Performer enthusiasts. For example, Marcelo Gesualdi created many great Gig Performer tutorials in Portuguese (click here to check them out). Click here to find resources in German. For resources inPortuguese, click here.
To see what’s new in the Gig Performer world, check out our newsletter. We keep an archive of all released newsletters here.
.
Share this article to help support Gig Performer and spread the word! 🙂
We use cookies to ensure that we give you the best experience on our website. If you continue to use this site we will assume that you are happy with it.Ok