The use case for the Rig Manager is to isolate the particular keyboards and MIDI controllers (MIDI pedal boards, etc.) from your actual rackspace setups.
The fundamental idea is:
– you name your physical devices in the Rig Manager,
– and you use those names when you are creating MIDI In blocks and widgets.
If you later need to use a different keyboard or control surface (or you need to deal with rented or back-line gear), you can simply redefine the association in the Rig Manager. Afterward, all your rackspaces will work with the new hardware. This is particularly useful if you are touring in different locations and you have to use different MIDI controllers.
The Rig Manager adds three significant features to Gig Performer. The ability to:
- use alias names for keyboards and widgets
- switch from one set of controllers to another
(Also useful when Windows decides to change the name of your MIDI port)
- distinguish controllers that use the same USB identifier
.
Aliases
.
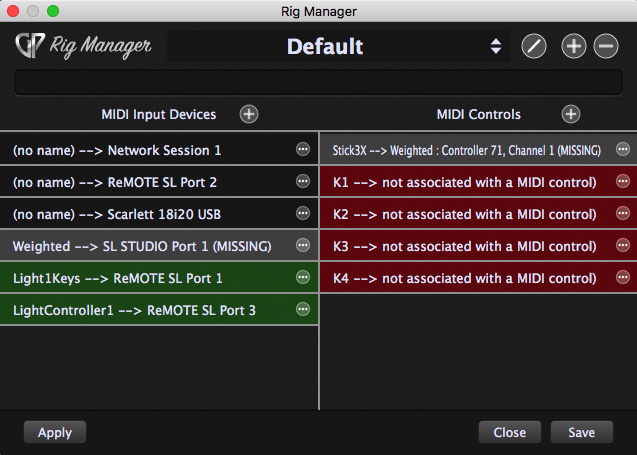
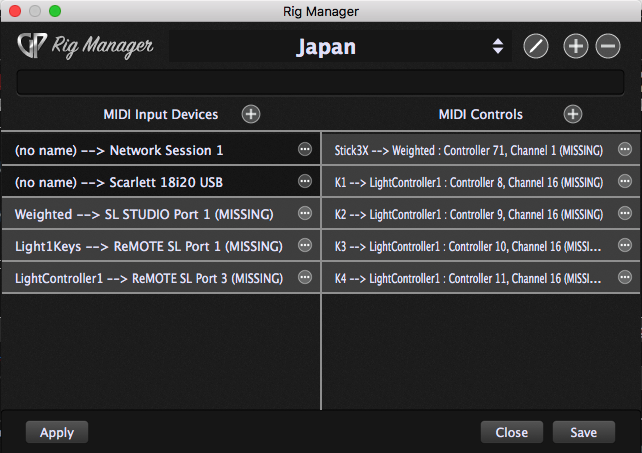
Take a look at the image above. On the left we have a list of physical devices, i.e, actual MIDI ports, typically over USB connections. In particular you can see that there is a Studio Logic keyboard called “Weighted” which is currently not connected to the computer and a Novation ReMOTE keyboard. The latter supports three MIDI ports, two of which have been named, Light1Keys and LightController1 respectively.
On the right is a list of controls that have been named. They are Stick3X, K1, K2, K3 and K4. The first, Stick3X, is currently a control that has been associated with the Studio Logic keyboard called Weighted which, as we’ve seen, is currently not available.
Now I’m going to associate those four controls, K1 thru K4 with four knobs on the Novation. After I’ve done that, we will see the following:
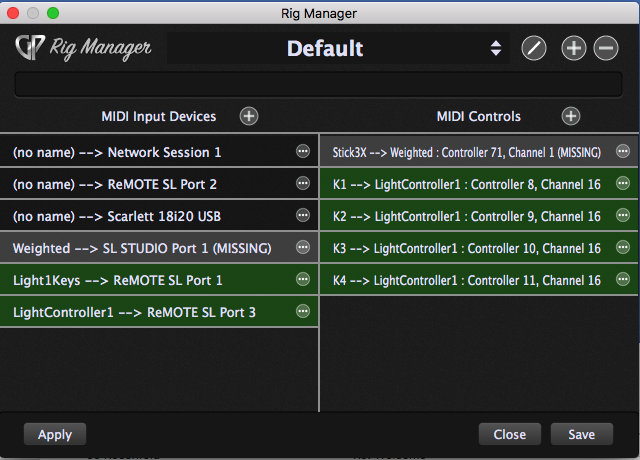
To use this configuration as our default, just click the Save button.
The benefit of this initial configuration will be immediately obvious once we start creating widgets in rackspaces. Take a look at this picture:
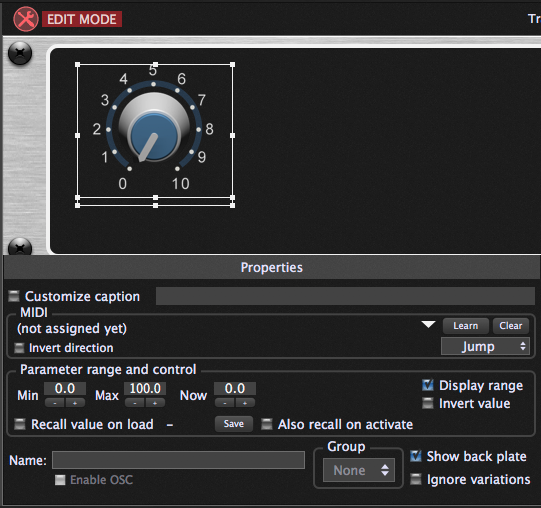
With Gig Performer 1 the next thing we would do is click the Learn button so as to associate a physical controller with the widget. That’s fine but the disadvantage is that as you create new rackspaces and add widgets, you have to perform that association every time. However, notice that to the left of the Learn button there is a little drop-down arrow. If you click that arrow, you will see the following:
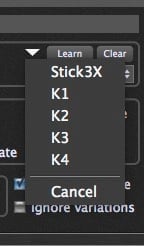
This is of course the list of aliases that we created in the Rig Manager as we were learning MIDI controls. You can now just select the alias you want and the associated control on the Novation will be attached to the widget. Below you can now see that the name K1 is associated with the widget.
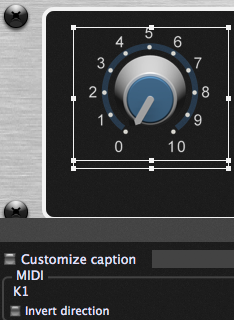
As you create new rackspaces and add widgets, simply associate them with the desired aliases and you’re done.
Controller sets
.
You’ll recall from above that we saved our work as the default configuration. However, if you have more than one set of controllers and keyboards that you use at different times, or perhaps you need to deal with controllers that you’re given at a particular show (such as when the show has been backlined), then you can copy your current Rig to a new rig but with a different name. Once you’ve done that, you’ll see the same list of alias names but the original physical devices will be displayed as missing.
Sadly, I don’t have another set of controllers available where I’m currently writing this article but if I did, I would plugin them in and then for each device or control, I would just click the  button which would open this menu:

At this point, you would click on Learn MIDI, then twist the knob on the new physical device. That’s it! All the widgets that you defined in your rackspaces would immediately work with the new physical controls.
Distinguishing identical MIDI devices
.
Suppose you have multiple identical MIDI devices. For example, I use three Roland A800 keyboards on tour, each connected to a USB hub. In that case, you may have the problem that, the plugin host will not know which keyboard corresponds with which MIDI In block. That depends on the order in which your controllers powered up or on which keyboard is connected to which input on your USB hub. However, it turns out that the MIDI In blocks also use those alias names. So, if you look at your list after creating names for your keyboards in the Rig Manager, you might see the following in your plugin list:
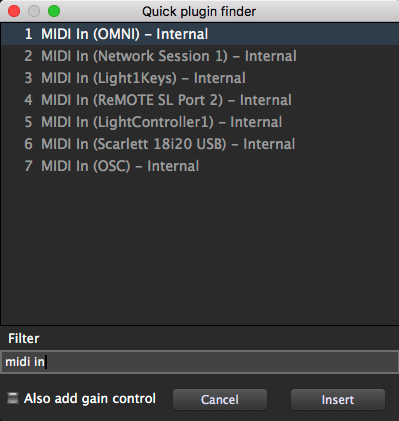
As you can see here, items 3 and 5 have names. So as long as you use those names in your MIDI In blocks, you can relearn aliases for keyboards. It’s just like you can relearn aliases for physical controls. Doing so will ensure that you always have the correct USB controllers associated with the correct MIDI In blocks. It’s something that takes about 2 minutes to do. You can easily and quickly do this after you have set up your rig on stage.
.
Related topics:
– How to switch between different controllers using the Rig Manager (YouTube)
– Dealing with back-lined or rented keyboards
– Gig Performer concepts (User Manual)
– The Rig Manager example (YouTube Shorts)


