In this guest blog article, you will learn about the best practices for deploying VST plugins on Windows.
Guest post by Gig Performer user Jim Erwin
— Keyboard player with The Suburbans
.
Best Practices (okay… my practices) for deploying VST Plugins on Windows
.
I’ve seen multiple approaches to installing VST plugins on Windows. After a number of years of building new Windows-based audio workstations, I have developed the following consistent approach to my plugin installation structure. There are two reasons for this. First, as I move from one machine to another, it is far easier to migrate when the machines are set up in a consistent manner from the old machine to the new machine. Second, my approach embraces the concepts around Windows security in order to avoid needing to ‘run as administrator’ for most application usage. Your mileage may vary, but here’s my take on the process. I would offer up that the install location for RTAS plugins would probably follow this same guidance, but I don’t use and typically won’t install a RTAS plugin on my system.
In today’s age, most of us Windows users (at least 90%) are on a 64-bit version of Windows. For non-business usage, that percentage is yet higher. I would expect for power-audio users, that is really at the 100% mark. I make it a policy to no longer use any 32-bit audio applications or plugins with my system, no exceptions. The incurred overhead and potential instability just isn’t worth it. That being said, I will reference where/how 32-bit plugins should be installed given my approach. Some install packages will require you to install and/or specify a location for 32-bit plugins in order to install the 64-bit versions, so there ARE some 32-big plugins on my systems. I just refuse to use them.
Application Install Location Guidance
.
By default, Windows 64-bit applications should install somewhere under C:\Program Files\ with some additional path specified by the installer package with either the vendor or application name folders or in some cases both. An example of this would be C:\Program Files\Arturia or C:\Program Files\KV331\SynthMasterOne .
By default, Windows 32-bit applications that are installed on a 64-bit Windows operating system will install to C:\Program Files (x86). Please note that in either case, I would NOT install these application files in the same location as your VST2 plugins. This is an anti-pattern. Installing the application files in your scanned plugins folders will result in scanning and flagging a significant number of .dll files that are NOT VST plugins. There are other side-effects of this approach that go beyond the scope of this set of best practices. Just suffice it to say “It’s a bad idea”.
Install Locations for VST2 Plugins
.
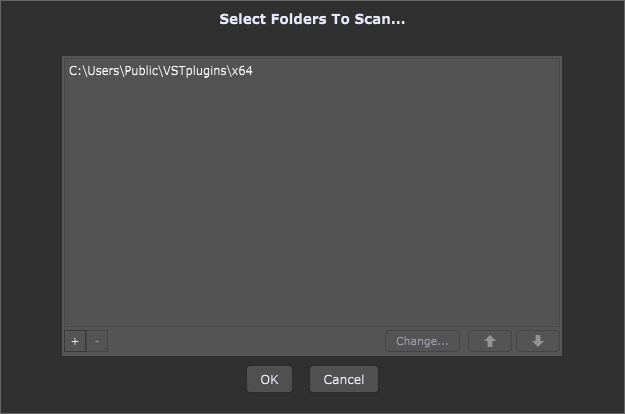
For VST2 plugins, a location that is ‘accessible’ to all users is a good practice. Personally, I will create a the folder C:\users\public\vstplugins on any new system I build. I will then create two additional subfolders, C:\users\public\vstplugins\x86 and C:\users\public\vstplugins\x64 for 32-bit and 64-bit plugins accordingly. I will then install any VST2 plugins of the appropriate type (32-bit or 64-bit) into the appropriate folder and specify the 64-bit one in the Plugin Manager:
This also makes for VERY simple setup of your VST2 scan folders for ANY audio applications that can load them.
Guidance for VST 3 Plugins
.
I don’t have any specific guidance here being as the methodology of how discovery is done with VST3 plugins is VERY different from VST2 plugins. I simply accept whatever location the installer package wants to put them in.
Installing Present Libraries, Sample Libraries, etc.
.
Provided the installer supports choosing the location of any preset/sound/sample libraries to be installed (and most do), I always install these under C:\users\public\documents. You may or may not choose to subdivide into additional subfolders based on vendor/application/etc… dependent on the particular installer package, however if you are taking a specific approach, DOCUMENT AS YOU GO. If you need to recover or build a new system, you will thank yourself for the guidance.
Please note that some libraries come with a significant amount of additional subfolders of their own, so you creating your own subdivisions could create excessively long path names that can cause other types of issues. Do so sparingly and at your own risk.
Backup, Backup, Backup
.
Lack of a backup strategy with a critical system like your audio workstation is sheer laziness that will one day bite you in the ….. I personally back up before any significant system change and at least once a week whether I’ve changed anything significant or not. This approach has saved me weeks of effort in the last year alone. Lack of a backup strategy is simply negligence on your part for something you obviously think important enough to spend some significant time on. I personally have been using Acronis True Image as my backup utility for 15 years with great success. Not only have I done full system restores from images, but occasionally just having the ability to peruse the file system at a date several months in the past to recover just one version of a given file has saved me significant effort in the long run.
Closing Thoughts
.
I’m hoping some of you find this guidance useful, however I’m sure there are others that have their own consistent standards for this topic. This post was really intended for those who do not yet have a standard, particularly those just starting out in the VST plugin world. This is one right approach, but not the only right approach. Your mileage may vary.
.
Related topics:
– How to specify VST and VST3 plugin locations?
– Gig Performer is used by professional and well known musicians all over the world
– Community tips and tricks
– Jim Erwin and Gig Performer in Action
