In this article we explain how to create a custom metronome with visual feedback using the System Actions plugin.
Introduction
.
The System Actions plugin is one of the new built-in plugins in Gig Performer 4. This plugin allows you to control various Gig Performer system actions and commands (such as Tap Tempo, Play/Stop or the Master Trim) using widgets (and therefore through your MIDI controllers or remote control surfaces via OSC). Visit our user manual to see the complete list of supported actions for this plugin.
We will focus on a specific set of System Actions parameters that will allow us to create our own custom metronome. Beside the System Actions plugin we need a plugin that will provide us with a drum sounds, such as the KeysOfThe70s plugin that comes bundled with Gig Performer 4. (NB: you can use any plugin you like, e.g. the free Sitala plugin).
What will we create
This is what our custom metronome will look like:
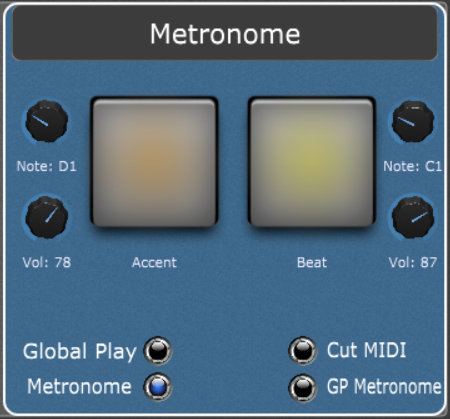
It will provide us with the following functionality:
- Visual feedback – the accent and beat buttons will light up at appropriate times.
- Change notes – you can easily change the notes for accent and beat respectively.
- Volume controls – easily change the volume of the accent and beat.
- Global Play – toggle the global playhead.
- Metronome control – you can turn this custom metronome on or off (perhaps you might want to use the built-in metronome instead).
- Cut MIDI – this feature provides visual feedback only. Sound is not generated (MIDI events won’t come into the sound generating plugin).
- GP Metronome – this toggles the built-in Gig Performer metronome.
.
You can have many different scenarios with this setup; for example, you can choose to have visual feedback only, or combine visual feedback with one of the metronomes (custom or Gig Performer’s) or to hear both of them at the same time.
Note: The download link is at the end of this article so you can easily download this gig file and try it out.
Let’s get started.
Inserting and connecting the plugins
.
Since we want our custom metronome to be globally available, make sure to switch to the Global rackspace and switch to the Wiring view:
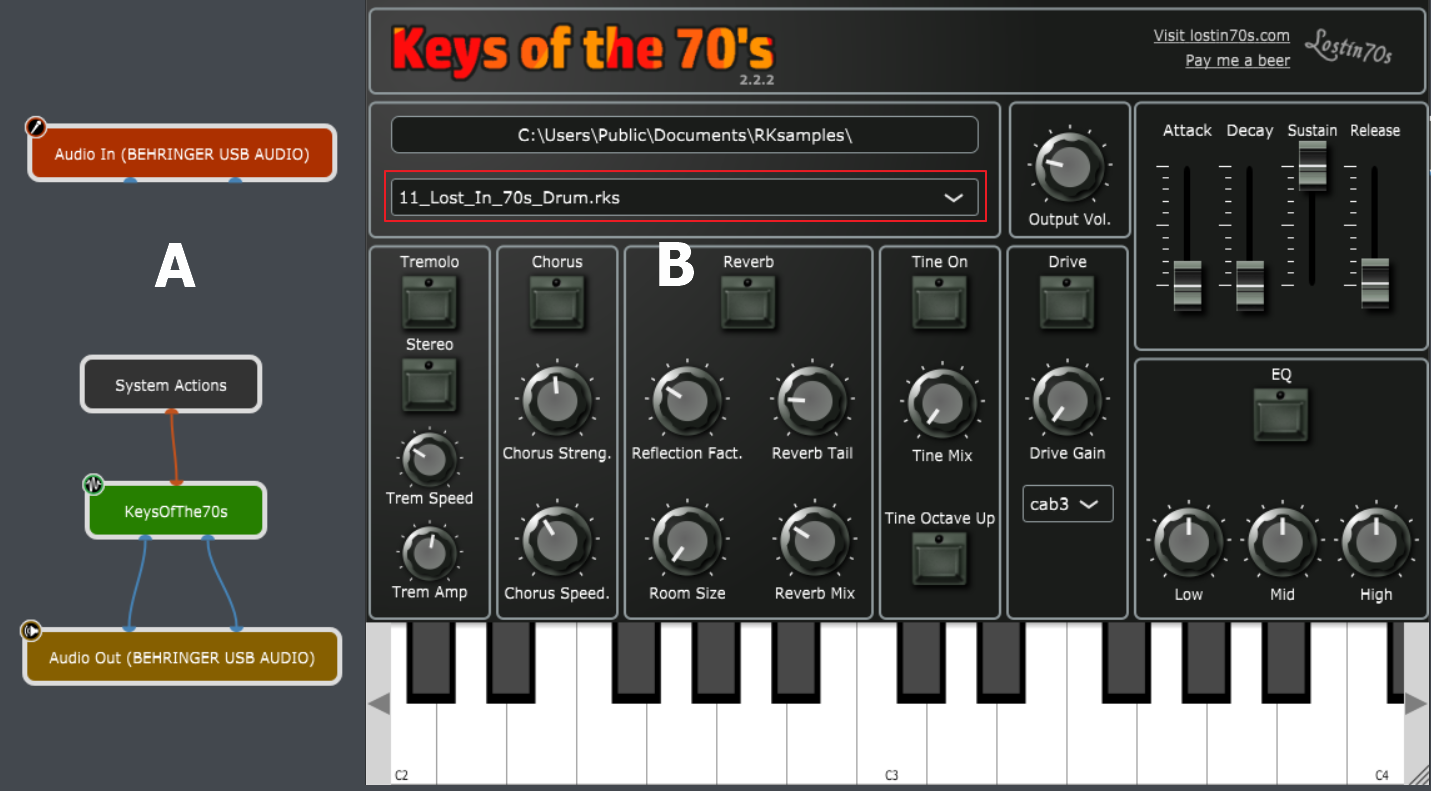
Insert the System Actions plugin and then the bundled KeysOfThe70s plugin and connect the plugins with your audio outputs as shown in (A). Refer to this chapter in the user manual if you need help with inserting and connecting plugins.
In the KeysOfThe70s plugin editor (B), select the 11_Lost_In_70s_Drum.rks sounds (the red rectangle in the image above). If this plugin editor is not displayed, double-click the KeysOfThe70s plugin to open it. This will load the drum sounds into the KeysOfThe70s plugin.
The next step is to insert and arrange widgets on a panel to access, display and control the parameters we want.
Designing a panel for the custom metronome
.
We’ll use the following widgets:
- Pad buttons – for the visual display of the Accent and the Beat.
- Plastic knobs – to control the note and volume for the Accent and the Beat buttons respectively.
- LEDs – to control and indicate the status of the global playhead, custom metronome, Gig Performer’s metronome and MIDI events generation.
- Shape widget – the Shape widget provides a great way to organize widgets visually in one section.
- Text labels – four of them are without the “back plate” (learn more in our user manual), like the plastic knobs in (B) in the screenshot below.
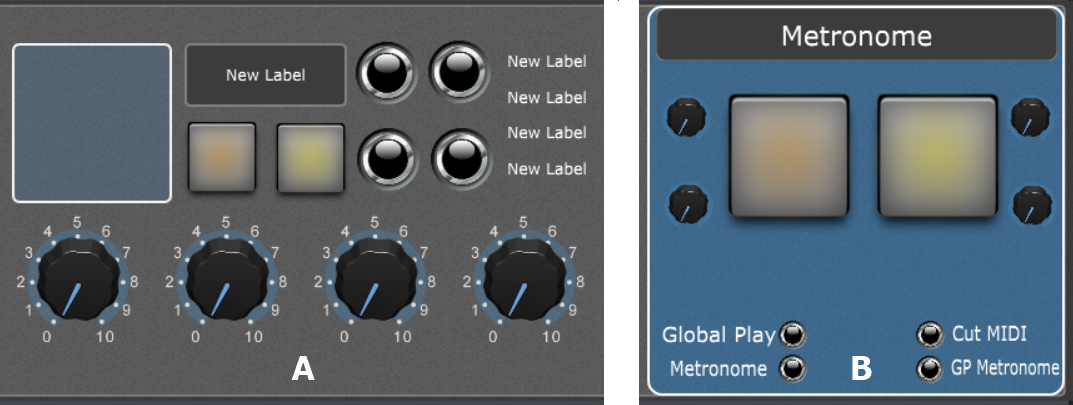
When you add the widgets to a panel in the Global rackspace (A), resize, reposition and adjust their Z-ordering to create a functional layout (see image (B)).
Connecting widgets to System Actions parameters
.
In this step we connect widgets to the corresponding System Action parameters. Click on a widget, select the System Actions plugin (indicated with the red rectangle) and then select the corresponding parameter (see the red arrow in the image below):
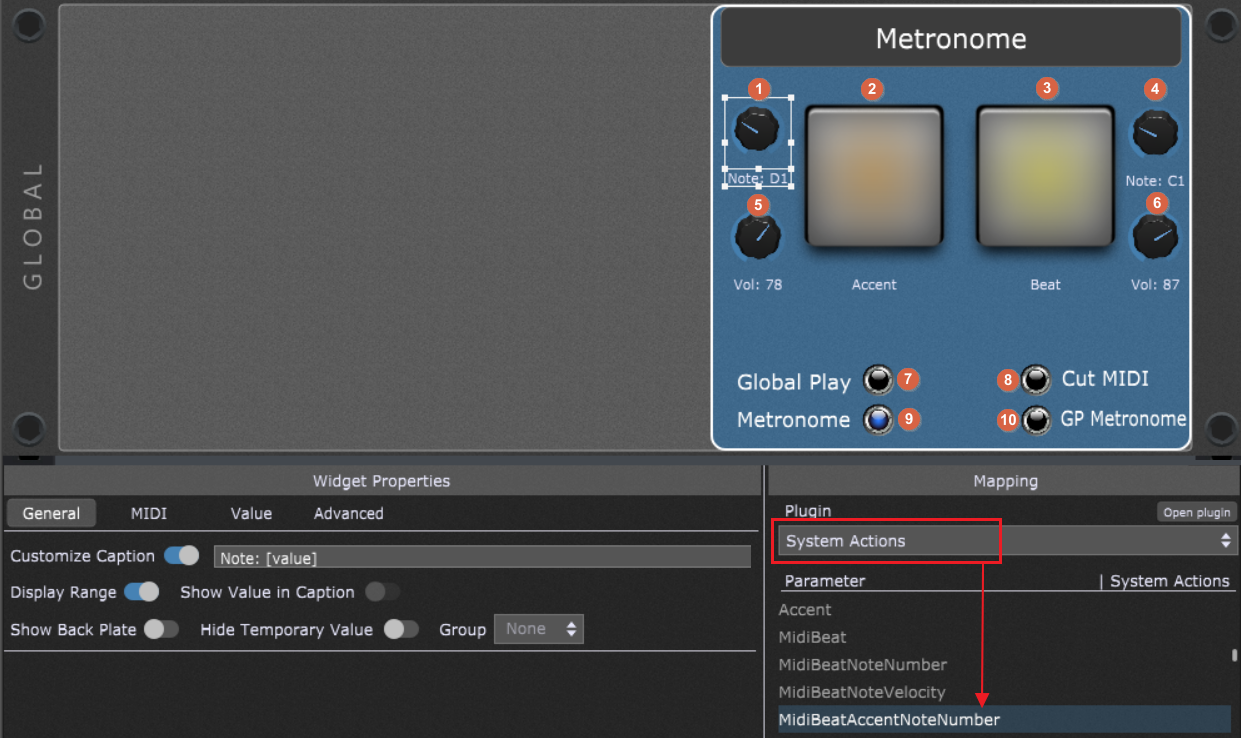
Assign parameters as follows:
1. Assign this plastic knob to: MidiBeatAccentNoteNumber
2. Assign this pad button to: Accent
3. Assign this pad button to: Beat
4. Assign this plastic knob to: MidiBeatNoteNumber
5. Assign this plastic knob to: MidiBeatAccentNoteVelocity
6. Assign this plastic knob to: MidiBeatNoteVelocity
7. Assign this LED to: PlayStop
8. Assign this LED to: MidiBeat
9. Assign this LED to: BeatMode
10. Assign this LED to: Metronome
Exit the Edit mode, activate the Global playhead and have fun with the metronome!
Download this gig file: Custom Metronome with the visual feedback.
Make sure to visit our Gig and Rackspace files category for more useful gig and rackspace files generated by our Community members.
Own the Stage® and enjoy Gig Performer®!
Nemanja Pudar
.
Related topics:
– System Actions showcase (Gig and Rackspace files)
– Time Controls in Gig Performer (User Manual)
