Thank you for your interest in Gig Performer Essentials.
Please enter your name and email address in the field below. Links for both Windows and macOS downloads will be sent to you.
By providing your email address, you will be subscribed to our newsletter from which you will be able to unsubscribe at any time. Make sure you use a valid e-mail address and if you don't receive our e-mail, please check your spam folder.
Dialog window
Gig Performer® 14-Day Free Trial
Thank you for your interest in Gig Performer.
Please enter your name and email address in the field below. Links for both Windows and macOS downloads will be sent to you.
By providing your email address, you will be subscribed to our newsletter from which you will be able to unsubscribe at any time. Make sure you use a valid e-mail address and if you don't receive our e-mail, please check your spam folder.
In this article, you will learn about touch screen support in Gig Performer.
Gig Performer Pro v5.1.4 comes with enhancements for touch-screen users. Here is a closer look at how touch screens integrate into the Gig Performer workflow and how to get the most out of it. .
Background
.
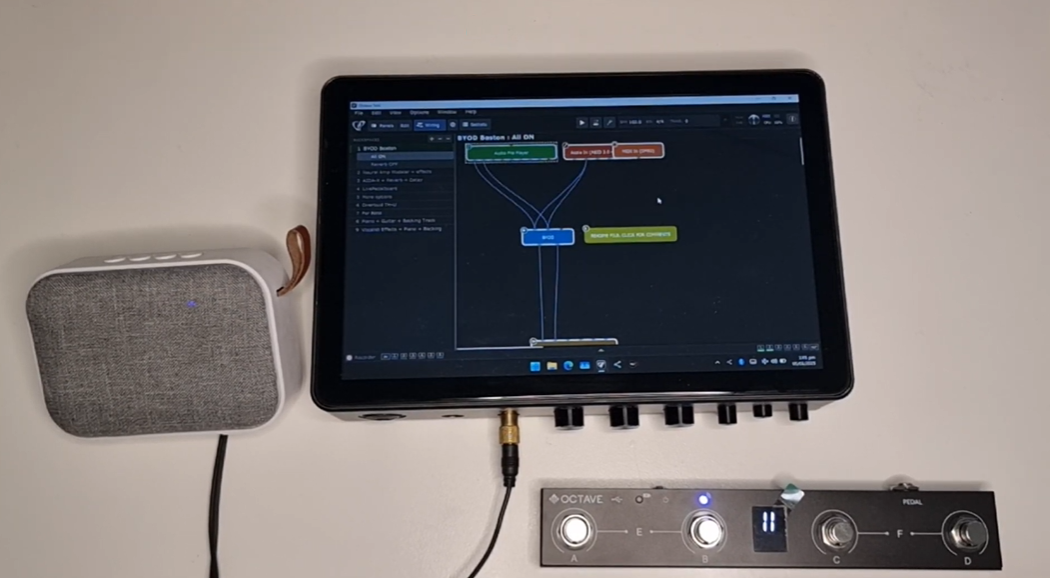
Whether you’re a keyboardist using soft synths, a guitarist running virtual amps, or a producer managing complex effect chains, touch screen integration in Gig Performer offers a natural, hands-on control experience.
Although the first versions of Gig Performer were not built with the touch screen functionality in mind, our users had been running them on touch screen devices nevertheless. A great example is this 9-year-old video from Robin Vincent of Molten Music Technology, demonstrating Gig Performer v1 running seamlessly on a Microsoft Surface Book.
Over the years, we have been supporting more of the touch screen features. We have seen many Gig Performer users interacting with Gig Performer using a touch screen device. They range from:
The latest Gig Performer update brings enhancements to the two-finger tap and pinch operations.
We will start by configuring various elements in Gig Performer to make them more accessible when working with a touch screen device.
NB: This blog article was written on a Windows 11 computer paired with an Asus touch-screen monitor. .
Make adjustments in Gig Performer for touch-screen use
.
First, customize Gig Performer with a touch-screen in mind. Depending on the size of your touch screen display, you may want to customize the size of various elements in Gig Performer, as well as other options, to suit your preferences. .
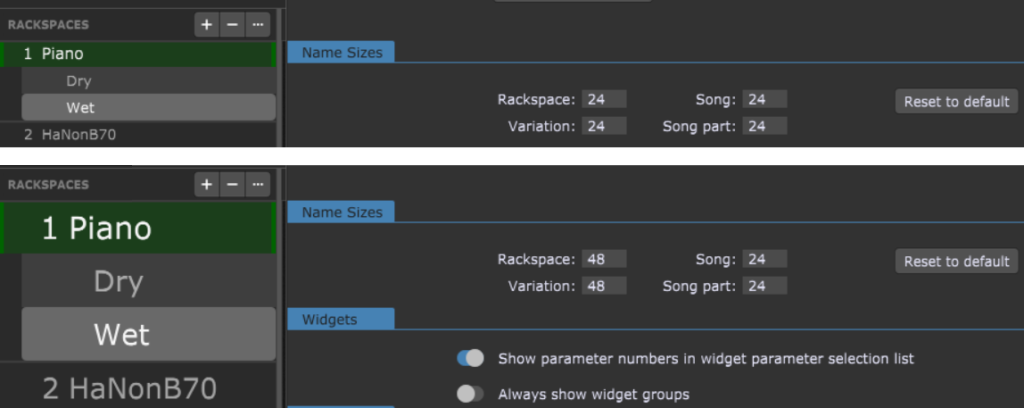
1. Adjust the size of rackspace, variation, song, and song part names
.
Gig Performer allows you to change the size of names of rackspaces and variations in the Panels and Wiring views and the size of names of songs and song parts in the Setlist view. You can make the desired changes in Display Options. The default size for all names is 24 pt, but you can change this to any value between 12 pt and 48 pt, per your liking. Here is a quick comparison:
The first screenshot shows the default size for rackspace/variation names and in the second screenshot these values for rackspace/variation name sizes are set to 48pt.
Similarly, adjust the name sizes for songs and song parts to your preferences. .
2. Increase the scroll bar width
.
In the Gig Performer Display Options, you can set the desired width of scroll bars, making them more suitable for touch screen use.
You can change the width of the Rackspace list, Songs list, Widget Properties area, the Plugin Manager, and the Wiring view scroll bars. (from 6 to 50) .
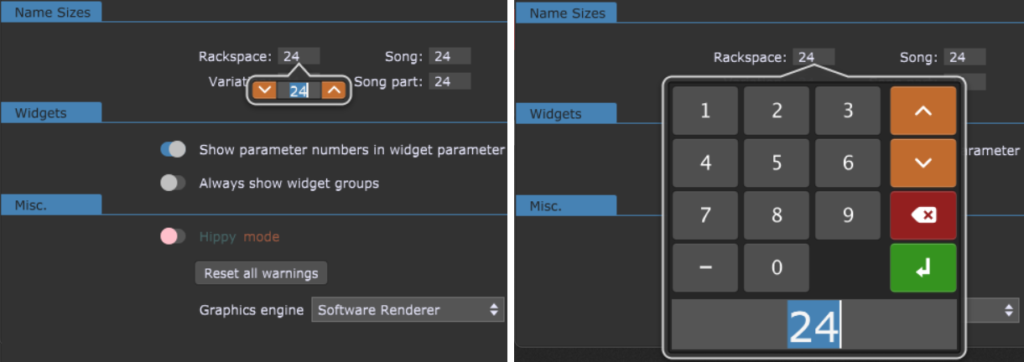
3. Enable large keypad for entering values
.
You can activate the larger keypad for entering some values by turning on the Touch friendly number editing toggle button in the Display Options. Here is a comparison between the default and larger keypad:
Needless to say, the larger keypad is a better option for touch screen devices. .
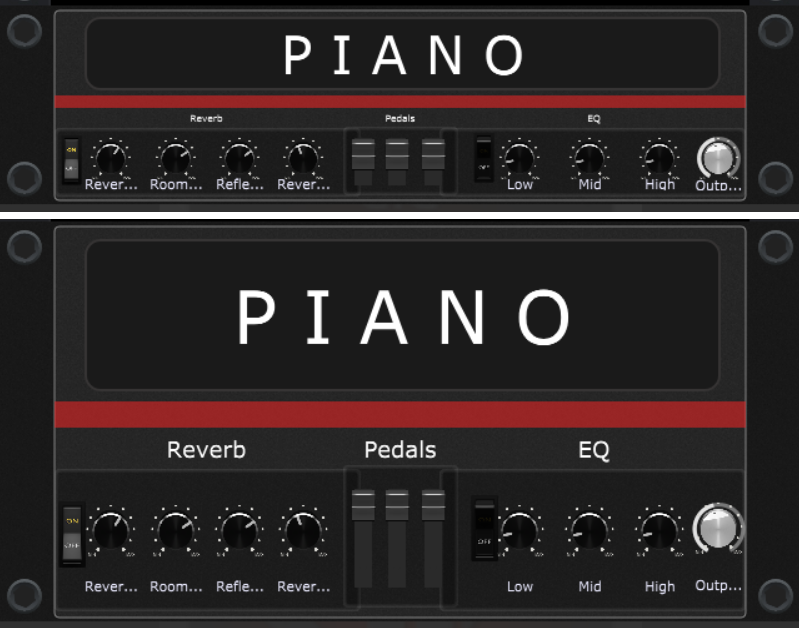
4. Adjust the size of widgets and panels
.
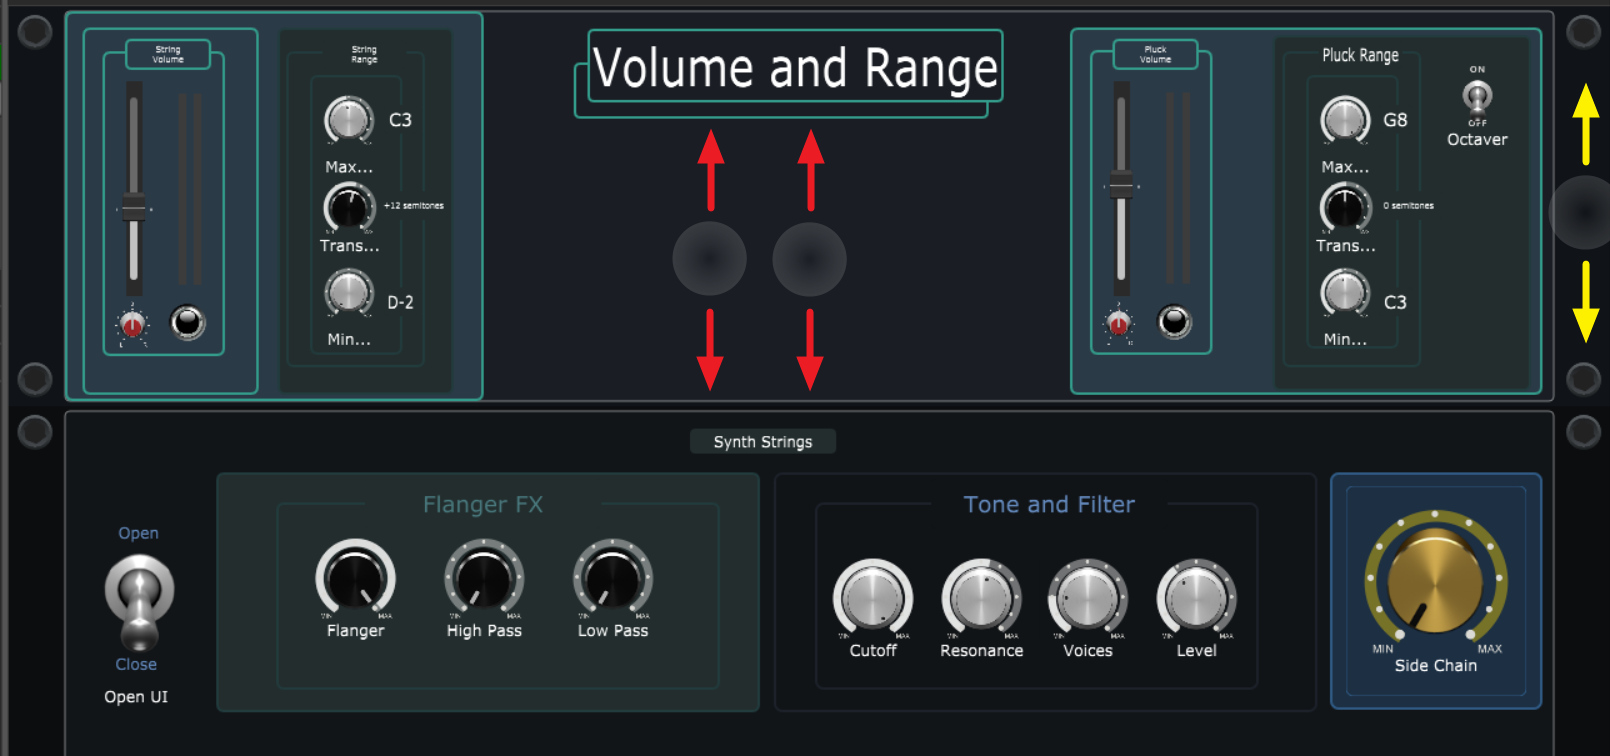
Particularly on small touch screens, you may want to use larger panels and widgets. In the following screenshot is compared a 2U panel and its 4U convert:
.
In the Setlist Options window, you can customize the Song part bar. You can adjust the number of rows and song parts per row (max is 3×8, therefore, you can show up to 24 song parts).
This bar allows you to easily tap the next or previous song and easily tap the desired song part. Double-tap on the current song opens the Quick Song Finder window.
Note: If you don’t use the Song part bar you can remove it altogether. Select ‘0’ from the Number of rows drop-down menu to remove the Song part bar. This allows you to have more space to display your panels on small displays. .
Windows touch screen tips
.
Before we proceed with touch screen operations, it is useful to take a look at some Windows touch-screen features.
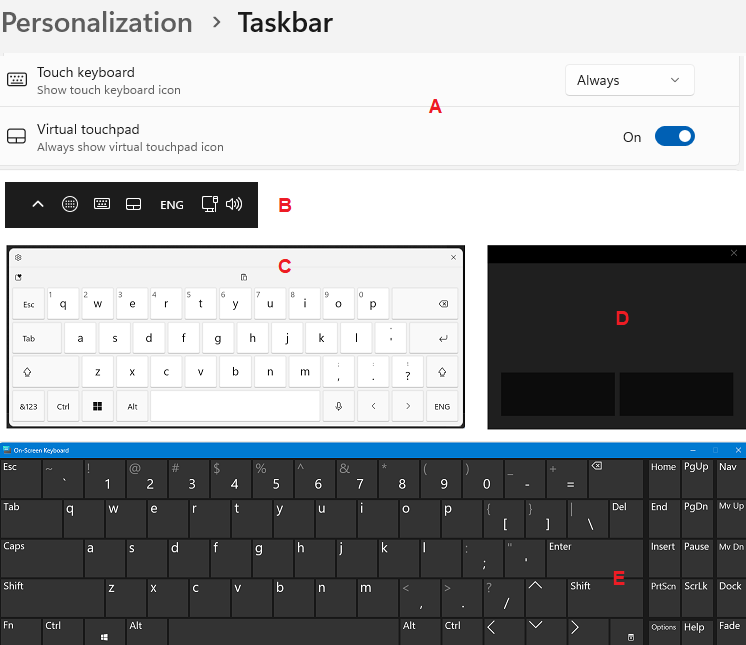
First, go to the Personalization -> Taskbar options and enable Touch keyboard and Virtual touchpad (A). The corresponding icons will be placed in the Windows Taskbar (B).
The Touch keyboard (C) will come handy when you rename plugin blocks, give rackspace names, etc. Since displayed in the Notification area of the Windows Taskbar as an icon, it is easily accessible for any text input. Note, however, that the usual modifiers (i.e. Shift, Ctrl, Alt) will not work in Gig Performer with this keyboard. For example, the Undo feature (Ctrl+Z) will not work.
The Virtual touchpad (D) is useful when extra precision is needed, e.g. when you draw a curve. Additionally, using this feature will show the cursor arrow.
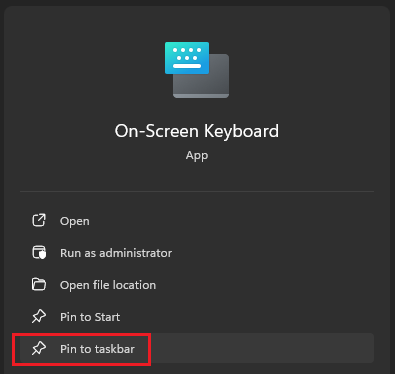
Windows includes another keyboard, the On-Screen Keyboard app (E), and all modifiers (i.e. Shift, Ctrl, Alt) work well with Gig Performer. This means that all the tips mentioned in the blog article: The Magic of the Shift key will work just fine on a touch screen device.
For example, when you toggle the Shift key and then tap on a widget (when not in Edit mode), the Widget Actions menu will appear.
Although this keyboard is not immediately accessible from the Notification area of the Taskbar, you can pin it to the taskbar (like any other application).
To move windows, don’t tap and hold the window’s title bar and then try to move a window — nothing will happen. Instead, tap on the window’s title bar and immediately start moving the window (while holding the tap). This is useful when trying to reposition a plugin editor window in Gig Performer.
NB: There are configurable gestures on Windows. For example, by default, if you swipe with three fingers down, all open windows will be minimized. If you are interested in these gestures, make sure to let us know in our community forum so that we can expand on this topic. .
Touch screen operations in Gig Performer
.
Now that you have adjusted Gig Performer elements and customized Windows per your liking, let’s review the touch screen operations in Gig Performer. In the Gig Performer’s touch screen world:
A tap on the touch screen corresponds to a mouse click.
A double-tap corresponds to a double-click.
The two-finger tap corresponds to the right-click and, as a rule of thumb, opens a contextual menu.
The pinch in gesture works in the Wiring view and corresponds to zoom out the Wiring area. Similarly, the pinch out gesture zooms in the Wiring area.
Use the tap and drag gesture to move widgets, plugin blocks, and plugin editor windows.
Moving two fingers up scrolls down the area (i.e. panels or the wiring area). Similarly, moving two fingers down, scrolls up the area.
Let’s review some of the touch operations in different views in Gig Performer. .
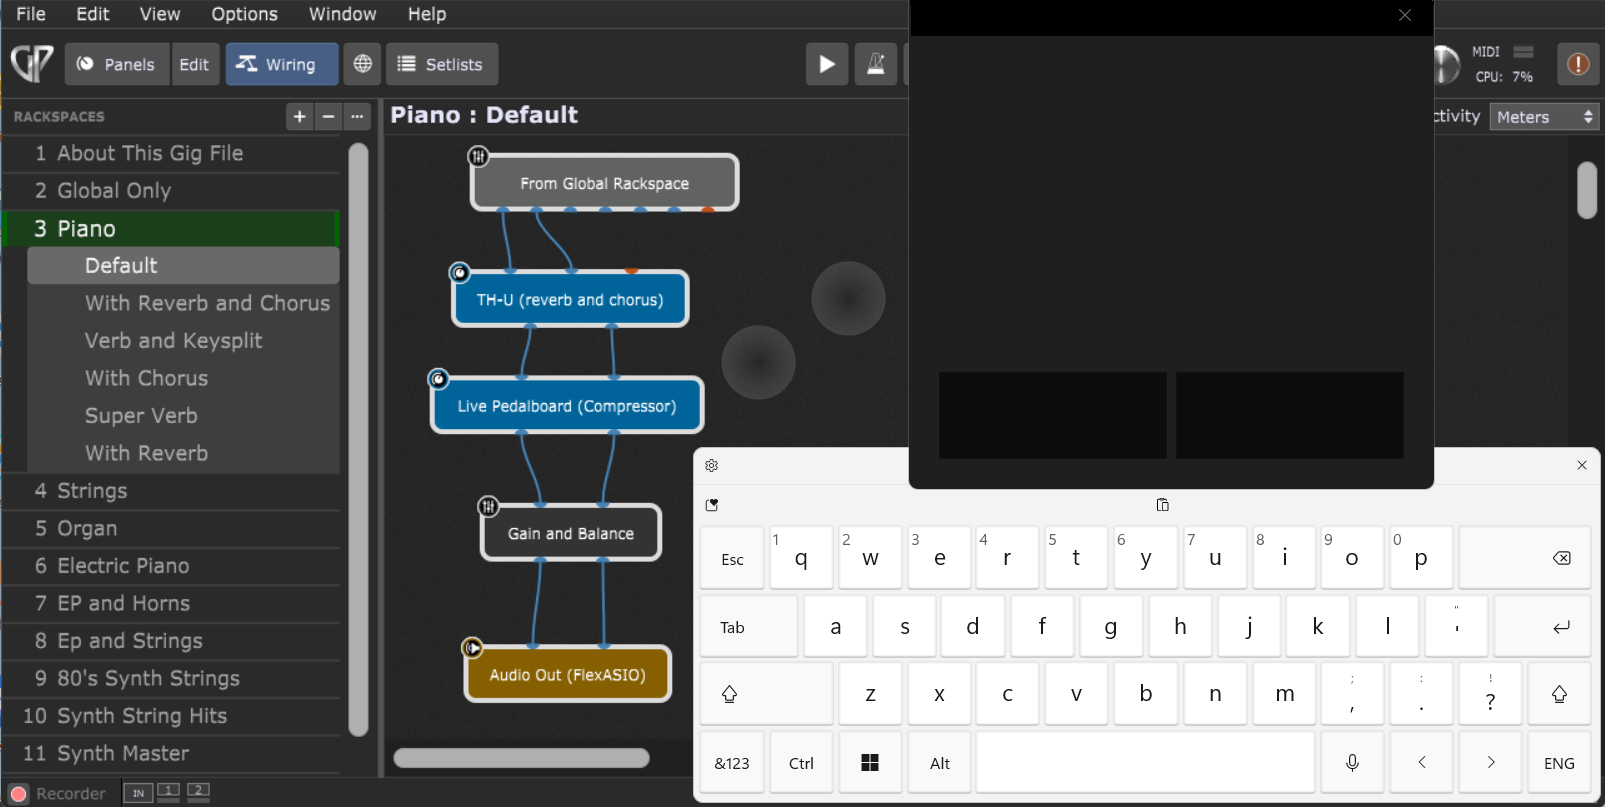
Touch screen operations in the Wiring view
.
To add a new plugin, tap with two fingers on an empty surface in the Wiring view to open a contextual menu. Afterwards, navigate the menu to select the desired plugin. Next, to change the position of the plugin, tap the plugin and drag it to the desired position. Double-tap a plugin to open its editor window. Tap on a plugin with two fingers to open a plugin contextual menu.
Connecting two plugins is easy, tap the output pin of one plugin and connect it to the input pin of another plugin:
To disconnect a plugin, you can either tap on a wire and drag it away or tap on a wire with two fingers and select “Remove this connection”.
Tap on a plugin to select it. If you want to select multiple plugins, tap and hold on the empty surface of the Wiring view and then drag around all the desired plugins so that they are inside the selection rectangle.
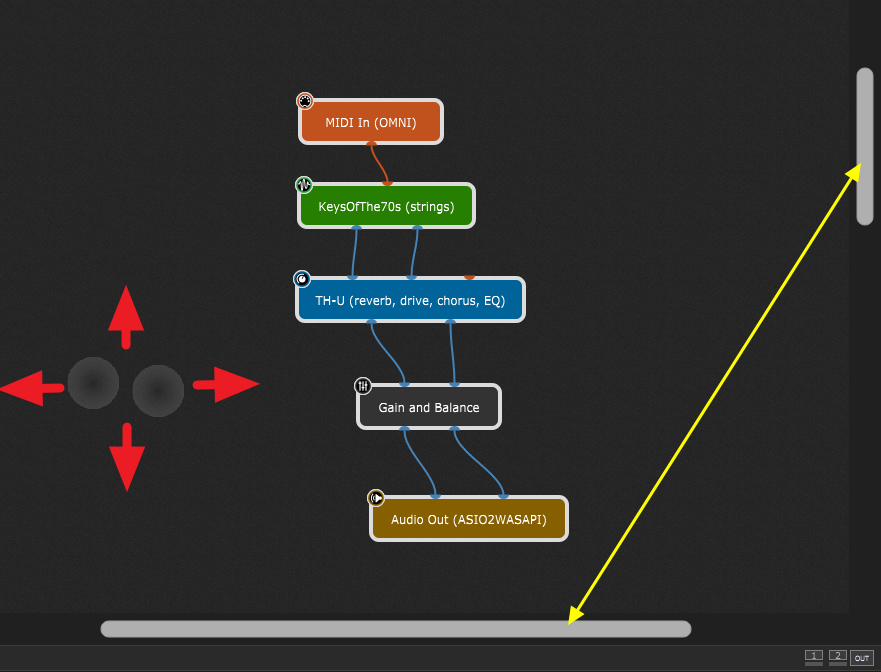
To scroll the Wiring view are you can use the scroll bars (indicated by the yellow arrows) or tap with two fingers and move up, down, left or right (indicated by the red arrows).
Pinch in or pinch out the Wiring area to zoom out or zoom in this area respectively. .
Working with Edit mode of the Panels view
.
To add a new widget, simply tap and drag desired widget onto a panel. Tap on any widget to select it. Next, to change a widget’s position, tap the widget and drag it to the desired position. If a widget is mapped to a plugin, double-tap a widget to open that plugin’s editor window.
To change the size of a widget, tap and drag the lower right corner of a widget.
If you want to select multiple widgets, tap and hold on the empty surface of the panel view and encompass the desired widgets with the selection rectangle.
To scroll the Panels view, you can tap and move across the right area (indicated by the yellow arrows) or tap with two fingers and move up and down (indicated by the red arrows).
In the Rackspace browser, you can tap and drag a rackspace or a variation to reorder it. .
Working in the Panels view, non-Edit mode
. >>Tap on a button, a switch or a LED to turn it on. Tap and move up or down knobs and sliders to change their value.
Double-tap on a widget to reset it to its default value.
In the Rackspace browser, you can tap and drag a rackspace or a variation to reposition it in the list. To scroll the browser, use either the scroll bar or tap on the Rackspace browser area with two fingers and drag them up and down. .
Working in the Setlists view
.
In the Song browser, you can tap and drag a song or a song part to reorder it. To scroll the browser, use either the scroll bar or tap on the Song browser area with two fingers and move them up and down.
If you have a large touch display, you may want to configure the Song part bar to easily tap on the desired song part, the next or the previous song. You can turn off this bar if you have a small touch display (as previously mentioned in the article). Double-tapping the current song name opens the Quick Song finder window. .
Touch-friendly Gig Performer extensions
. Extensions are third-party libraries that Gig Performer can load to provide additional functionality. In this context, an extension can provide some new (and touch-friendly) GUI functionality. Click here to see the list of available extensions for Gig Performer.
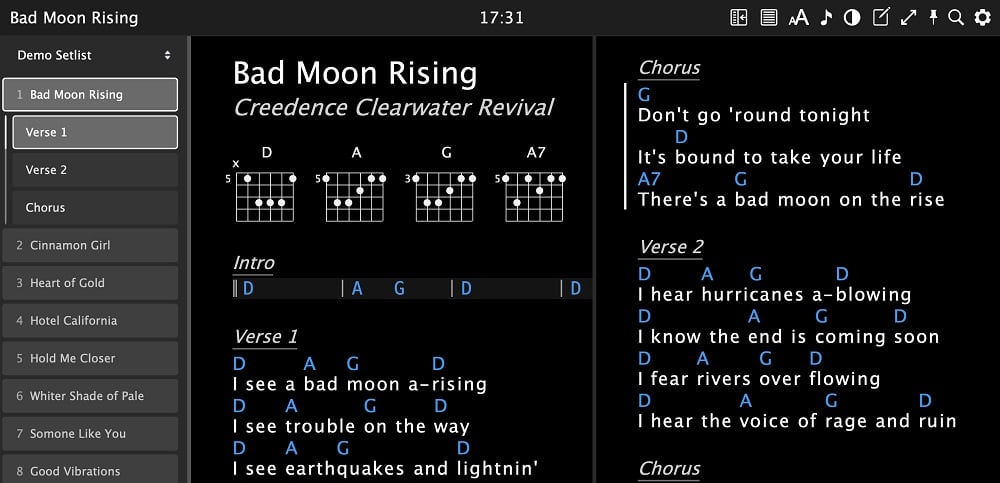
Take a look at this awesome free extension called GP Lyrics/Chords:
NB: the free version of this extension is available here.
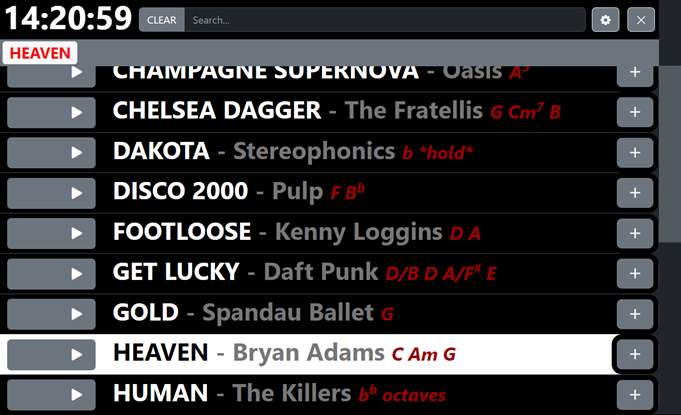
You can also use a touch surface with applications such as TouchOSC, Lemur, BandHelper, Open Stage Control, Mobile Sheets and OnSong. Click here to check out the tutorials for integrating these applications with Gig Performer.
To see more tips and tricks about touch screen use cases, or you want to share your feedback, please this community thread.
.
Share this article to support Gig Performer and spread the word!
We use cookies to ensure that we give you the best experience on our website. If you continue to use this site we will assume that you are happy with it.


")