Thank you for your interest in Gig Performer Essentials.
Please enter your name and email address in the field below. Links for both Windows and macOS downloads will be sent to you.
By providing your email address, you will be subscribed to our newsletter from which you will be able to unsubscribe at any time. Make sure you use a valid e-mail address and if you don't receive our e-mail, please check your spam folder.
Dialog window
Gig Performer® 14-Day Free Trial
Thank you for your interest in Gig Performer.
Please enter your name and email address in the field below. Links for both Windows and macOS downloads will be sent to you.
By providing your email address, you will be subscribed to our newsletter from which you will be able to unsubscribe at any time. Make sure you use a valid e-mail address and if you don't receive our e-mail, please check your spam folder.
In this article you will learn about tips and tricks to optimize your plugin usage.
Or community forum is a great knowledge resource. Here and there we stumble upon many that can help reduce one’s CPU and RAM usage. We decided to compile some of these tips in this article.
Sample it!
. Gig Performer includes the Auto Sampler, a powerful and revolutionary feature. It allows users to create a set of samples from individual or interconnected plugins that, if used together, might demand too much CPU to be practical for live performance. External synths can also be sampled with added plugin effects, eliminating the need to bring those heavy synths to a show.
Note: there is a new Auto Sampler YouTube video — check it out here.
Create your own impulse responses
.
Suppose you particularly like a plugin’s room effects, but when that effect is engaged, CPU usage jumps up substantially. In that case, you may want to create your own impulse responses.
Read this article to see how our community member and beta tester @rank13 managed to reduce his CPU cycles significantly (25% instead of 50%) by creating his own impulse responses.
Try physical modeling plugins
.
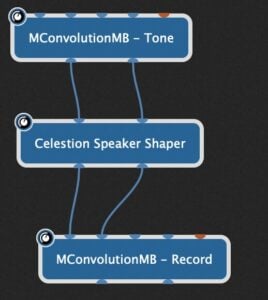
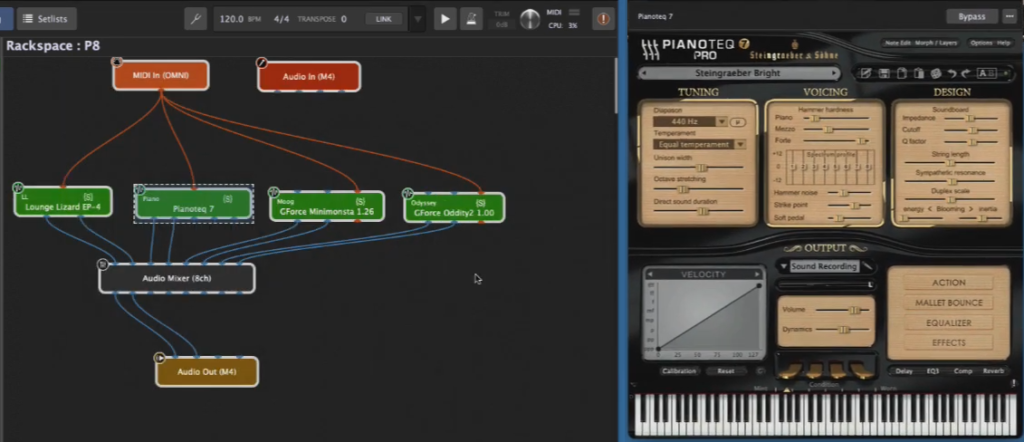
If you like sample-based plugins but you do not have enough RAM or disk space to store all the samples, you might want to try a physically modeled plugin as an alternative. For example, Pianoteq from Modartt creates a physical model of an acoustic piano. Therefore, it doesn’t need gigabytes of samples. Additionally, Pianoteq supports sympathetic resonance, something not really possible with sampled pianos. It also has addons for physically modelled electric pianos and clavinet.
Applied Acoustics Systems has physical modeled plugins for several synths, string machines, guitars and even a modular rack.
.
We have covered using multiple instances in detail in this blog article:
If you use a plugin such as Diva or Tyrell N6 (as pro musician Alistair Begg describes in this post) that are notorious for having high computer resources requirements, you can put it in a separate Gig Performer instance.
Another benefit is that your other instance can use with a different buffer size, say 256 samples. NB: ensure that the sample rate (say 44,100 Hz) is the same across your instances.
Read this blog article to learn how buffer size and sample rate affect your computer resources.
Get to know your plugins and tweak them
A little bit of reading the documentation or researching your plugins can be helpful.
Is a plugin available for your CPU?
For example, if you are on a Mac and plan to migrate to Apple Silicon, you should check whether your plugin is natively available for your M1 chip or whether you need to run it under Rosetta.
NB: Gig Performer is natively available for Apple Silicon. Of course, we recommend that you use plugins built natively for your processor to have the best performance.
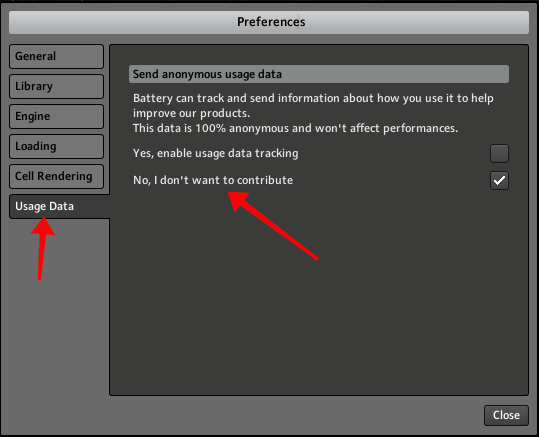
Disable Usage Data Tracking
Further, certain options in your plugins may cause CPU spikes or other undesirable behavior. For example, as described in this article, we strongly recommend that you disable the Usage Data Tracking option in Native Instruments plugins and look for similar options in other plugins:
Also make sure that you disable any automatic update or automatic install features for your plugins.
NB: Gig Performer itself does not share usage data.
Test different plugin formats
Gig Performer supports VST, VST3 and AU plugins, the latter on Mac only. However, sometimes certain formats are not as well tested as others and a VST version may work flawlessly while the AU version fails, or vice versa. For example, some plugin formats may crash but the same plugin in a different format may work just fine (see an example here). It can also happen (although very rare) that different features are supported in different plugin formats (see examples here, and here). Therefore, test your setup thoroughly and select the most stable and efficient plugin format.
Look for the tips from a plugin’s documentation
The documentation for specific plugins may also contain tips to reduce the load on the CPU. Here is an example.
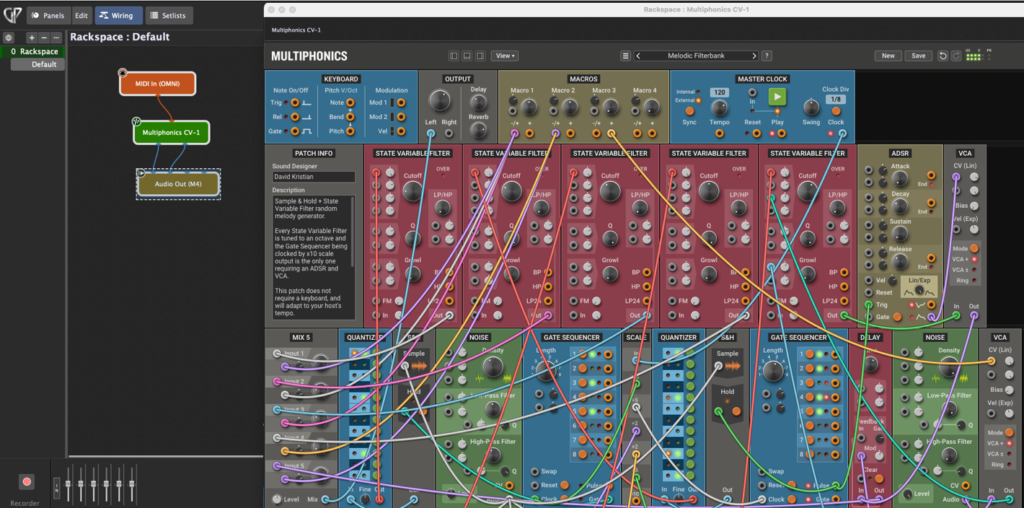
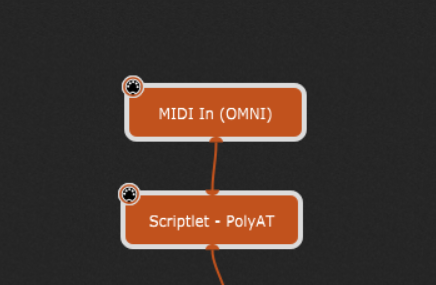
Use Scriptlets and scripting
.
Although GPScript was initially developed for specialized MIDI transformations, it has morphed into a robust and sophisticated programming language tailored to the needs of musicians. This blog article explains how Gig Performer provides you with extremely flexible MIDI processing options. You will learn that it may save you from having to download or buy additional plugins or applications.
Gig Performer 4 introduced Scriptlets, allowing you to create their own MIDI and OSC processor plugins using GPScript. The best thing is that they can be easily reused. You don’t need to know programming to be able to use them. For example, see this useful scriptlet that implements a version of polyphonic aftertouch for keyboards that don’t explicitly support it:
So, if you don’t have a keyboard with Poly Aftertouch, this scriptlet will allow you to have this functionality! It works remarkably well, see here. With this scriptlet, you don’t need third-party plugins.
.
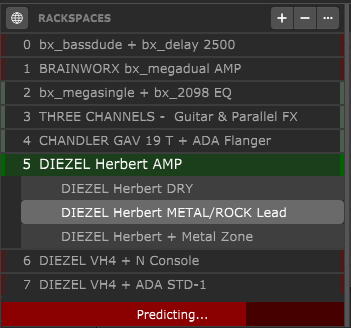
In normal operation, Gig Performer loads all plugins for all rackspaces and does some optimization to reduce the impact of hosting a large number of plugins simultaneously while still allowing you to switch instantly from one rackspace to another, even in the middle of a bar.
If your computer has limited RAM or your setup highly relies on a bunch of samples, Gig Performer’s Predictive Loading feature can be of great help:
There are two benefits to Predictive Loading. The first is that by reducing the number of plugins that are actually loaded at one time, you reduce RAM requirements significantly. You can still go to any rackspace you want but you might have to wait for a plugin to load. The second benefit is taking advantage of “proximity” to preload (and unload) rackspaces so you can get the benefit of instant switching, if you are following a setlist.
Replace plugin features
.
It can happen that activating a certain plugin feature can lead to unwanted behavior such as occasional CPU spikes, significantly higher CPU usage, or even add more latency. In these cases you may want to use a different plugin in your plugin chain and improve the overall stability (or just improve your sound, like Robert Martin in this post). NB: to see how much latency a plugin block introduces to your setup, simply hover with your mouse over it; click here to learn more.
Many of these specialized plugins may be free, so make sure to check our list of free plugins here.
Plugin implementation and bypass
.
The plugin implementation itself is also one of key factors to consider. The thing one sees sometimes with poorly developed plugins is that they spawn off a bunch of threads that they just leave running and since those threads are not directly involved in audio, they suck up CPU cycles even when they’re not doing anything. In that situation, even if you put them on different rackspaces, they’ll still suck some cycles.
This issue has been brought up many times in our user community. If you’re seeing significantly higher CPU levels when you have a plugin in rackspaces that are not “Active” or CPU cycles are high even when a plugin is idle, then one or more of the plugins in those other rackspaces are poorly implemented. When you switch away from a rackspace, all plugins in that other rackspace have their audio processing disabled. However, if they are still using a lot of CPU cycles, that means that they have lots of other threads running all the time as opposed to just when:
– audio processing is needed,
– or the plugin GUI editor is open.
Therefore, a decently implemented plugin should reduce its CPU usage almost completely (see examples here) when it is not generating any sound (or when it is bypassed).
Bypass a plugin or plugins when the volume is reduced to zero
A useful trick is to bypass a plugin or plugins when the volume is reduced to zero. You can accomplish this:
– using widgets groups (see this post)
– or scripting (read this blog article for the detailed guidelines).
While observing CPU cycles and determining how your plugins behave, note that Gig Performer shows only the CPU cycles used by the audio processing. That’s completely different from overall CPU usage which you would see using the Windows Task Manager or the Activity Monitor (read this blog article to learn more).
To see more tips or share your own tips, visit this Community thread.
.
Share this article to support Gig Performer and spread the word!
We use cookies to ensure that we give you the best experience on our website. If you continue to use this site we will assume that you are happy with it.