In this article you will learn how to make various elements of Gig Performer bigger and making them suitable for smaller displays, touch screen devices or simply tweaking options to better match your preferences.
The first two tips that will be presented are especially useful when your screen is too small, as discussed in this Community thread.
Enter full screen mode
.
The first tip is to dedicate your entire screen size to Gig Performer – enter full screen mode. You can enter full screen mode:
– via the main menu; click on the View menu and then click on the Toggle Full Screen menu item.
– using the keyboard shortcut Ctrl + Alt + F (or Cmd+Option+F on Mac) toggles full screen mode.
– clicking (or tapping) on the Gig Performer logo toggles full screen mode.
You can also configure Gig Performer to always start in full screen mode; click Options -> Display to open Display Options and then turn on the Always start in full screen mode toggle button. NB: you can also enter full screen mode using GPScript.
Tip: if you want to access Gig Performer options while you are in full screen mode, hold the Shift key down and click on the Metronome. Learn about other tips with the Shift key in this article: The magic of the Shift key.
Move the separator
.
If you move the separator line (indicated with the red arrow on the screenshot below) to the far left, you can have clearer view as the panels’ and widgets’ size will increase proportionally. Compare these two screenshots with the default separator position and the separator moved to the far left:
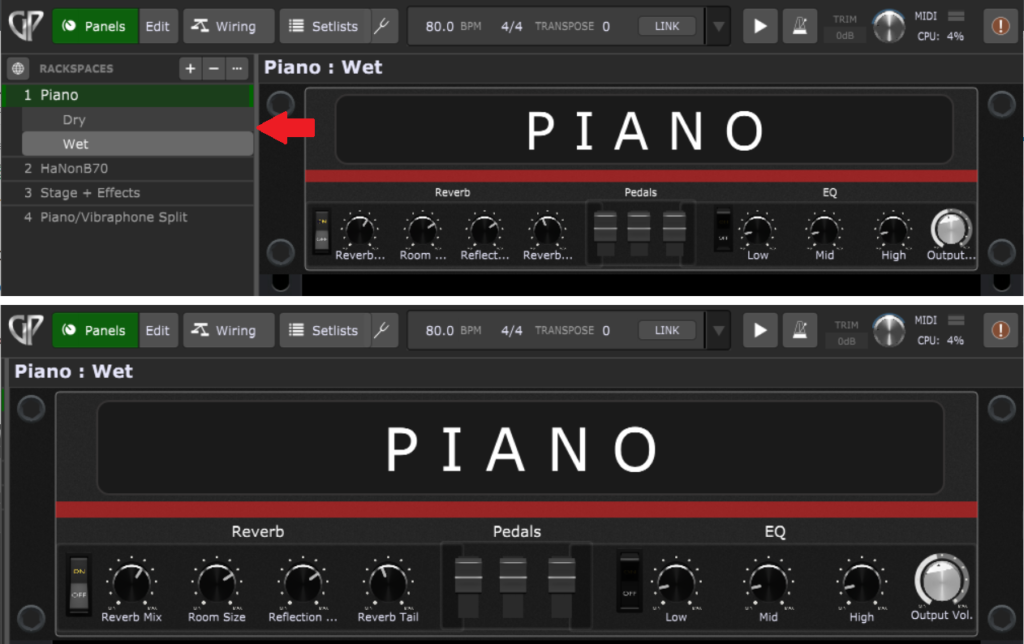
Tip: if you moved the separator to the far left and want to quickly reposition it to the default position, click Help -> Show a Gig Performer Hint. Showing a new hint will automatically set the separator line to its default position.
Increase the size of rackspace, variation, song, and song part names
.
Gig Performer 4.5 brought us a neat feature to change the size of names of rackspaces and variations in the Panels and Wiring views and the size of names of songs and song parts in the Setlist view. You can make the desired changes in Display Options. The default size for all names is 24 pt, but you can change this to any value between 12 pt and 48 pt. Here is a quick comparison:
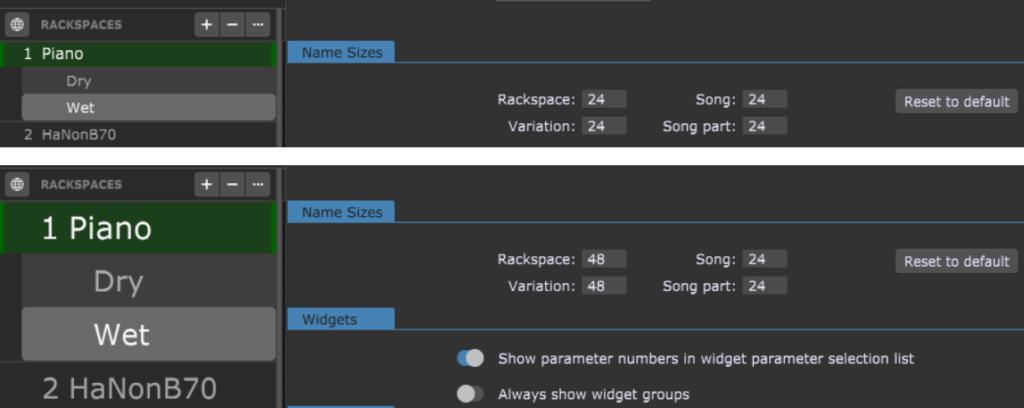
The first screenshot shows the default size for rackspace/variation names and in the second screenshot these values for rackspace/variation name sizes are set to 48pt.
Similarly, adjust the name sizes for songs and song parts to your preferences.
Convert panels to the larger ones
.
On small screens, it’s easier to layout and arrange widgets if you first design them on larger panels. In the following screenshot is compared a 2U panel and its 4U convert:
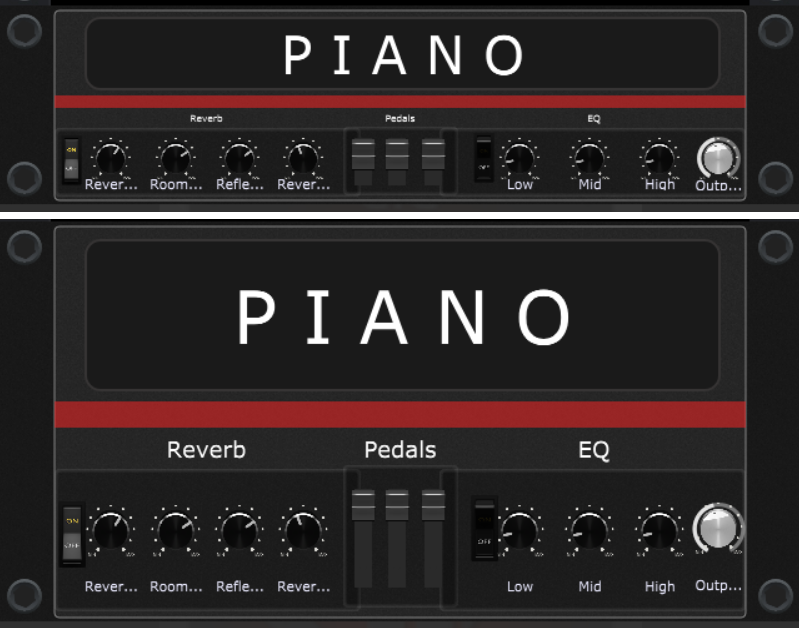
Check this user manual page to see how to create new panels or convert existing panels.
Enable large keypad for entering values
.
You can activate the larger keypad for entering some values by turning on the Touch friendly number editing toggle button in the Display Options. Here is a comparison between the default and larger keypad:
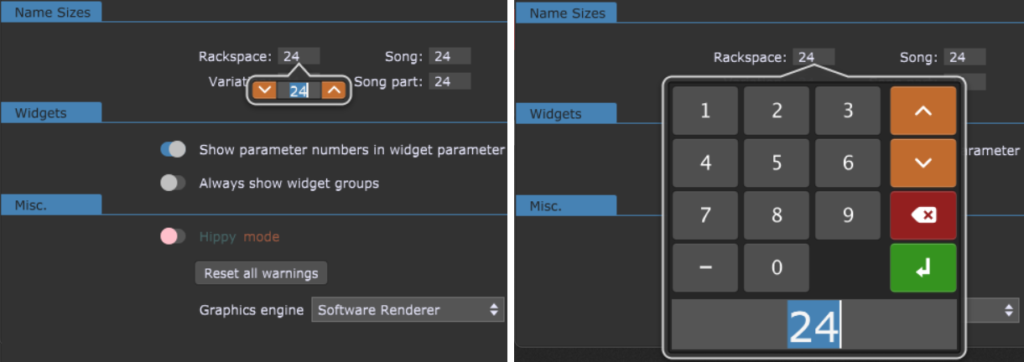
The larger keypad is a better option for touch screen devices.
Show various system-wide parameters in big labels
.
If you want to display certain system-wide parameters in Gig Performer larger than normal, you can insert the System Action plugin in the Wiring view, add a label widget onto the panel and then associate that widget with the desired System Actions parameter. Here is an example:
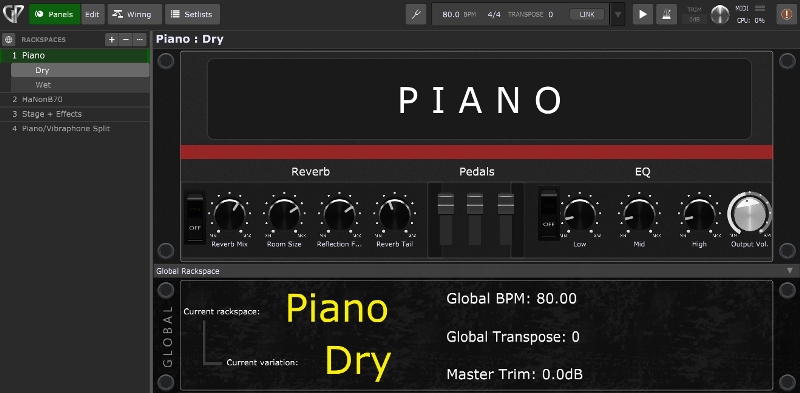
Here we displayed the current rackspace, the current variation, Global BPM, Global Transpose and Master Trim in the Global panel. You can display many other parameters, such as the current song name, the previous song name, the next song name, or song key (you must be in the Setlist view to display these parameters). For the complete list of parameters check this user manual page. A solid starting point to practice with the System Action plugin is this blog article.
Remove the Song part bar
.
In the Setlist Options window note the option Number of rows; starting from Gig Performer v4.7 you can select ‘0’ from the drop-down menu to remove the song part bar.
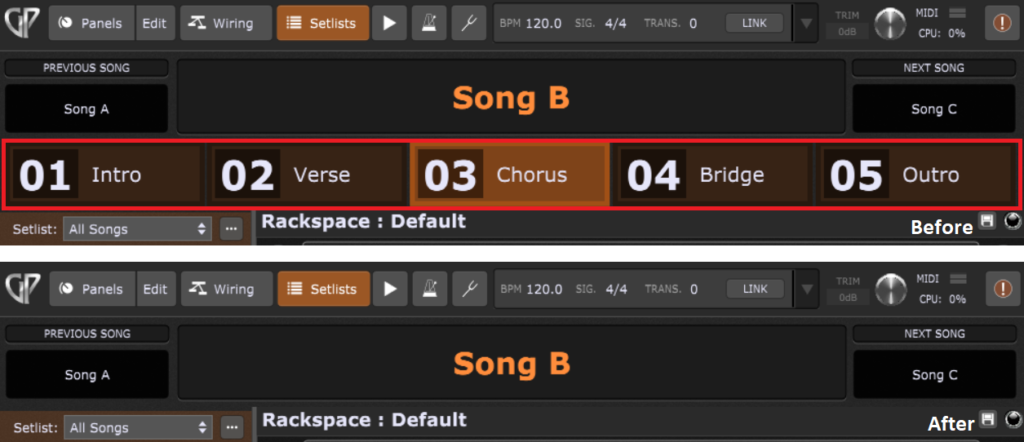
This allows you to have more space to display your panels.
Use a Gig Performer extension
.
Gig Performer extensions can be used to design and display various elements of Gig Performer in arbitrary sizes. Here is an example of the Gig Performer Selector extension in action from this thread:
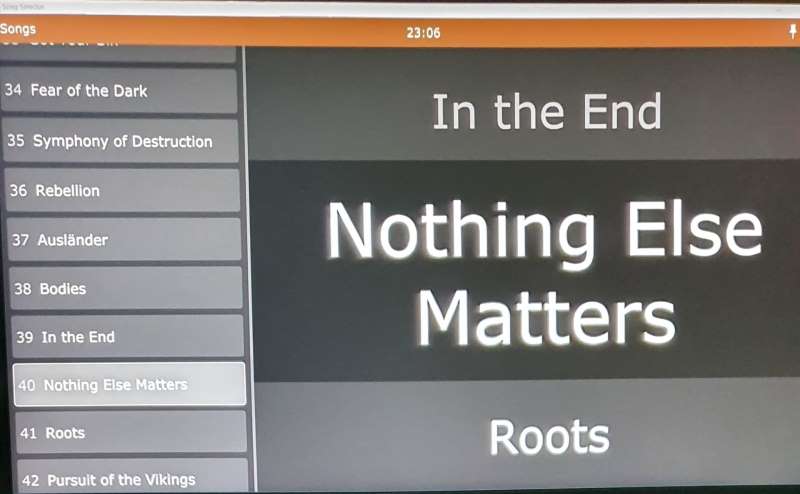
You can learn about this extension and extensions in general in this blog article.
Use an OSC application
.
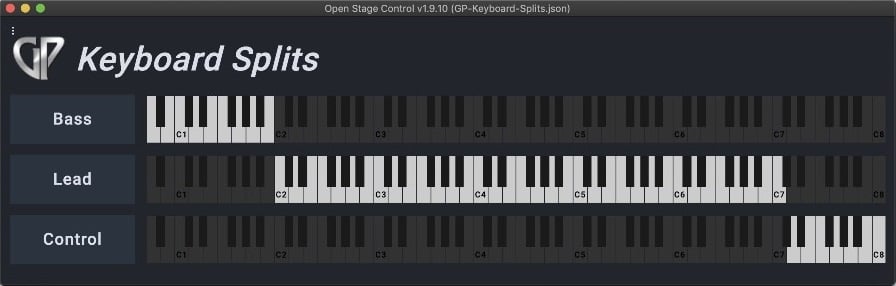
Open Stage Control is an OSC application that allows you to control Gig Performer via a Web browser, that can run on any platform (iOS, Android, macOS, Windows or Linux) and any device in the local network including the computer that is running Gig Performer. You can design a layout any way you like and control Gig Performer via OSC. Check this blog article to learn more about Open Stage Control. For example, keyboard splits can be displayed very prominently (click here to download the project):
You can also use other OSC apps on your tablet or smartphone, such as TouchOSC to control Gig Performer. Check this blog article to learn more.
To see more tips or to share your feedback, please to visit this Community thread.
.
Share this article it to support Gig Performer and spread the word!
Own The Stage® with Gig Performer®
Nemanja Pudar
.
Related topics:
– Working with panels and widgets
