Guest blog written by Greg Nelson
.
Shortly after the turn of the current century, I started to experiment with Virtual Studio Technology. I and was very impressed with various software emulations of organs and synthesizers, and sampled pianos.
I started to explore the possibility of replacing my hardware keyboard rig, with 2 controllers and a CPU built to run VST instruments. This idea took me on a journey through hardware computer builds, and VST hosts, to being a long time Brainspawn Forte user. I’ve been using Forte as a VST host application to perform with VSTIs, live on stage, since Forte Version 4 was released. Before discovering Forte, I was using Propellerhead Reason with some success.
The creator of Forte has recently announced that he is stopping all development and support of his products. In the wake of this announcement, I decided to explore the newest VST host software applications available. After a bit of research, have landed on the latest version of Gig Performer. I was instantly impressed! I saw many advantages I could gain from transitioning my keyboard rig over to Gig Performer.
Forte vs Gig Performer Overview
.
When launched, Gig Performer opens up to the Panels View screen of a new, or recalled, Gig (.gig) file. This screen is very similar to Forte’s Scene View screen. A column on the left side of the Panels View screen lists the Rackspaces in the current Gig file. Each Rackspace basically serves the same function as a Scene does in Forte. The main difference in Gig Performer’s Rackspaces vs Forte’s Scenes is that each Gig Performer Rackspace can have a completely different set of plugins.
You can turn on a Gig Performer feature called Predictive Loading, if necessary, to reduce RAM usage. Predictive loading will cause Gig Performer to load only the next few Rackspaces, in the background, ahead of the current Rackspace in use. This means that you can use memory intensive plugins, like Kontakt, in many of your Rackspaces, and not worry about using up your system’s memory.
Both Forte and Gig Performer have very similar Global MIDI controls. An alternative to Forte’s rack file “adaptation” to different hardware controllers and audio is Gig Performer’s Rig Manager.
Some Workflow Differences
.
In Forte, as you develop the Rack, and add plugins, the file can become very large. They can have many instrument modules on the Rack View screen. Each plugins’ routing and configuration takes place in this screen. Having all the plugins on one screen can get confusing, and cause a lot of paging up and down.
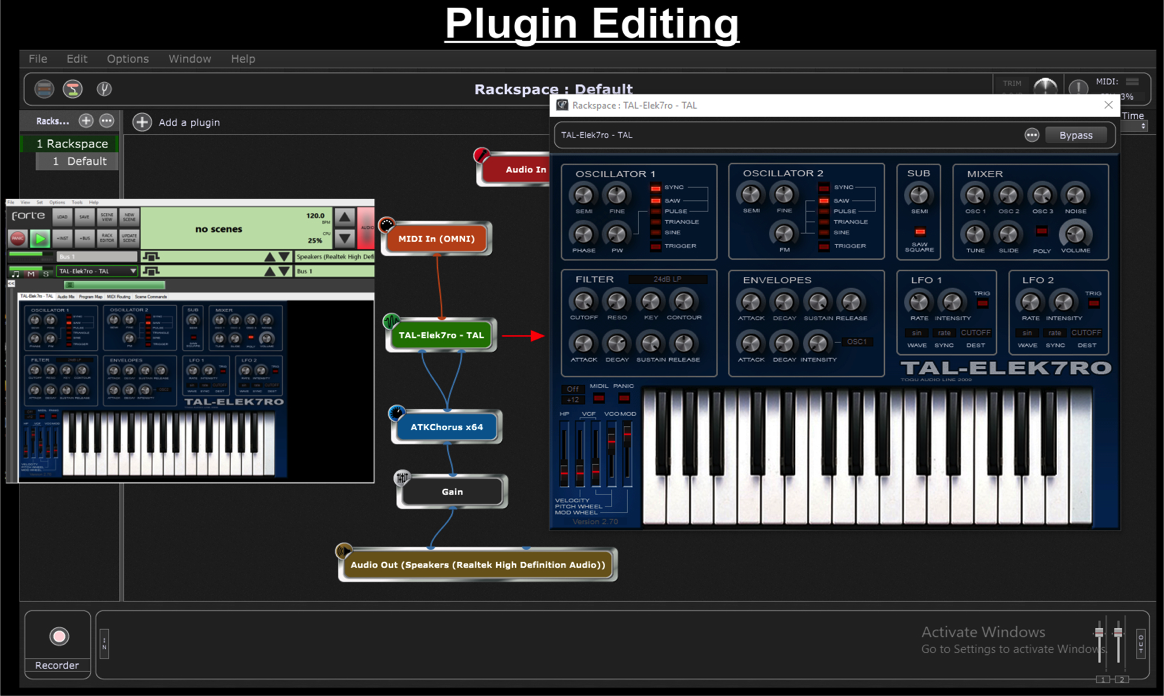
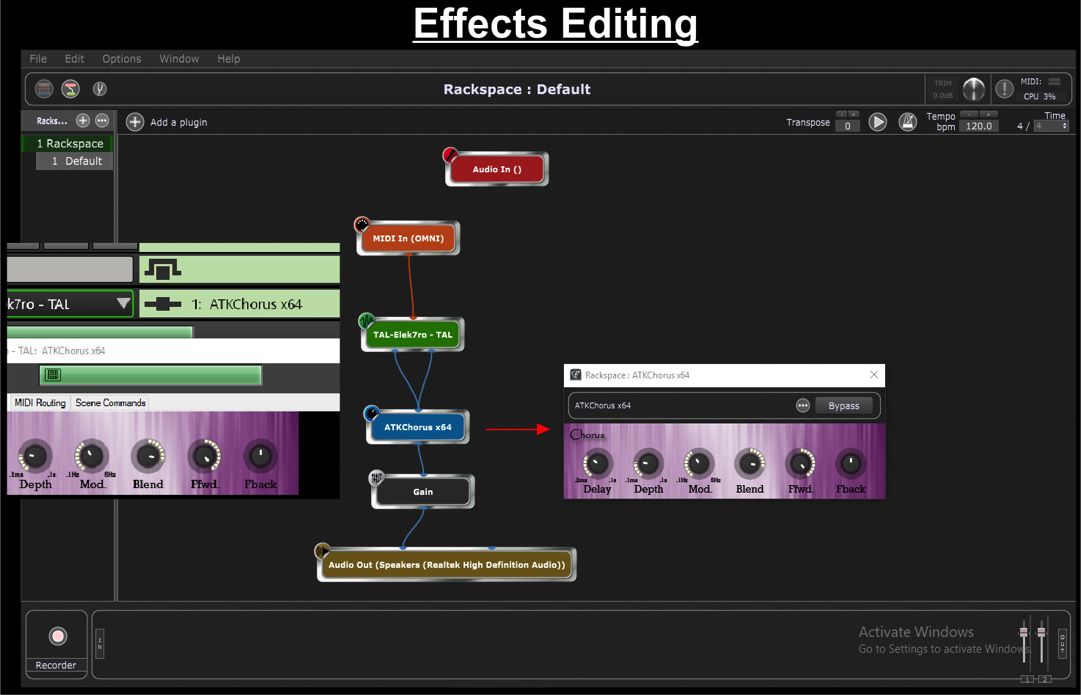
Gig Performer’s Wiring View screen gives a graphical layout of the plugins, and the signal flow of MIDI and audio, for each Rackspace. This screen is where you add plugins, MIDI In and MIDI Out blocks, and route audio and MIDI. Double-clicking a plugin’s block will open its editor window.
Mapping function
You can achieve Forte’s MIDI Controller Mapping functions via Widgets and MIDI Filters. On the Panels View screen, you can access layout designer mode. This is where you add Gig Performer Widgets (buttons, sliders, foot pedals etc.). Afterward, you map widgets to plugin parameters for performance control.
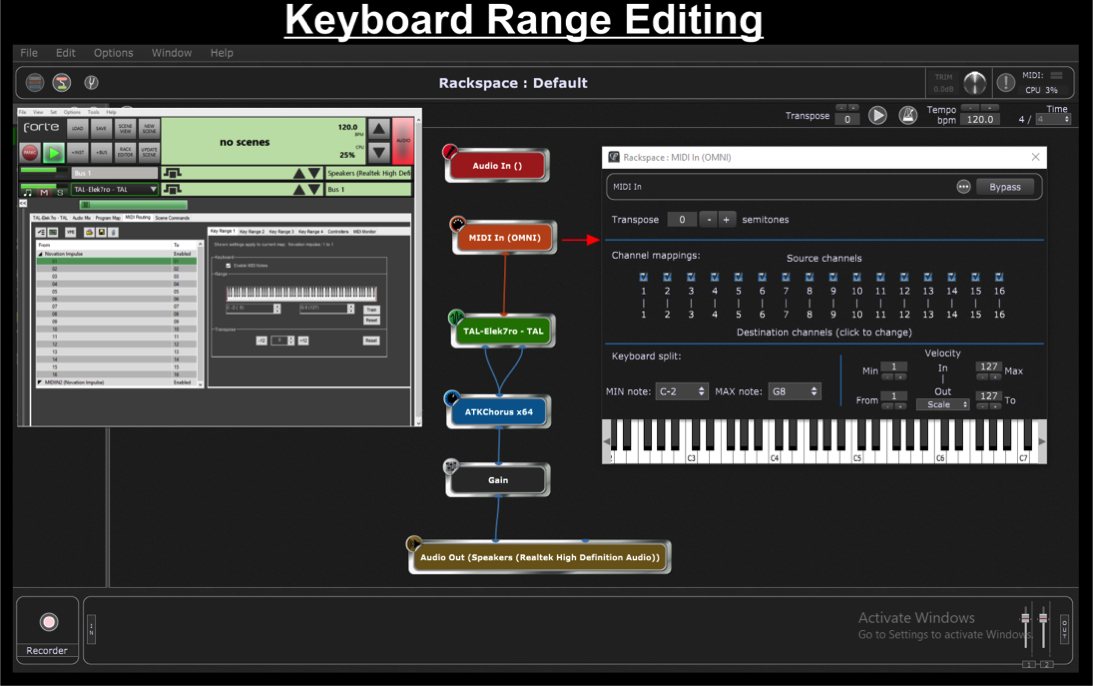
In Gig Performer, you can achieve Forte’s multiple key zones for an instrument by adding multiple MIDI Input blocks for the same MIDI device. You can configure each one as desired. You edit key range and transpose settings in Gig Performer’s MIDI Input blocks.
Forte’s Rack Editor page doesn’t exist in Gig Performer. You create setlists in Gig Performer by simply reordering the list of Rackspaces in the left hand column, on the Panel View. Each Gig file can easily become a set list for a show. Just Import individual Rackspaces from disk. Forte users who use the same scene twice in the same song will want to explore Gig Performer’s Rackspace Variations feature.
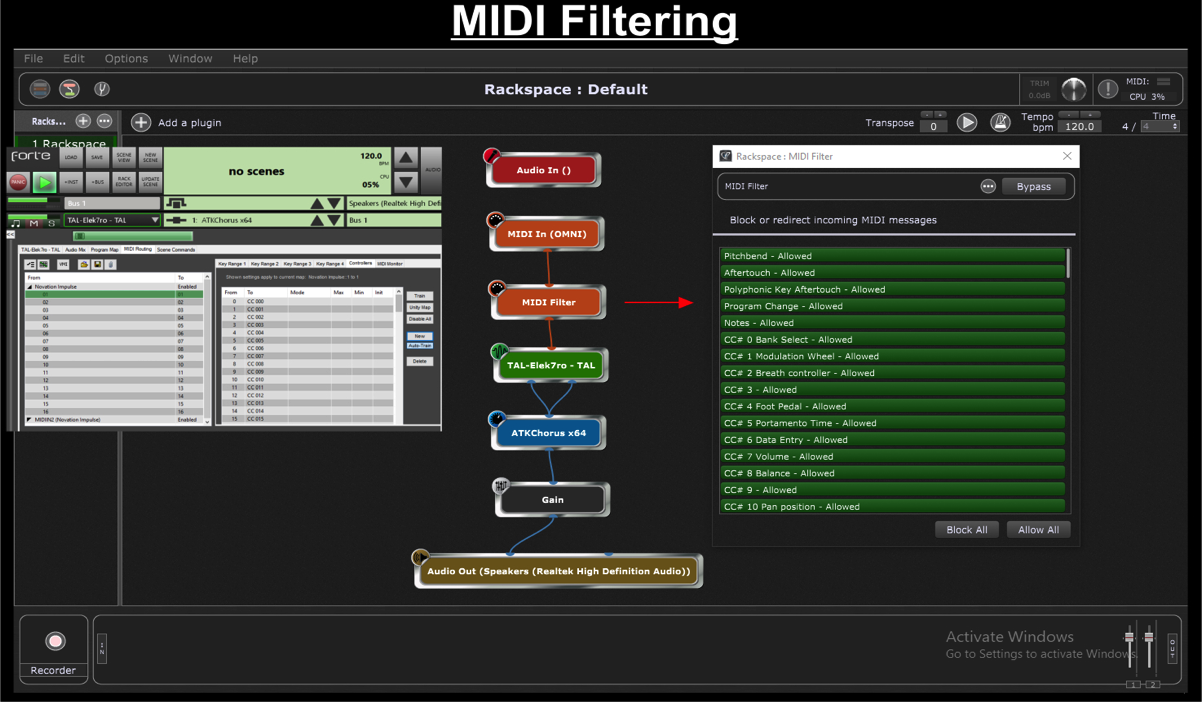
Workflow Comparison in Pictures
.


Some Installation considerations
.
When setting up folders that will contain your VST (*.dll) files on your computer, you may want to keep the tree structure as simple as possible. Gig Performer’s Gig files contain plugin path information, as well as the plugin file names, within the Rackspace code. Therefore, when configuring a “hot backup” computer, in order to transparently share and use Gig files from your main computer, each system’s VST plugin folder names and paths need to be identical.
64-bit plugins
Gig Performer only supports 64-bit plugins. If you want to use your favorite 32-bit plugins, it’s still possible with the help of jBridge. While you could set up Forte to automatically use jBridge during the plugin scan, Gig Performer does not have that option built-in. You will have to manually create bridged versions of your plugins with jBridge.
It’s very easy, and step by step instructions are available on the jBridge website. Then just add the folder that contains your bridged plugins to the “folders to scan” list in the Plugin manager.
Some Advantages of Gig Performer over Forte
MIDI operations
- The MIDI Filter in Gig Performer allows you to filter NON-CC# events, such as Pitch Bend, Aftertouch, and Note On/Off. There is no provision for this in native Forte.
.
- The ability to add a MIDI Monitor at any point in the MIDI signal path.
.
Rackspace mechanism
- You have the ability to export Rackspace (.rackspace) files, and import them into any Gig file in Gig Performer. This makes It easy to have different versions of the same song to choose from. It’s great to have the ability to develop new keyboard mapping for a song, or try different sounds and instruments. You can save an alternate version of the song to it’s own, self contained Rackspace file, that can be used later.
.
- Additionally, you can import your Rackspaces on the fly, in case your band decides to play a song that’s not in the currently active Gig file. Forte has the ability to insert a Scene into a set on the fly. However, the advantage goes to Gig Performer, because a Rackspace doesn’t have to be part of the currently active Gig file. You can quickly load any saved Rackspace from disk via the Import function. Comparatively, to quickly call up a Scene in Forte, that Scene must already exist in the currently active Rack file..
.
Other features
- The Patch Persist feature in Gig Performer allows me to advance to the next Rackspace, and launch into the next song, while sustaining the last chord from the previous song. This is only possible in Forte if the next Scene has the same plugin with the same MIDI filtering and transpose setting.
.
- Gig Performer’s widgets can provide a visual indicator to confirm that a foot pedal or other control’s function has been carried out. For example, in the excitement of a performance, I often wonder, “Did I remember to change my SL88 keyboard back to a piano, from an organ?” My only way of confirming that in Forte would be to play a note and listen for my piano sound. In Gig Performer, a quick glance at the LED Button Widget, that I mapped to the piano MIDI filter’s NoteOn-Allowed (pass-thru) parameter, tells me what I need to know..
.
- Gig Performer comes with a built-in Audio File Player, making it easy to add backing tracks to your Rackspaces.
.
- Gig Performer’s Rig Manager allows you to save (Export) multiple rig setups.
.
- Gig Performer’s GPScript programming language allows you to inject some logic into your Widgets! The possibilities are endless.
Gig Files
- Gig Performer allows you to run multiple Gig files simultaneously. A multi tier keyboard rig can be configured for each keyboard to change Rackspaces, independently of each other, by using the Multiple Instance feature of Gig Performer. There is no way to do this in Forte.
.
- Working with a smaller file on stage makes it quicker to recover from a host application crash. It takes less time to reload a smaller Gig file than it does to load a larger Forte rack file. I can use a smaller Gig file containing 15 to 30 Rackspaces (songs) for each set or show, and still have my repertoire readily available via Gig Performer’s import function.
.
- To have the bands entire repertoire accessible with Forte, all of the songs must already be configured as Scenes in the opened Rack file. This can be a pretty large file when containing Scenes for over 100 songs. Loading a single Scene from disk, into a Forte Rack file, on stage, is just not possible.
.
Gig Performer is updated regularly
New and exciting features are sure to be developed for future releases of Gig Performer. Forte’s last, and final version was released February 9, 2018.
.
Related topics:
– Some research on latency, jitter and buffer size (Gig Performer vs Forte)
– Gig Performer is the best companion for all your musical efforts and more
– Modern audio plugin hosts comparison
– Gig Performer is used by professional and well-known musicians all over the world


