Gig Performer is an audio plugin host for live performance that allows musicians the most flexible MIDI processing and creating very sophisticated live setups.
About MIDI
MIDI (Musical Instrument Digital Interface), originally created by Dave Smith (creator of the famed Prophet polyphonic synth) is a technical standard that describes a communications protocol, digital interface, and electrical connectors that connect a wide variety of electronic musical instruments, computers, and related audio devices for playing, editing, and recording music. Originally designed to control multiple synths at the same time, the first hardware-based MIDI sequencer was created by Roland (the MSQ-700), and was quickly followed by software-based sequencers which later were extended to support audio recording as well, leading to the creation of the Digital Audio Workstation, also known as a DAW.
MIDI does not produce sound
MIDI does not have any sound capabilities. For example, when you press a key on a MIDI keyboard, a message is generated that represents the key you pressed, often along with how hard you pressed it (velocity). When you release the note, another message is produced. These messages are generally interpreted by MIDI capable synthesizers that then create sounds based on the received messages.
Today, one very common MIDI application is to play a MIDI keyboard (or other MIDI controller/surface) and use it to trigger software synths, also known as VSTs to generate sounds. Visit our user manual to learn about the Basic terminology used in Gig Performer.
MIDI features in Gig Performer
To process MIDI events, Gig Performer provides lots of powerful built-in features that will be described in this article:
- MIDI In block
- MIDI Out block
- Global MIDI Monitor and MIDI Monitor block
- MIDI Filter block
- MIDI Channel Constrainer block
- Scriptlet block and GPScript
- Other blocks
- MIDI options in Gig Performer
.
Along the way you’ll find lots of useful resources such as other blog articles, user manual pages or videos, so make sure to check them out, as well.
Let’s get started!
.
Process MIDI messages received from an external MIDI device using the MIDI In block
.
The MIDI In block has already been covered (for earlier versions of Gig Performer) in an earlier blog article The hidden power of MIDI In block and is also described extensively in the user manual. Gig Performer’s MIDI In block is not just your everyday block for receiving MIDI events. It can do much more than just receive MIDI messages from an external MIDI device and feed them to connected soft-synth plugins (and indeed back out to external synths) and some of the features are:
.
Monophonic options
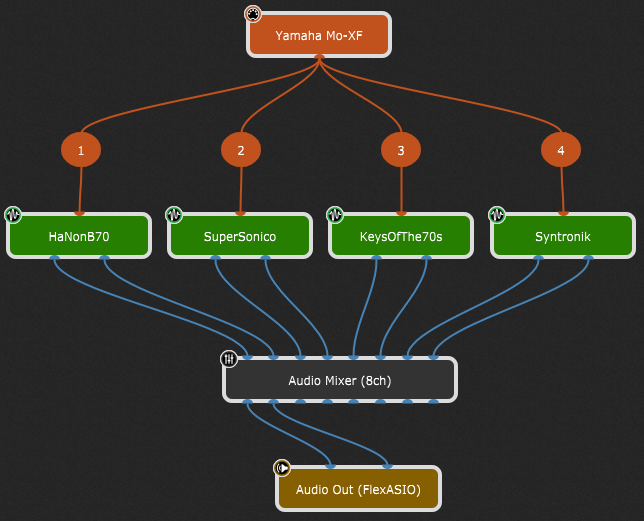
It could be that the most overlooked feature here is the Monophonic options area. This area at the bottom of the MIDI In plugin block editor filters the note messages from the controller down to a monophonic stream of notes. This allows you to easily extract the lowest or the highest note in a chord and send it to a different plugin. Take a look at this example:
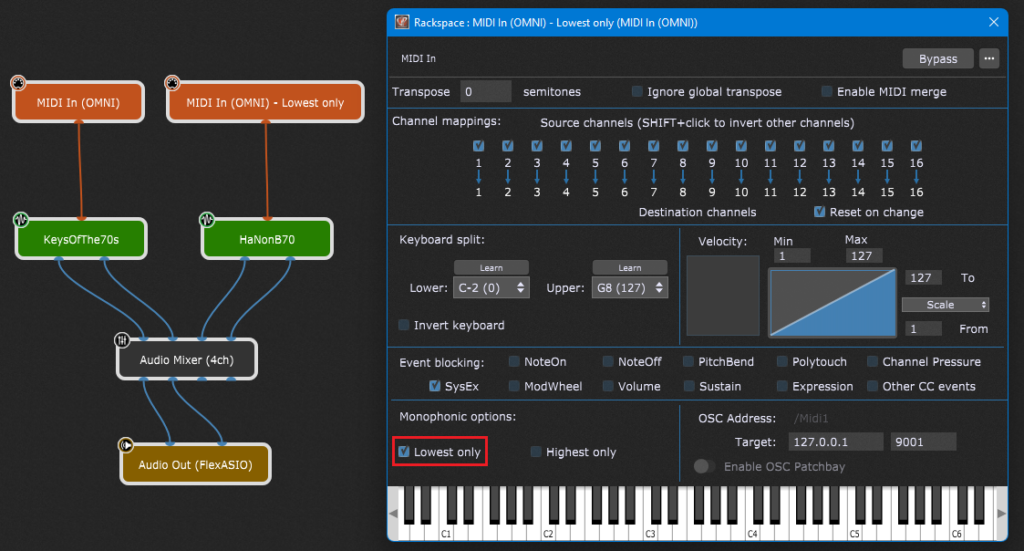
Simply duplicate your MIDI In block and check the Lowest only check box in the duplicate block. Afterward, route that block to another plugin (such as bundled HaNonB70). You can also add an Audio Mixer to (say) easily increase the volume of detected lowest note. The same procedure applies if you want to extract the highest note from a chord, just select the Highest only check box in the MIDI In plugin’s editor.
The original goal for this feature was for the case where you want to superimpose a different sound playing the lead on top of (or below if lowest) playing the full chord.
.
Leverage the MIDI Out block’s features to control external MIDI devices
.
The MIDI Out block is used to send MIDI messages to external devices such as synthesizers or samplers. The use cases are covered in great detail in the blog article How to send Program Change messages out to hardware devices and other applications. Also make sure to check the above-mentioned MIDI In and MIDI Out Blocks episode of Backstage with Gig Performer for some live examples.
If you want to send MIDI messages from rackspaces to the Global rackspace, check out this blog article, that uses MIDI Out (OSC) blocks (NB: OSC is also extensively covered on our blog so make sure to leaf through the articles to learn more).
Instrument Definition Files (INS files) are also supported:
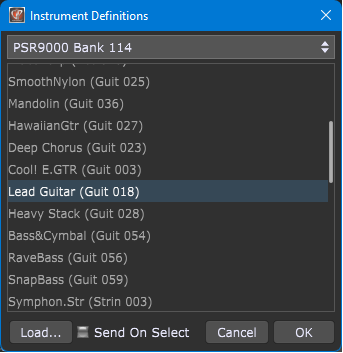
Rather than just manually typing PC and bank numbers, you can select the PC and bank numbers to be sent out using patch names defined in an INS file (if one is available for your hardware synth).
.
MIDI Monitoring
.
Gig Performer includes the system-wide Global MIDI Monitor and the MIDI Monitor plugin that displays MIDI messages from the plugin block which is connected to. These are useful means for diagnostic purposes:
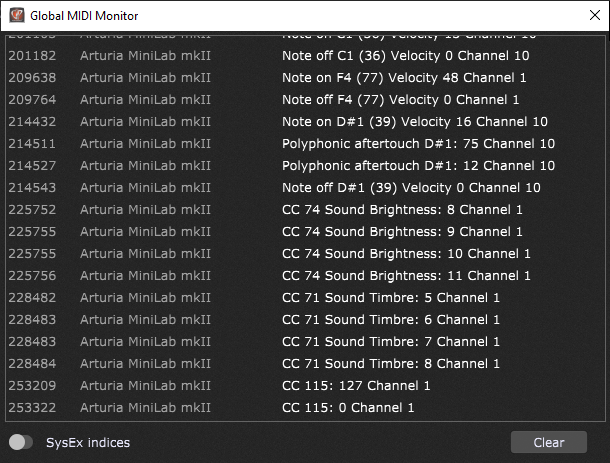
Additionally, MIDI monitors can show SysEx indices, helpful if you are using GPScript to manipulate incoming SysEx messages . Check out the user manual for more information.
.
Easy remapping of MIDI messages using the MIDI Filter plugin
.
The MIDI Filter plugin can be used either to block specific MIDI messages or to remap them to other messages:
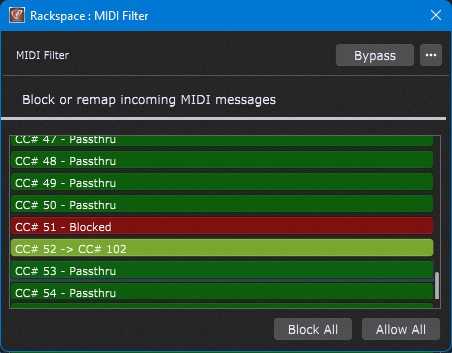
Check out the user manual for detailed guidelines. Also visit Remap MIDI messages without using the MIDI Filter plugin to see another way of remapping MIDI messages.
.
Remap MIDI channels using the MIDI Channel Constrainer plugin
.
The MIDI Channel Constrainer is a new built-in plugin in Gig Performer 4 and it allows you to set what messages are allowed through based on the MIDI input channel, remap the input channel to another channel, or block all MIDI traffic that goes through this plugin in a very clear way (learn more about Gig Performer’s way):
Visit The MIDI Channel Constrainer blog article to learn more (video included).
.
The ultimate MIDI processing using GPScript and Scriptlet plugins
.
If you have some specific use cases or want highly advanced setups, you can take a look at the true musicians programming language created by Gig Performer developers – GPScript. This assumes that you have some basic programming skills and is really straightforward to learn. The GPScript manual will help you through your journey. There is a detailed example in the user manual that will help you to quickly dive into the realm of GPScript.
If you have your specific user scenario, we suggest that you first search our Community forums. For example, here is a recent thread where a user had a USB foot switch that simulated the letter “b” on the computer keyboard and wondered whether he could he change variations/rackspaces with that foot switch and indeed Gig Performer can respond to a key stroke, so this was a solution:
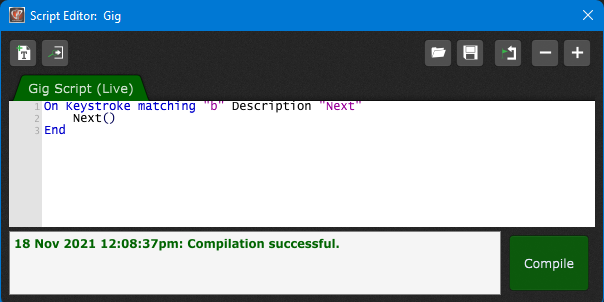
Try it! 🙂 Click on the Window menu and select Show Gig Script Editor. Type in the text above. Alternatively, copy the text from the community thread that is mentioned above. Finally, click on the Compile button. As the result, every time that you press the “b” key on your keyboard, Gig Performer will switch to the next variation (and jump to the new variation in the subsequent rackspace). Therefore, there is no need to buy third-party software to achieve this functionality.
Another example is converting note or CC messages to PC messages. Click here to see the solution from one of our superpower users. There is no need to use a third-party application such as MidiPipe or to buy a MIDI converter.
Local GP Port
You can use scripting to inject MIDI messages into MIDI devices as if the messages had originally come from those physical devices. Take a look at this example with another advanced Gig Performer 4 feature – the Local GP port, which provides even more flexibility in Gig Performer.
Scriptlets
So, what are Scriptlets then? Scriptlets are my favorite feature of Gig Performer 4. The Scriptlet plugin allows you to leverage the power of GPScript and create your own MIDI processor plugins! For example, you can play various chord progressions using only one key from your keyboard. This example is included as a template when you create a new gig. Look under Cool Stuff:
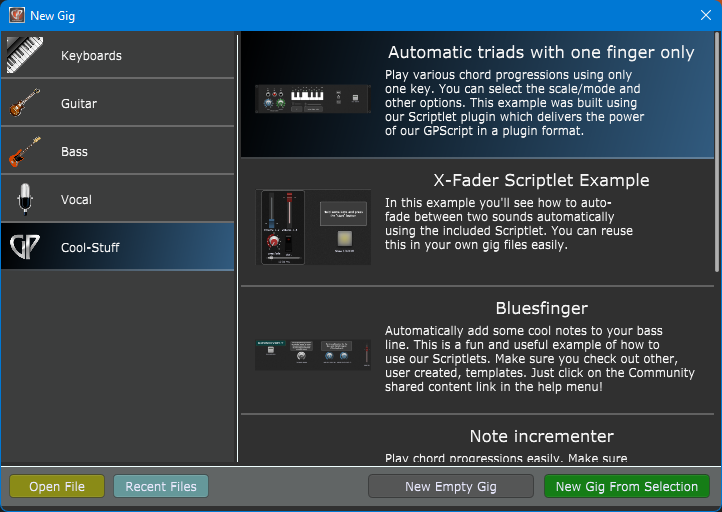
Find other examples tagged with Scriptlet in Gig and Rackspace files forum category, created by our brilliant beta users.
The best is that you can save Scriptlets as favorites and easily reuse them in your own gig files.
.
Other plugin blocks that can help you on your MIDI journey
.
Here are other plugins bundled in Gig Performer that can help you with MIDI processing and management:
.
MIDI options in Gig Performer
.
We conclude this article with Gig Performer options where you can configure different MIDI options and behavior.
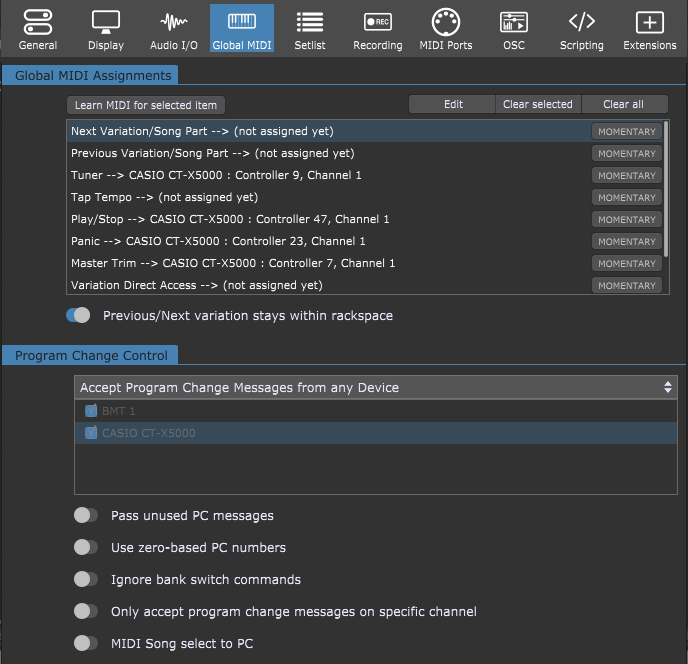
Check our user manual for detailed explanation of various MIDI related setting.
.
If you like this article, please share it! Spread the word about Gig Performer, the best companion for all your musical efforts.
To learn more tips or leave a comment, please visit this Community thread.
Own the Stage® with Gig Performer®.
Nemanja Pudar
.
Further reading:
– SysEx support – Controlling RJM GT Mastermind pedal controllers from Gig Performer
– How to synchronize Gig Performer’s tempo to an external MIDI clock or Link-enabled products
– Use host automation rather than MIDI to control plugin parameters
– Rackspaces vs Program Changes
– How to map tap tempo to the Spacebar on your keyboard
– Using Streamdeck with Gig Performer


